Книги по обучению торговле бинарными опционами пользуются все большим спросом, поскольку мир инвестиций и трейдинга становится все более осведомленным об этих гибких инструментах с ограниченным риском.
Теперь, с появлением книг по бинарным опционам, менее опытные участники рынка могут хорошо освоить эти простые и удобные в использовании инструменты, что, в свою очередь, повышает интерес к платформам для торговли бинарными опционами, которые им предлагают..
В этой статье вы найдете лучшие книги по бинарной торговле, доступные на данный момент. Мы даем вам наши лучшие рекомендации, которые помогут вам поднять свои навыки торговли бинарными опционами на новый уровень.

Самые важные факты о книгах по бинарным опционам для изучения торговли:
- Специализированные книги по бинарным опционам становятся все более популярными, поскольку они предлагают ценную информацию как новичкам, так и опытным трейдерам.
- Раньше основное внимание уделялось академическим перспективам, таким как барьерные и экзотические варианты, но теперь книги более практичны.
- Книги охватывают различные аспекты: от базовых ставок до продвинутых стратегий, ориентированных как на конечных пользователей, так и на участников рынка.
- Хэмиш Роу и другие вносят свой вклад в литературу, делая сложные темы доступными для более широкой аудитории.
Имея это в виду, мы с гордостью представляем лучшие книги по бинарному трейдингу:
1. Бинарные опционы от Хэмиша Роу

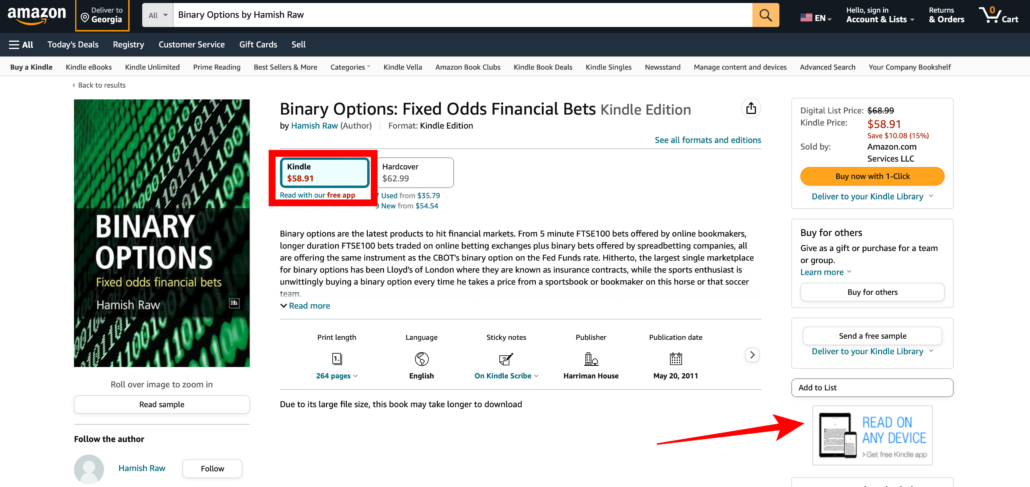
Первая книга, с которой мы хотели бы вас познакомить, — это «Бинарные опционы – фиксированные шансы и финансовые ставки», Хэмиш Роу. С нашей точки зрения, это лучшая книга по бинарной торговле.
Как вы, возможно, знаете, бинарные опционы — это новейшие продукты, появившиеся на финансовых рынках. От 5-минутных ставок FTSE100, предлагаемых онлайн-букмекерами, до долгосрочных ставок FTSE100, торгуемых на онлайн-биржах ставок, до бинарных ставок, предлагаемых компаниями, занимающимися спред-ставками, — все они предлагают тот же инструмент, что и бинарный опцион CBOT на ставку по федеральным фондам. Крупнейшим рынком бинарных опционов является Lloyd's of London, известный как страховые контракты. В то же время любитель спорта невольно покупает бинарный опцион каждый раз, когда получает от букмекерской конторы цену на ту или иную лошадь или ту футбольную команду.
В этой книге используются те же ставки с фиксированными коэффициентами и иллюстрирует, как бинарные опционы работают на финансовом рынке. Автор начинает с описания обычных ставок и объяснения логики, которая определяет некоторые основные выигрышные и проигрышные ставки. Затем следует более подробный анализ того, как торговать бинарными опционами, в котором автор исследует, как стоимость ставки зависит от течения времени, волатильности базового инструмента и цены базового финансового инструмента.
Затем представлены более продвинутые ставки, показывающие читателю когда и как выгодно использовать бинарные опционы в различных рыночных условиях, а также методы хеджирования занимаемой позиции. Далее обсуждаются ставки в одно касание в том же формате, что и при обычных ставках.
В своем первом углубленном анализе бинарных опционов Хэмиш Роу амбициозно написал как для конечного пользователя, так и для маркет-мейкера. В книге имеется множество диаграмм, иллюстрирующих точку зрения автора. Наша рекомендация номер один!
Эта книга рекомендуется для: Люди, плохо знакомые с бинарными опционами и желающие получить фундаментальное понимание, а также маркет-мейкеры, желающие глубже понять механику бинарных опционов.
2. Бинарные ставки Джона Пайпера

Мир ставок кардинально меняется – поприветствуйте бинарные ставки, наш второй выбор, когда дело доходит до хороших книг для трейдеров бинарных опционов.
В последние годы ставки на спортивные события и торговля на финансовых рынках стали ближе друг к другу, и результатом этого сближения стали бинарные ставки. Бинарные ставки сочетают в себе азарт спортивных ставок с гибкостью финансовых рынков.
Бинарные ставки позволяют игрокам:
- Делайте ставки на сотнях различных спортивных и финансовых рынков
- Закрыть ставки до того, как событие состоится
- Прибыль от впечатляющих движений цен
- Проведите лучший технический анализ
- Делайте ставки необычными и неожиданными способами – опытным трейдерам это понравится
Это первая книга о бинарных ставках, в которой простым языком объясняется, что такое бинарные ставки, как ими выгодно торговать и как снизить риск. В книге представлено множество реальных примеров сделок по бинарным ставкам и поминутный анализ поведения цен в бинарной торговле. Кроме того, книга помогает вам выявлять тенденции и включает полезные советы от опытного трейдера, который изо дня в день использует бинарные ставки в своей торговле – найдите ставку, которая принесет прибыль, даже если вы совершенно неправы!
Прочитав эту книгу, вы узнаете, что делает бинарные ставки самой быстрорастущей областью ставок и почему трейдеры переходят в новый захватывающий мир бинарных ставок.
Эта книга рекомендуется для: Любители спорта, переходящие на финансовые рынки, и трейдеры, заинтересованные в изучении уникального сочетания ставок и финансовой торговли.
3. Торговля бинарными опционами, Абэ Кофнас

Третья книга, которую мы представляем вам, представляет собой важное руководство по быстро развивающейся области бинарных опционов.
Бинарные опционы, давно принадлежавшие профессиональным трейдерам, теперь предлагаются розничным инвесторам через Североамериканскую биржу Derivative (Nadex) и растущую группу онлайн-брокеров бинарных опционов. Теперь в этой новой книге автор Эйб Кофнас объясняет, как независимые трейдеры и инвесторы могут использовать бинарные опционы, чтобы спекулировать на движении цен конкретных компаний и глобальных событий..
Большая привлекательность бинарных опционов заключается в том, что они менее сложны, чем традиционные опционы. Более того, они предлагают простой метод торговли, основанный на мнении о том, куда движется рынок в течение очень коротких периодов времени. Это увлекательное и информативное руководство объясняет, как работают бинарные опционы, какие стратегии торговли бинарными опционами являются лучшими и когда их использовать.
Автор определяет различные рынки в котором доступны бинарные опционы, и дает представление о том, как бинарные опционы дают возможность спекулировать на направлении рынка и получать существенные выплаты. Это также подсказывает, какие рынки предлагают лучшую ликвидность и минимальные затраты на исполнение сделок..
Будучи первой книгой, посвященной исключительно этой теме, она предоставит розничным трейдерам авторитетное руководство по общим принципам основных торговых стратегий на этом захватывающем рынке.
Эта книга рекомендуется для: Трейдеры и инвесторы, желающие расширить свои знания о бинарных опционах и ищущие практические стратегии для улучшения своих торговых результатов.
4. Формула победы на бинарных опционах: каждый раз добивайтесь стабильных побед, Джерри Манс

Четвертая книга «Формула победы на бинарных опционах (BOWF)» — еще одна книга. глубокое погружение в систематический и методический подход к торговле бинарными опционами.
BOWF снабжает трейдера лучшими инструментами и знаниями в области бинарных опционов для завоевания этого нового рынка и достижения рентабельности инвестиций (ROI) в районе 185% каждый месяц. Трейдинг — это инвестиция, и для достижения успеха к нему следует относиться как к бизнесу. Пробовали ли вы бинарные опционы, слышали ли вы много шумихи? «Удвойте свои деньги в кратчайшие сроки…» «Заработайте деньги менее чем за 1 час…» — все это правда.
Автор этой книги постоянно зарабатывает много денег, используя формулу победы. Благодаря формуле выигрыша бинарных опционов (BOWF) соответствующая рентабельность инвестиций может достигать 80-90% в месяц, даже если только половина ваших сделок является выигрышной. Эта система уникальна для торговли всеми типами бинарных опционов – в одно касание, больше/меньше, лимит и так далее. Ссылка у вас есть, смотрите сами!
Эта книга рекомендуется для: Трейдеры, стремящиеся к стабильным победам в торговле бинарными опционами, и те, кто ищет структурированный подход для улучшения своих торговых стратегий.
5. Книга знаний по бинарным опционам: все, что я хотел бы знать до того, как начал торговать, Кристофер Карлсон

«Книга знаний по бинарным опционам» Кристофера Карлсона является маяком для тех, кто отправляется в мир торговли бинарными опционами. Карлсон мастерски сочетает свой личный опыт с теоретическими знаниями, чтобы предоставить читателям полное понимание ландшафта бинарных опционов.
Книга углубляется в нюансы конкретных валютных пар и проливает свет на оптимальное время для торговли.. Сочетая теоретические знания и действенные стратегии, он призван снабдить как новичков, так и опытных трейдеров инструментами, необходимыми для уверенного начала своего торгового пути.
Благодаря экспертному руководству Карлсона читатели смогут разобраться в сложностях торговли бинарными опционами, гарантируя, что они примут обоснованные решения, соответствующие их инвестиционным целям.
Эта книга рекомендуется для: Начинающие трейдеры, отправляющиеся в путешествие по бинарным опционам и ищущие как фундаментальные знания, так и практические идеи, которые помогут начать свои торговые начинания.
6. Бинарные опционы: руководство для начинающих по торговле и прибыли Эдварда Дорси

Не судите о книге по ее обложке – эта поговорка особенно верна в данном случае, в нашей шестой книге-рекомендации «Бинарные опционы: руководство для начинающих по торговле и прибыли» Эдварда Дорси.
Эдвард Дорси предлагает комплексное введение в мир бинарных опционов. Книга выходит за рамки основ и предлагает стратегии и методы управления рисками которые имеют неоценимое значение для трейдеров.
Дорси даже углубляется в то, как глобальные события могут повлиять на цену финансовых активов и соответствующих им бинарных опционов, что делает эту книгу обязательной к прочтению всем, кто хочет получить преимущество в торговле бинарными опционами.
Эта книга рекомендуется для: Новички, стремящиеся получить прочную основу в области бинарных опционов, сочетая теоретические знания и действенные торговые стратегии.
7. Бинарные опционы: мощные стратегии доминирования на бинарных опционах, Джордан Сайкс

Джордан Сайкс представляет взвешенный и проницательный взгляд на торговлю бинарными опционами. Его книга — сокровищница торговых техник и стратегий для трейдеров всех уровней квалификации. От понимания основы освоения продвинутых стратегий, Сайкс предлагает панорамный взгляд на ландшафт бинарных опционов, гарантируя, что трейдеры хорошо подготовлены к решению этих проблем. Это также поможет вам правильно использовать двоичный таймфрейм и объединить эти знания со знаниями рынка для принятия более эффективных решений.
Эта книга рекомендуется для: Трейдеры, которые хотят улучшить свою торговую игру, от основополагающих концепций до передовых методов, обеспечивая полное понимание рынка бинарных опционов.
8. Торговля бинарными опционами за 60 секунд: технический план успеха с высокой вероятностью, Мэтт Даффилд

Книга Мэтта Даффилда в центре внимания. по 60-секундной торговой стратегии для бинарных опционов, предназначенных для извлечения выгоды из торговых сетапов с высокой вероятностью. В этом руководстве используется механический подход для минимизации эмоционального вмешательства с использованием трех ключевых технических индикаторов для определения возможностей, обеспечивающих стабильный и надежный доход..
Упаковано с диаграммы и реальные примерыЭто важное чтение для трейдеров среднего и продвинутого уровня, стремящихся усовершенствовать свои торговые стратегии для получения быстрой и стабильной прибыли.
Эта книга рекомендуется для: Трейдеры заинтригованы динамичностью 60-секундных бинарных опционов и ищут систематический подход для получения быстрой и последовательной прибыли.
9. Бинарные опционы без масок: хорошие, плохие и совершенно опасные!

Книга Анны Куллинг направлена на раскрыть истинную природу рынка бинарных опционов. Он развеивает мифы и заблуждения, обеспечивая глубокое понимание анализа рынка. Книга призвана предложить рациональный взгляд на то, как получить максимальную отдачу от торговли бинарными опционами.
Эта книга рекомендуется для: Тем, кто интересуется тонкостями рынка бинарных опционов и ищет четкую и непредвзятую точку зрения на его потенциальные выгоды и подводные камни.
10. Победите бинарные опционы: выигрышные стратегии финансовых ставок для сегодняшних рынков, Дрю Каш

Наша последняя рекомендация — книга Дрю Каша «Обыграйте бинарные опционы: выигрышные стратегии финансовых ставок на сегодняшних рынках». Эта книга по бинарной торговле предназначена для трейдеров среднего и продвинутого уровня. Основное внимание уделяется помощи трейдерам получить психологическое преимущество на рынке бинарных опционов.
Книга охватывает широкий спектр стратегии, каждая из которых объяснена простыми словами и подкреплена примерами из реальной жизни.. Подход Каша практичен: он предлагает пошаговые методы, которые помогут трейдерам понять тенденции рынка и сделать прибыльные ставки. Эти знания предназначены не только для трейдеров бинарных опционов: вы можете применить эти знания к любому типу торговли, включая торговлю валютой, внутридневную торговлю или торговлю акциями. Обязательно прочтите!
Эта книга рекомендуется для: Опытные трейдеры, стремящиеся усовершенствовать свои стратегии и получить более глубокое психологическое понимание рынка бинарных опционов.
Все эти книги являются хорошими книгами по торговле опционами и расширят ваши знания. Подумайте о том, чтобы их прочитать!
Что делает книгу о бинарных опционах хорошей?
Давайте сначала поговорим о том, что делает книгу хорошей по бинарным опционам. Как вы, наверное, догадались, полномочия и опыт автора в данной области может служить индикатором качества хорошей книги по бинарным опционам. Но это еще не все – хорошая книга по бинарным опционам не просто царапает поверхность, она погружает глубже. Он предлагает не только теоретические знания, но и практические стратегии, которые могут реализовать трейдеры.
Вы можете отличить плохую книгу по бинарным опционам от хорошей, просто взглянув на ее содержание. Должен быть хорошо структурирован, начиная с основ и постепенно переходя к более сложным темам, что облегчает читателю следить за текстом. Автор должен передать знания компетентно и практично.
Примеры из реальной жизни и тематические исследования могут принести огромную пользу, предоставляя контекст и делая материал понятным. Ведь именно вам придется применить полученные знания. Кроме того, хорошая книга по бинарным опционам часто включать интервью или мнения отраслевых экспертов, чтобы обеспечить всесторонний взгляд на рынок. Это признаки хорошей книги по бинарным опционам, которую вы можете использовать, чтобы узнать больше по этой теме. Примените эти знания и начните торговать!
Как извлечь максимальную пользу из книг по бинарным опционам

Покупая книгу о бинарных опционах, вы должны не только прочитать ее, но и убедиться, что используете полученные знания наилучшим образом.
Подумайте о том, как вы можете применить знания на практике. Но как это работает? Читая книгу о бинарных опционах, начните с определения ключевых стратегий или идей, которые вам нравятся. Запишите их и сравните с тем, что вы уже знаете. Если у вас появились новые идеи, пришло время применить их на практике. Лучше всего использовать демо-счет для тестирования этих стратегий в безрисковой среде. Это поможет вам понять, как различные переменные могут повлиять на ваши торговые решения.
Также полезно вести торговый журнал, чтобы записывать, что работает, а что нет и почему. Со временем вы сможете усовершенствовать свои стратегии и принимать более обоснованные решения. Если в книге есть упражнения или тесты, обязательно их выполните; они созданы, чтобы углубить ваше понимание. И не стесняйтесь вернуться к книге; даже опытным трейдерам полезно вернуться к основам и освежить свои знания.
Лучшие электронные книги по бинарной торговле
К счастью, эпоха цифровых технологий привела к появлению множества ресурсов, среди которых лидируют электронные книги. Удобство электронных книг позволяет вам получить доступ к бесценной информации в любое время и в любом месте. Все перечисленные здесь книги, известные своим всесторонним охватом и практическими стратегиями, также доступны в электронном виде. Это гарантирует, что трейдеры смогут легко вписать обучение в свой напряженный график.
Вот краткое изложение этих названий, которые необходимо прочитать:
- Бинарные опционы от Хэмиша Роу
- Бинарные ставки Джона Пайпера
- Торговля бинарными опционами, Абэ Кофнас
- Формула победы на бинарных опционах: каждый раз добивайтесь стабильных побед Джерри Манс
- Книга знаний о бинарных опционах: все, что я хотел бы знать до того, как начал торговать, Кристофер Карлсон
- Бинарные опционы: руководство для начинающих по торговле и прибыли Эдвард Дорси
- Бинарные опционы: мощные стратегии доминирования на бинарных опционах, Джордан Сайкс
- Покорите 60-секундную торговлю бинарными опционами: технический план успеха с высокой вероятностью Мэтт Даффилд
- Бинарные опционы: хорошие, плохие и совершенно опасные, Анна Куллинг
- Победите бинарные опционы: выигрышные стратегии финансовых ставок на современных рынках, Дрю Каш
Независимо от того, являетесь ли вы новичком или опытным трейдером, эти электронные книги обещают обогатить ваше понимание различных рынков и отточить вашу торговую хватку в области бинарных опционов.
Часто задаваемые вопросы (FAQ) о книгах по бинарному трейдингу:
Почему книги по бинарным опционам становятся популярными?
Книги по бинарным опционам становятся все более популярными, поскольку они предлагают практические идеи и стратегии, что делает их ценными ресурсами как для начинающих, так и для опытных трейдеров. В отличие от видеообучения, многие люди по-прежнему предпочитают получать знания из книг.
Какие темы охватывают книги о бинарных опционах?
Книги по бинарным опционам охватывают все: от базового понимания ставок до продвинутых торговых стратегий и управления рисками. Они также охватывают различные типы активов, которыми можно торговать с использованием бинарных опционов, таких как акции, сырьевые товары, валюты и индексы. Читатели получат ценную информацию – как техническую, так и фундаментальную – а также советы по интерпретации новостных событий, которые могут повлиять на цены активов.
Книги по бинарным опционам предназначены только для профессиональных трейдеров?
Нет, они обслуживают как новичков, так и опытных трейдеров, предлагая широкий спектр тем, подходящих для всех уровней.
Заменяют ли книги по бинарным опционам необходимость в брокере или торговом программном обеспечении?
Нет, это дополнительные ресурсы, которые улучшают понимание и стратегию, но не заменяют торговые платформы. Книги по бинарным опционам служат образовательным инструментом, который поможет вам понять рынок, его механику и различные торговые стратегии. Они могут дать вам теоретические знания, необходимые для уверенного подхода к торговле бинарными опционами. Однако они не заменяют функциональную роль, которую брокер или торговое программное обеспечение играют при совершении сделок.
Кто некоторые известные авторы в области книг о бинарных опционах?
Хэмиш Роу — один из таких авторов, известный тем, что делает сложные темы доступными в своих книгах, таких как «Бинарные опционы: финансовые ставки с фиксированными коэффициентами». Алекс Некритин — еще один авторитетный автор в этой области, написавший такие работы, как «Бинарные опционы: стратегии направленной и волатильной торговли». Его книги часто посвящены стратегиям успешной торговли бинарными опционами и ориентированы как на новичков, так и на опытных трейдеров.
Есть ли торговая книга Quotex?
Хотя официальной книги по трейдингу Quotex не существует, в Интернете доступны PDF-файлы по трейдингу Quotex, которые могут служить образовательными ресурсами. Эти PDF-файлы по бинарной торговле содержат подробные руководства по различным торговым стратегиям, включая скальпинг, стратегии прорыва и стратегии следования за трендом. Найди Книга по трейдингу Quotex PDF здесь.


Rogeria
говорит:Добрый день, мсье Витцель
Je voudrais savoir si vous donnez des Cours pour les options binaires.
J'étudie seule et je ne trouve pas assez de contenu sur Internet, pouvez vous me conseiller un livre à un Cours? Помощник Merci de votre.
Роджерия Тейшейра