
Malaysia ialah sebuah negara di Asia Tenggara. Negara jiran Malaysia ialah: Thailand, Indonesia dan Brunei. Perdagangan pilihan binari menjadi terkenal di seluruh dunia di kalangan semua pelabur. Akibatnya, peniaga Malaysia membuat wang dengan cepat dengan berdagang pilihan binari. Tetapi perdagangan pilihan binari di Malaysia adalah sah seperti di negara lain.
Binary Option Malaysia menawarkan peniaga peluang untuk menjadi jutawan jika mereka bergerak secara terancang. Walau bagaimanapun, pilihan binari perdagangan di Malaysia memerlukan pedagang mengikut prosedur langkah demi langkah. Panduan perdagangan pilihan binari ini akan mengajar anda segala-galanya tentang perdagangan mereka di Malaysia.
Panduan langkah demi langkah untuk berdagang pilihan binari di Malaysia
Apa yang anda akan baca dalam Post ini
Pedagang Malaysia tidak sabar-sabar untuk memperoleh keuntungan cepat dengan meletakkan perdagangan pilihan binari boleh mengikuti langkah ini.
#1 Pilih broker pilihan binari yang tersedia di Malaysia
Terdapat beberapa broker pilihan binari di seluruh dunia. Dengan populariti dagangan mereka, anda boleh menyaksikan peningkatan dalam bilangan broker pilihan binari. Walau bagaimanapun, setiap broker tidak mempunyai bidang kuasa di semua negara. Jadi, jika anda ingin berdagang pilihan binari di Malaysia, anda boleh memilih yang berbeza broker pilihan binari dengan permit untuk menawarkan perkhidmatan broker di negara ini.
Walaupun terdapat beberapa broker, perkhidmatan tiga broker utama adalah berbaloi di Malaysia. Broker ini juga mempunyai lesen derivatif OTC yang membenarkan mereka menawarkan perkhidmatan mereka.
Senarai 4 broker Pilihan Perduaan terbaik di Malaysia
Terdapat banyak broker Pilihan Perduaan di seluruh dunia. Tetapi tidak semua broker ada di Malaysia. Berikut adalah 4 broker Pilihan Perduaan teratas di Malaysia.
Ini adalah 4 broker Pilihan Perduaan teratas di Malaysia – lihat:
100+ Pasaran
- Min. deposit $10
- tunjuk cara $10,000
- Platform profesional
- Keuntungan tinggi sehingga 95%
- Pengeluaran cepat
- Isyarat
300+ Pasaran
- Deposit minimum $10
- Akaun demo percuma
- Pulangan tinggi sehingga 100% (sekiranya ramalan yang betul)
- Platform ini mudah digunakan
- Sokongan 24/7
100+ Pasaran
- Platform profesional
- Akaun demo percuma
- Deposit minimum $10
- Webinar dan pendidikan
- Bayaran yang tinggi
100+ Pasaran
- Menerima pelanggan antarabangsa
- Bayaran tinggi 95%+
- Platform profesional
- Deposit cepat
- Perdagangan Sosial
- Bonus percuma
100+ Pasaran
- Min. deposit $10
- tunjuk cara $10,000
- Platform profesional
- Keuntungan tinggi sehingga 95%
- Pengeluaran cepat
- Isyarat
daripada $10
(Amaran risiko: Dagangan adalah berisiko)
300+ Pasaran
- Deposit minimum $10
- Akaun demo percuma
- Pulangan tinggi sehingga 100% (sekiranya ramalan yang betul)
- Platform ini mudah digunakan
- Sokongan 24/7
daripada $10
(Amaran risiko: Modal anda mungkin berisiko)
100+ Pasaran
- Platform profesional
- Akaun demo percuma
- Deposit minimum $10
- Webinar dan pendidikan
- Bayaran yang tinggi
daripada $10
(Amaran risiko: Dagangan adalah berisiko)
100+ Pasaran
- Menerima pelanggan antarabangsa
- Bayaran tinggi 95%+
- Platform profesional
- Deposit cepat
- Perdagangan Sosial
- Bonus percuma
daripada $50
(Amaran risiko: Dagangan adalah berisiko)
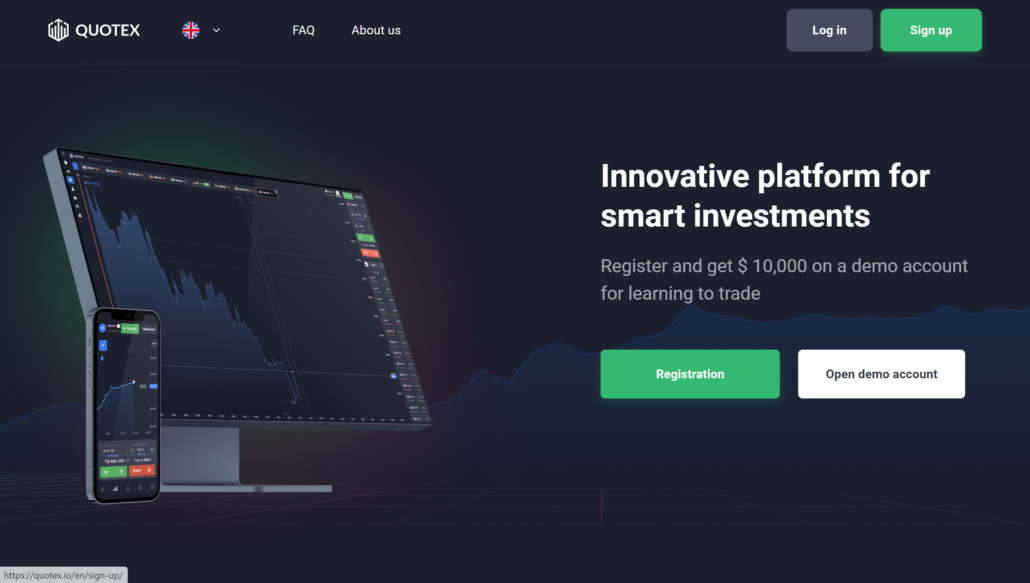
1. Quotex
Quotex.io adalah platform masa depan. Ia wujud pada tahun 2020 dan telah mendapat keuntungan populariti yang besar sejak itu. Bahagian terbaik platform ini ialah ia menawarkan isyarat pasaran kepada peniaga untuk menentukan ramalan yang tepat. Quotex.io ialah produk sampingan Awesomo Ltd. Ia beroperasi di bawah peraturan IFMRRC.
Pilihan pembayaran adalah terhad kepada mata wang kripto untuk pedagang Kanada, Amerika Syarikat, Jerman dan Hong Kong tetapi bukan untuk pedagang dari Malaysia. Ia menawarkan anda maksimum pembayaran sehingga 100%, yang merupakan tokoh yang terpuji. Tetapi peratusan pembayaran mungkin berbeza-beza, bergantung pada jenis aset, kecairannya dan prestasi pasaran. Platform broker tidak menawarkan platform MT4 & MT5.
Dapatkan bonus deposit percuma sebanyak 50% di Quotex dengan kod promosi kami “bobroker50“
Anda boleh memilih tempoh tamat tempoh antara 60 saat hingga 4 jam. Selain itu, anda boleh memperhalusi graf harga untuk melihat walaupun turun naik dalam masa beberapa saat. Anda mendapatkan cadangan penganalisis mengenai arah harga, tempoh dan pilihan aset, untuk membantu menyelaraskan keuntungan potensi. Pelanggan juga mendapat bantuan dengan menyesuaikan diri dengan penyesuaian dagangan.
Adakah Quotex sah di Malaysia?
Sudah tentu, Quotex boleh diakses secara sah kepada pelanggan di Malaysia, menawarkan peluang perdagangan. Adalah penting untuk ambil perhatian bahawa, sebagai entiti bukan warga Malaysia, Quotex tidak berdaftar dengan Suruhanjaya Sekuriti Malaysia.
(Amaran risiko: Modal anda boleh berisiko)
2. IQ Option
IQ Option ialah platform 2013 dan keasliannya untuk menawarkan perkhidmatan. Ia adalah platform yang ideal yang didedikasikan untuk tujuan CFD dan perdagangan pilihan binari. Juga, ia mempunyai a portfolio yang sangat besar daripada berbeza produk kewangan yang memberikan banyak pilihan untuk dipilih daripada senarai. Lebih-lebih lagi, IQ Option telah menerima beberapa anugerah, yang menjadikannya terkenal dan popular di seluruh dunia.

Ia adalah salah satu yang terbaik broker pilihan binari Malaysia, yang menawarkan anda a bayaran maksimum sehingga 95%. Sama seperti mana-mana platform lain, kadar pembayaran berbeza bergantung pada prestasi aset di pasaran. Anda mendapat sejumlah besar alat perdagangan untuk membantu anda menentukan ramalan ketepatan. Malah, anda boleh memanfaatkan potensi penunjuk teknikal untuk mengenal pasti corak pergerakan harga aset yang dipilih dan meramalkannya.
IQ Option tersedia untuk peniaga di 13 bahasa. Jika peniaga Malaysia memilih untuk bertukar-tukar antara bahasa pilihan, mereka bebas untuk berbuat demikian! Dengan itu, anda juga mendapat reka letak berbilang carta, kalendar ekonomi, petikan sejarah, penyaring saham, kemas kini pasaran dan amaran turun naik. Semua ciri ini bertujuan untuk mencapai ketepatan dalam ramalan perdagangan. Antara muka ialah cemerlang dan mudah dinavigasi, walaupun untuk pemula.
Adakah IQ Option sah di Malaysia?
Berdagang dengan IQ Option adalah sah sepenuhnya di Malaysia, dan syarikat itu beroperasi dalam rangka kerja undang-undang. Tiada peraturan atau sekatan ketat yang dikenakan ke atas platform berasaskan Eropah ini. Sebagai seorang pemastautin Malaysia, anda berpeluang mendaftar secara percuma dan melibatkan diri dalam perdagangan merentasi pelbagai rangkaian lebih 500 pasaran.
(Amaran risiko: Modal anda boleh berisiko)
3. Olymp Trade
Olymp Trade adalah salah satu daripada beberapa platform zaman moden yang memperkenalkan konsep perdagangan pilihan binari kepada kebanyakan calon dagangan yang tidak sedar. Platform ini sesuai, bukan sahaja untuk pelabur kecil, tetapi juga mempunyai ciri yang luar biasa untuk profesional. Tambahan pula, perdagangan Olymp menawarkan pelbagai pelbagai instrumen kewangan daripada pasaran yang berbeza.

Olymp Trade, menjadi yang terbaik broker pilihan binari di Malaysia, telah menyediakan pilihan pembayaran yang pelbagai untuk peniaga. Platform ini telah mempertimbangkan kemudahan semua peniaga pilihan binari. Anda juga boleh mendepositkan Bitcoin anda pada platform ini untuk memulakan perdagangan pilihan binari anda di Malaysia. Olymp Trade memegang gelaran sebagai broker kewangan terbaik di CPA Life Awards pada tahun 2017.
Antara muka yang ditawarkan oleh Olymp Trade agak menonjol dan mudah untuk digunakan. Platform ini mempunyai kebolehgunaan yang sangat baik untuk kedua-dua pemula dan juga pedagang yang berpengalaman. Ia mempunyai rekod untuk memegang jumlah pengguna harian yang tinggi, iaitu a tanda keberkesanan untuk jenama. The platform bersih dan telah mengatur pautan ke ciri yang ditawarkan oleh broker. Ia beroperasi di bawah peraturan CySEC dan menawarkan p maksimumkeluar sehingga 90%.
Adakah Olymp Trade sah di Malaysia?
Ya, Olymp Trade menawarkan pelbagai kelebihan kepada peniaga di seluruh dunia, termasuk di Malaysia. Platform ini menjalankan usaha wajar yang menyeluruh terhadap semua peniaga sebagai sebahagian daripada komitmennya untuk mencegah penipuan dan pengubahan wang haram.
(Amaran risiko: Modal anda boleh berisiko)
4. Pocket Option
Pocket Option adalah yang terakhir dalam senarai ini tetapi tidak kurang daripada mana-mana pilihan di atas. Ia beroperasi di bawah peraturan IFMRRC dan mempunyai nama yang hebat dalam industri untuk ciri bonusnya. Anda boleh dapatkan sehingga 92% daripada pembayaran maksimum atas platform ini. Anda boleh pergi dengan perdagangan tinggi/rendah atau turbo, bergantung pada keutamaan anda ke atas platform ini.

Tambahan pula, Pocket Option membolehkan anda memulakan ciri dagangan sosial dengan lebih baik keuntungan. Tidak seperti kebanyakan platform dagangan lain, Pocket Option menawarkan hanya satu jenis akaun dagangan kepada semua pedagang Malaysia. Ia adalah untuk memastikan perjalanan perdagangan seragam untuk kedua-duanya pemula dan juga profesional. The jumlah deposit yang boleh dibuat adalah keputusan tunggal peniaga, tetapi tiada pengkategorian peniaga sebagai standard atau VIP.
Anda boleh menetapkan tamat tempoh dagangan antara julat 60 saat hingga 4 jam. Aspek keselamatan modal peniaga adalah tinggi dalam platform. Pocket Option mungkin tidak mempunyai cengkaman tertinggi di pasaran, tetapi ia masih popular broker pilihan binari di Malaysia, dengan ciri yang sempurna.
Adakah Pocket Option sah di Malaysia?
Ya, tetapi Pocket Option beroperasi tanpa peraturan khusus di Malaysia, tanpa lesen kewangan, yang mungkin menimbulkan kebimbangan keselamatan. Walau bagaimanapun, perlu diingat bahawa syarikat itu mengekalkan reputasi yang baik dan telah menunjukkan kebolehpercayaannya kepada peniaga dari semasa ke semasa.
(Amaran risiko: Modal anda boleh berisiko)
#2 Daftar untuk akaun dagangan langsung

Selepas memilih broker, seorang peniaga boleh melawati laman web platform dagangan dalam talian dan klik pada 'buat akaun saya' atau 'pilihan daftar.
Proses pendaftaran memerlukan anda memasukkan nama, e-mel dan butiran lain yang berkaitan yang diperlukan oleh broker untuk mengesahkan akaun anda.
(Amaran Risiko: Modal anda boleh berisiko.)
#3 Gunakan akaun demo atau akaun langsung

Kini, peniaga boleh memulakan dagangan dengan akaun dagangan demo jika mereka tidak mempunyai sebarang pengalaman dagangan terdahulu. Di samping itu, akaun demo pilihan binari tidak memerlukan pedagang untuk melabur dana sebenar mereka pilihan binari perdagangan di Malaysia atau di tempat lain. Oleh itu, peniaga dengan mudah boleh menyelamatkan diri daripada kerugian yang tidak dijangka.
Walau bagaimanapun, jika seorang peniaga mengetahui dan mempunyai pengalaman dagangan terdahulu, dia boleh bermula dengan akaun dagangan langsung. Pedagang boleh menambah dana sebenar pada akaun dagangan langsung mereka. Membiayai akaun anda membolehkan anda berdagang pilihan binari.
(Amaran Risiko: Modal anda boleh berisiko.)
#4 Pilih aset untuk berdagang

Kini, peniaga boleh memilih aset asas yang difikirkannya berprestasi luar biasa dalam pasaran. Dalam kes itu, mereka boleh mencarinya dengan mengklik pada pilihan 'cari' atau 'cari' pada platform dagangan dalam talian.
Selepas peniaga menemui aset asas mereka, mereka boleh membuat perdagangan. Walau bagaimanapun, sebelum berbuat demikian, seorang peniaga mesti membuat analisis.
#5 Buat analisis yang betul

Kini, tugas seorang peniaga adalah untuk menganalisis keadaan pasaran dengan baik. Pilihan binari perdagangan Malaysia melibatkan risiko seperti bentuk perdagangan lain. Jika analisis anda tentang kenaikan atau penurunan harga yang tepat adalah tidak wajar, anda mungkin akan kehilangan wang anda!
Oleh itu, adalah penting untuk membuat analisis yang betul.
- Pedagang boleh menggunakan beberapa alat dan penunjuk dagangan untuk mengetahui arah di mana harga aset pendasar akan bergerak.
- Mereka boleh menggunakan analisis aliran untuk mencari sama ada harga aset akan meningkat.
- Selain itu, mengikuti berita dan maklumat lain tentang aset itu juga akan berguna.
- Di samping itu, peniaga boleh menggabungkan semua aktiviti ini untuk membangunkan strategi perdagangan yang sempurna.
#6 Letakkan dagangan

Setelah analisis teknikal anda memuaskan hati anda dan anda percaya anda telah cukup meneliti, anda boleh meletakkan perdagangan pilihan binari anda. Meletakkan dagangan anda adalah mudah; anda hanya perlu memilih aset pendasar dan pilih harga mogok dan masa tamat tempoh.
| Senang tahu! |
| Perdagangan pilihan binari mempunyai masa luput yang berbeza. Sebagai contoh, anda boleh meletakkan dagangan yang tamat tempoh dalam beberapa saat atau minit. Jadi, sama ada anda menetap di Malaysia atau mana-mana negara lain, perdagangan pilihan binari memberi anda peluang untuk menghasilkan wang dengan cepat. |
(Amaran Risiko: Modal anda boleh berisiko.)
#7 Tunggu hasilnya

Sekarang, jika analisis anda ternyata tepat, anda akan memenangi perdagangan pilihan binari anda. Jika tidak, anda kehilangan wang anda. Ia adalah sebab mengapa ia dikenali sebagai perdagangan pilihan binari. Walau bagaimanapun, ia hanya mempunyai dua hasil.
Pedagang akan mendapati baki akaun dagangan mereka bertambah jika cadangan mereka tepat. Sebaliknya, analisis yang tidak betul akan menyebabkan mereka kerugian. Jadi, adalah lebih baik untuk merancang langkah anda selepas analisis pasaran yang teliti.
Sekarang anda mempunyai panduan perdagangan pilihan binari yang berguna, berikut adalah beberapa asas yang perlu anda ketahui.
(Amaran Risiko: Modal anda boleh berisiko.)
Peraturan kewangan di Malaysia
Semua derivatif OTC, termasuk perdagangan pilihan binari yang ditawarkan oleh syarikat Malaysia, memerlukan lesen daripada pihak berkuasa kawal selia untuk beroperasi dengan lancar. Tetapi, setakat ini, tiada syarikat yang telah mendaftar ke Suruhanjaya Sekuriti dan FMAM untuk lesen broker pilihan binari. Oleh itu, peniaga adalah bergantung harap pada broker luar pesisir untuk berdagang pilihan binari.

Pengiktirafan pilihan binari sebagai OTC Derivatives baru-baru ini. Sehingga 2011, satu-satunya pertukaran derivatif OTC yang diiktiraf ialah tempatan Bursa Komoditi Kuala Lumpur. Dengan pengiktirafan daripada populariti berkaitan dengan perdagangan pilihan binari, pihak berkuasa memutuskan untuk naik taraf undang-undang mereka untuk mengawal selia aspek penghantaran wang daripada broker luar pesisir ke negara ini.
(Amaran risiko: Modal anda boleh berisiko)
Adakah perdagangan binari sah di Malaysia?
Sebagai jiran kepada salah satu negara kewangan terbesar di rantau Asia, Malaysia telah melangkah jauh dalam mengesahkan perkara yang baik. Sebagai contoh, walaupun negara tidak meletakkan peraturan perdagangan yang jelas untuk pilihan binari, ia tidak bermakna ia adalah haram.
Pilihan binari adalah sah sepenuhnya di Malaysia, seperti di banyak negara jiran. Jadi, jika anda seorang peniaga Malaysia yang ingin mendapatkan wang melalui perdagangan pilihan binari, anda boleh mendaftar dengan broker yang tersedia.
The Bank Pusat Malaysia dan Persatuan Kewangan Pasaran Kewangan Malaysia mengawasi fungsi pasaran pilihan binari. Pihak berkuasa ini mengawal dan menghalang sebarang aktiviti penipuan daripada berlaku.
Jadi, pemindahan wang haram merentasi sempadan Malaysia adalah mustahil bagi peniaga. Di samping itu, pihak berkuasa ini menjadikan perdagangan di Malaysia bebas risiko dan perdagangan pilihan binari yang mudah.
Kaedah pembayaran untuk peniaga di Malaysia

Ia mengalahkan tujuan perdagangan jika anda tidak boleh membiayai akaun dagangan langsung anda dengan wang. Jadi, peniaga di Malaysia harus mempunyai akses kepada semua kaedah pembayaran yang boleh mereka gunakan dengan mudah.
Berikut adalah beberapa kaedah pembayaran pilihan binari yang tersedia untuk pedagang Malaysia.
(Amaran Risiko: Modal anda boleh berisiko.)
Pindahan bank
Menggunakan pindahan bank, anda boleh membiayai akaun dagangan anda dengan broker yang tersedia. Pindahan bank membolehkan anda membiayai akaun anda dengan cepat. Walau bagaimanapun, pengeluaran dana melalui kaedah pembayaran ini mungkin mengambil sedikit masa.
Platform dagangan dalam talian di Malaysia secara amnya tidak mengenakan bayaran deposit atau pengeluaran. Walau bagaimanapun, anda mungkin perlu membayar sedikit jika bank anda mengenakan apa-apa.
Pembayaran kad
Pembayaran kad adalah kaedah pembayaran yang biasa dan digunakan secara meluas oleh peniaga Malaysia. Peniaga boleh menggunakan kedua-dua kad debit dan kredit untuk membiayai akaun mereka selagi kad ini milik mereka.
Pembayaran kad untuk membiayai akaun dagangan anda adalah pantas. Walau bagaimanapun, pengeluaran yang anda buat melalui kad anda mungkin mengambil masa sehingga 2-24 jam untuk dilihat.
Dompet elektronik
Dompet elektronik sedang popular hari ini dan membuat kaedah pembayaran yang mudah. Pedagang di seluruh dunia menggunakan dompet elektronik untuk membiayai akaun dagangan mereka atau mengeluarkan dana.
Pembayaran melalui dompet elektronik adalah pantas dan segera.
Cryptocurrency
Pedagang di Malaysia boleh mengakses beberapa mata wang kripto, seperti Bitcoin, Bitcoin Cash, dan Litecoin, antara beberapa yang lain. Mereka boleh menggunakan mata wang ini untuk membiayai akaun dagangan mereka dengan broker yang tersedia.
Pengeluaran melalui mata wang kripto adalah sama mudah. Manfaat menggunakan mata wang kripto untuk pembiayaan dan pengeluaran ialah ia menawarkan pemindahan wang yang cepat.
Kebaikan dan keburukan perdagangan Binary Option di Malaysia
Perdagangan pilihan binari di Malaysia mempunyai kebaikan dan keburukan, seperti di tempat lain. Berikut adalah sebahagian daripadanya.
Kebaikan perdagangan pilihan binari ialah:
- Perdagangan pilihan binari secara amnya bebas risiko selagi anda membuat analisis pakar.
- Peniaga boleh melipat gandakan baki akaun mereka dengan memperdagangkannya dengan keuntungan.
- Perdagangan pilihan binari tamat tempoh dalam beberapa saat, jadi peniaga tidak perlu menunggu lama untuk mengetahui keputusan keputusan mereka.
- Peniaga boleh mengakses beberapa aset asas dan meletakkan berbilang dagangan pilihan binari serentak.
Keburukan perdagangan pilihan binari ialah:
- Pilihan binari perdagangan memerlukan tahap kepakaran yang tinggi dalam membuat analisis yang betul.
- Ia bukan satu bentuk perdagangan yang ideal untuk pedagang emosi. Ia adalah kerana pilihan binari perdagangan boleh menjadi ketagihan. Seorang peniaga mungkin membuat dagangan berturut-turut selepas kehilangan satu untuk memulihkan kerugian yang dia buat sebelum ini.
- Walaupun dagangan tamat tempoh dalam beberapa saat, seorang pedagang perlu menjejaki carta dan menganalisis pasaran selama beberapa hari. Dia hanya perlu mengemukakan cadangan pakar apabila berdagang pilihan binari.
Risiko perdagangan pilihan binari di Malaysia
Sebelum peniaga di Malaysia menikmati perdagangan pilihan binari, mereka harus tahu tentang risiko perdagangan pilihan binari.
- Perdagangan pilihan binari melibatkan sejumlah besar analisis. Jadi, peniaga yang gagal melakukan analisis yang betul berpeluang kehilangan wang mereka.
- Ia adalah bentuk dagangan yang sangat tidak menentu, dan peniaga menghadapi risiko kehilangan wang sebenar mereka.
- Selain itu, beberapa broker penipuan beroperasi di pasaran. Jika seorang peniaga jatuh ke dalam perangkap mereka, mustahil baginya untuk mendapatkan wangnya.
Kesimpulan: Perdagangan Opsyen Binari boleh didapati di Malaysia
Dagangan pilihan binari di Malaysia semakin pesat kerana ia adalah satu bentuk perdagangan yang diiktiraf. Pedagang boleh mendaftar dengan broker yang tersedia di Malaysia dan memulakan perjalanan dagangan mereka.
Walaupun perdagangan pilihan binari adalah selamat, beberapa risiko masih dikaitkan dengan perdagangan mereka. Jadi, seorang peniaga harus sentiasa cuba menyemak semula keputusan perdagangan dan membina beberapa strategi dagangan yang berbaloi.
(Amaran Risiko: Modal anda boleh berisiko.)
Soalan Lazim (Soalan Lazim) tentang Pilihan Perduaan di Malaysia:
Sebagai seorang peniaga Malaysia, bolehkah saya berdagang pilihan binari?
Ya! Perdagangan pilihan binari adalah sah sepenuhnya di Malaysia. Anda hanya perlu memilih salah satu daripada broker pilihan binari Malaysia yang tersedia untuk memulakan dagangan.
Bagaimanakah perdagangan pilihan binari berfungsi?
Perdagangan pilihan binari melibatkan peniaga membuat cadangan ya/tidak tentang kenaikan atau penurunan harga mana-mana aset. Jika harga naik, peniaga menang. Walau bagaimanapun, kejatuhan harga boleh menyebabkan peniaga kehilangan wang.
Adakah perdagangan pilihan binari selamat di Malaysia?
ya. Perdagangan pilihan binari adalah selamat di Malaysia selagi anda bergerak di jalan yang betul untuk membina strategi perdagangan. Walau bagaimanapun, peniaga juga harus memilih broker yang terkenal untuk mengelak daripada ditipu.
Berapa banyak wang yang anda perlukan di Malaysia untuk berdagang pilihan binari?
Dana yang diperlukan untuk berdagang pilihan binari di Malaysia boleh berbeza-beza berdasarkan pilihan broker, strategi dan risiko anda. Selidik dan pilih broker yang sesuai dalam bajet anda, dan pastikan anda mengamalkan pengurusan risiko yang bertanggungjawab.
Apakah kaedah pembayaran biasa untuk broker pilihan binari di Malaysia?
Biasanya, broker pilihan binari di Malaysia menawarkan pelbagai kaedah pembayaran. Ini termasuk kad bank, pindahan bank, dompet digital seperti Skrill dan Neteller, pilihan pembayaran tempatan dan mata wang kripto seperti BTC dan XRP.
Apakah risiko pilihan perdagangan binari di Malaysia?
Dagangan pilihan binari di Malaysia membawa risiko yang ketara, termasuk potensi kerugian keseluruhan pelaburan anda. Ia tidak mempunyai peraturan, meningkatkan risiko menghadapi broker penipuan.
Bolehkah anda berdagang pilihan binari secara percuma di Malaysia?
Perdagangan pilihan binari biasanya memerlukan pelaburan wang sebenar untuk menjana keuntungan. Akaun demo, yang ditawarkan oleh sesetengah broker untuk amalan, menggunakan dana maya dan bukan untuk urus niaga monetari sebenar.


