Menjadi Batswana dan mencari yang terbaik perdagangan pilihan binari tapak boleh mencabar. Kami memilih mereka khususnya yang membenarkan perdagangan dengan pelbagai teknik perdagangan pilihan binari dan membenarkan peniaga pilihan binari Botswana untuk mengambil bahagian. Kami membantu anda, jadi jangan risau!
Secara umumnya, terdapat banyak broker pilihan binari yang boleh dipercayai tersedia di seluruh dunia. Dengan begitu banyak pilihan, mengekalkan gambaran keseluruhan adalah mencabar. Hasilnya, kami telah memilih yang teratas untuk anda. Jadi mari kita ketahui lebih lanjut mengenai broker pilihan binari teratas Botswana.
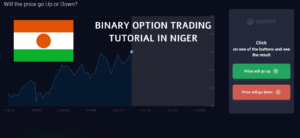
Panduan langkah demi langkah untuk berdagang Binary Option di Botswana
Broker berasaskan web ini menumpukan pada pilihan binari. Pada platform komputer dan aplikasi telefon pintar, peniaga juga boleh berdagang secara spekulatif dalam mata wang, ekuiti, indeks, mata wang kripto dan komoditi.
#1 Pilih Broker Pilihan Perduaan yang tersedia di Botswana
100+ Pasaran
- Min. deposit $10
- tunjuk cara $10,000
- Platform profesional
- Keuntungan tinggi sehingga 95%
- Pengeluaran cepat
- Isyarat
100+ Pasaran
- Menerima pelanggan antarabangsa
- Bayaran tinggi 95%+
- Platform profesional
- Deposit cepat
- Perdagangan Sosial
- Bonus percuma

250+ Pasaran
- Pilihan kripto
- Pelbagai kaedah pembayaran
- Keuntungan tinggi sehingga 88%+
- Antara muka mesra pengguna
- Sokongan peribadi
- Pendaftaran pantas
100+ Pasaran
- Min. deposit $10
- tunjuk cara $10,000
- Platform profesional
- Keuntungan tinggi sehingga 95%
- Pengeluaran cepat
- Isyarat
daripada $10
(Amaran risiko: Dagangan adalah berisiko)
100+ Pasaran
- Menerima pelanggan antarabangsa
- Bayaran tinggi 95%+
- Platform profesional
- Deposit cepat
- Perdagangan Sosial
- Bonus percuma
daripada $50
(Amaran risiko: Dagangan adalah berisiko)
250+ Pasaran
- Pilihan kripto
- Pelbagai kaedah pembayaran
- Keuntungan tinggi sehingga 88%+
- Antara muka mesra pengguna
- Sokongan peribadi
- Pendaftaran pantas
daripada $ 10
(Amaran risiko: Modal anda boleh berisiko)
Laman web perdagangan pilihan binari teratas yang membenarkan pedagang Batswana mengendalikan pilihan digital dan pilihan binari disenaraikan di bawah.
1. Quotex

Broker pilihan interaktif lanjutan yang dipanggil Quotex menawarkan dagangan di hampir 100 pasaran. Platform ini telah ditubuhkan pada 2020, dan pemiliknya, Maxbit LLC, bertanggungjawab menjalankannya dari ibu pejabat syarikat di St. Vincent dan Grenadines. Ia adalah broker luar pesisir standard yang mengalu-alukan semua jenis pelanggan. Pasaran memberikan keuntungan yang besar hampir kepada 95% untuk dagangan.
Platform dagangan dan alatan yang dicipta baru-baru ini dipersembahkan oleh broker dalam talian. Kedua-dua platform desktop dan mudah alih disokong oleh platform. Perniagaan ini beroperasi di lebih 20 negara dan menyediakan perkhidmatan dalam beberapa bahasa. Pelanggan dan pelabur pasaran mempunyai akses kepada tawaran hebat pada platform Quotex.
(Amaran Risiko: Modal anda boleh berisiko.)
2. Pocket Option

Ia adalah broker pilihan binari global. Terdapat pasaran pilihan binari di mana anda boleh bertaruh pada pasaran yang berkembang atau menurun dengan potensi pembayaran yang besar. Gembell Limited ialah pemilik broker yang berpangkalan di Marshal Islands Pocket Option. Broker mempunyai lesen perniagaan, dan IFMRRC mengawasi broker.
Laman web Pocket Option nampaknya agak menyenangkan dan tersusun pada pandangan pertama. Anda boleh melihat dengan segera apa yang mereka sediakan untuk peniaga mereka. Dengan hasil yang baik, anda boleh melabur dalam lebih daripada 100 aset berasingan seperti Pilihan Perduaan. Dalam beberapa saat, akaun baharu boleh dibuat. Mereka juga menyediakan sampel akaun percuma supaya anda boleh menguji platform.
(Amaran Risiko: Modal anda boleh berisiko.)
3. Focus Option

Tidak perlu memuat turun sebarang perisian kerana Focus Option menyediakan platform dagangan berasaskan pelayar yang mesra pengguna. Bayaran yang diramalkan dipaparkan dengan jelas di bahagian atas terminal, dan penunjuk sentimen pedagang hadir di sudut kiri bawah untuk membantu pengguna dalam menentukan keadaan pasaran.
Penunjuk stokastik, julat sebenar purata dan titik pangsi ialah beberapa penunjuk teknikal yang boleh ditindih pada carta harga. Terdapat banyak pilihan carta yang tersedia, termasuk graf garisan dan batang lilin Jepun.
Pengguna juga mendapat akses kepada berita kewangan terkini, seperti kadar bank pusat dan laporan daripada firma kewangan penting. Pelanggan hanya perlu memasukkan jumlah pegangan mereka, masa tamat tempoh, dan sama ada mereka mahu pergi tinggi atau rendah untuk melaksanakan dagangan.
Ini bermakna sebelum mengambil sesuatu jawatan, pelanggan menyedari potensi keuntungan atau kerugian mereka. Perlu diingatkan bahawa peniaga boleh menghubungi talian sokongan untuk membuat dagangan jika mereka mempunyai sambungan rangkaian yang buruk dan, oleh itu, boleh mengakses pelayar internet mereka.
(Amaran Risiko: Modal anda boleh berisiko.)
#2 Daftar untuk akaun dagangan

Anda mesti mendaftar dahulu dengan broker pilihan binari berlesen untuk berdagang pilihan binari di Botswana. Mencari broker yang boleh dipercayai yang berdaftar dan berlesen dengan pihak berkuasa adalah langkah pertama. Sebaik sahaja anda telah menemui broker, anda mesti mengisi borang pendaftaran dalam talian dengan memasukkan data peribadi anda. Selain itu, anda perlu memilih parameter dagangan anda dan membiayai akaun anda.
(Amaran Risiko: Modal anda boleh berisiko.)
#3 Gunakan akaun demo

Platform dagangan menawarkan akaun demo dan langsung. Anda boleh mendaftar untuk mana-mana daripada mereka dan mula berdagang. Tetapi jika anda tidak mengetahui proses perdagangan atau memerlukan latihan, mulakan dagangan menggunakan a akaun demo. Walau bagaimanapun, jika anda mahir dalam perdagangan, maka anda boleh menggunakan akaun langsung untuk pilihan binari selepas memahami bagaimana pilihan berfungsi.
#4 Pilih aset untuk berdagang

Pilih aset untuk berdagang pilihan binari anda. Langkah ini sama pentingnya dengan menentukan arah perdagangan. Aset yang bergerak pantas boleh memberikan keuntungan yang lebih baik daripada aset yang bergerak perlahan.
#5 Buat analisis

Analisis aset berdasarkan aliran pasaran semasa dengan mendalam serta prestasi sebelumnya untuk lebih banyak sokongan kepada analisis anda. Alat dalam platform dagangan juga boleh membantu dalam aspek ini. Buat keputusan berdasarkan hasil yang anda perolehi.
(Amaran Risiko: Modal anda boleh berisiko.)
#6 Letakkan dagangan

Laksanakan perdagangan dari platform dagangan dan perhatikan pergerakannya. Walaupun terdapat sedikit turun naik dalam kedudukan anda, anda perlu membuat keputusan yang betul bergantung pada analisis anda.
#7 Tunggu hasilnya
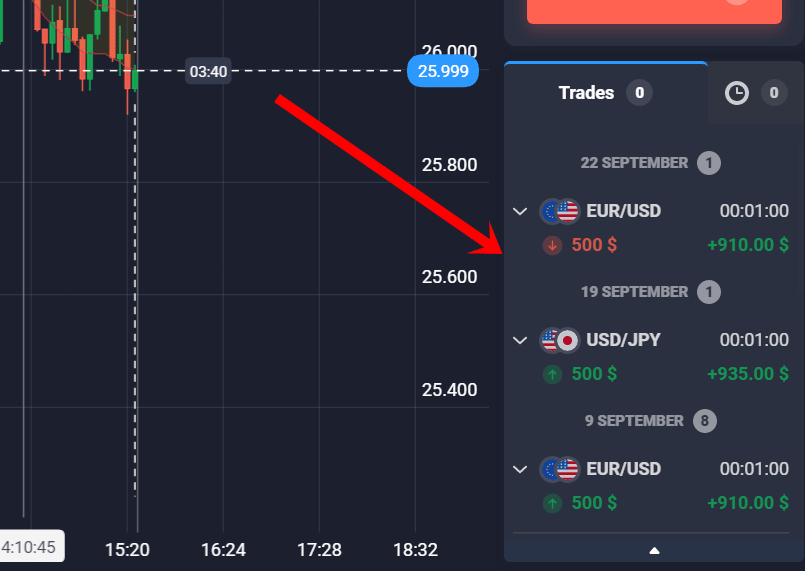
Pasaran mungkin naik dan turun, seperti yang telah disebutkan, tetapi tetap, jika anda tahu bila untuk menunggu dan bila untuk keluar dari perdagangan, anda akan mendapat keuntungan yang lebih baik. Apabila anda membuat analisis yang teliti dan yakin dengan penyelidikan anda, adalah lebih baik untuk menunggu.
(Amaran Risiko: Modal anda boleh berisiko.)
Apakah Pilihan Perduaan?

Sebagai sekuriti derivatif, pilihan binari memperoleh aset asasnya. Aset ini boleh jadi apa sahaja, termasuk saham, komoditi, sepasang mata wang, atau mungkin indeks. Perbezaan utama antara perdagangan opsyen dan derivatif lain ialah apabila berdagang pilihan binari, pelabur hanya perlu mempertimbangkan saiz pergerakan harga aset asas, bukan arahnya. Akibatnya, ia adalah lebih mudah untuk ditangani berbanding derivatif lain. Pilihan binari datang dalam dua jenis: pilihan panggilan dan letak.
Adakah perdagangan binari sah di Botswana?
Populariti daripada pilihan binari perdagangan telah meningkat di seluruh dunia. Walaupun ia dibenarkan di beberapa negara, ia dilarang di negara lain. Oleh itu, persoalan di fikiran semua orang ialah sama ada pilihan binari dibenarkan atau tidak di Botswana.
Ya, Botswana ada pilihan binari yang disahkan. Bank Pusat Botswana, yang menyelia sektor itu, telah melaksanakan beberapa peraturan untuk melindungi pelabur, termasuk tuntutan supaya broker yang diberi kuasa menawarkan pulangan pelaburan %, menyediakan pendidikan perdagangan dan mendedahkan sebarang yang berkaitan. risiko. Broker pilihan binari juga mesti mematuhi undang-undang anti pengubahan wang haram dan dilesenkan oleh Agensi Perisikan Kewangan (FIA).
(Amaran Risiko: Modal anda boleh berisiko.)
Kaedah pembayaran untuk pedagang di Botswana
Teknik yang agak baru dan menarik untuk mendapatkan wang dari rumah adalah melalui perdagangan pilihan binari. Langkah seterusnya melibatkan membuat deposit dan memulakan dagangan selepas anda membuat keputusan mengenai broker pilihan binari yang boleh dipercayai dan menyediakan akaun dengan mereka. Setiap broker akan mempunyai cara pembayaran pilihan mereka sendiri; walau bagaimanapun, majoriti akan menggunakan wayar bank, kad, kripto dan dompet digital.
Dompet digital
Pelanggan hanya boleh membuat pembayaran atau pengeluaran pilihan binari menggunakan e-dompet mereka selepas menyedari pulangan yang lumayan ke atas pelaburan mereka.
Pemindahan bank
Cara transaksi yang paling boleh dipercayai adalah yang ini. Apabila pilihan pindahan bank tersedia, anda boleh menggunakan data tersebut untuk memulakan pindahan terus menggunakan kaedah tersebut.
Urus niaga kad
Ia adalah cara paling mudah untuk memindahkan wang sementara bukan yang paling selamat. Majoriti individu berasa paling selesa membuat pembelian dengan kad. Pilihan ini memudahkan anda mendepositkan wang dengan segera.
Cryptocurrency
Malah ini adalah pilihan yang baik untuk digunakan oleh pelanggan yang memiliki mata wang kripto, memandangkan bilangan pemegang mata wang kripto yang semakin meningkat.
Cara deposit dan pengeluaran
Cara paling biasa untuk membiayai akaun pembrokeran pilihan binari adalah menggunakan kad kredit/debit. Ini kerana ia mengambil sedikit masa untuk disiapkan, dan secara amnya anda boleh mula berdagang dengan segera.
Deposit
Anda mempunyai pelbagai cara untuk membiayai akaun pembrokeran langsung anda. Anda boleh mendeposit menggunakan Bitcoin atau Tether, serta kad debit/kredit MasterCard dan VISA. Ini semua membenarkan deposit segera.
Boleto Bancario, PIX, TED dan LATAM ialah pilihan deposit lain yang diterima dengan masa pemprosesan satu hingga tiga hari setiap satu.
Mengeluarkan
Apabila anda ingin mengeluarkan dana daripada akaun pilihan binari, prosedurnya agak mudah. Broker anda akan menghantar wang ke akaun anda selepas menerima maklumat perbankan yang diperlukan daripada anda. Prosedur lengkap biasanya hanya mengambil masa beberapa hari.
Walau bagaimanapun, apabila anda membuat pengeluaran, anda harus mengambil kira perkara berikut:
- Anda mungkin akan dikenakan bayaran pengeluaran oleh broker anda.
- Untuk mengeluarkan wang, anda mungkin perlu menyimpan jumlah minimum tertentu dalam akaun anda.
- Berdasarkan broker yang anda pilih; anda mungkin perlu membayar cukai pada pengeluaran anda.
Kebaikan dan keburukan perdagangan Opsyen Binari di Botswana
Kebaikan dan keburukan perdagangan pilihan binari disenaraikan di bawah.
Kelebihan Dagangan Binari ialah:
- Untuk beberapa ratus dolar, anda boleh membuka akaun pilihan binari dengan kebanyakan laman web. Bagi ramai peniaga yang berdagang secara sampingan dan tidak mahu melabur banyak wang, ini adalah ideal.
- Cara murah untuk berdagang pelbagai instrumen asas.
- Pulangan cepat adalah faedah daripada pilihan binari perdagangan.
Keburukan Perdagangan Binari ialah:
- Kerana alat dagangan yang mudah, profesional perdagangan berpendapat mereka mempunyai semua pengetahuan yang diperlukan untuk memperoleh keuntungan dalam masa beberapa minit, tetapi ini tidak selalu berlaku.
- Tidak banyak broker web yang cerdik yang menipu pelanggan daripada wang berharga.
Risiko Dagangan Pilihan Perduaan di Botswana
Jika anda meramalkan pergerakan harga yang betul, pilihan binari menjamin keuntungan yang cepat dan ketara. Sebenarnya anda akan kehilangan semua wang anda jika entah bagaimana pasaran tidak bergerak seperti yang anda ramalkan.
Struktur pembayaran "semua atau tiada", di mana salah satu daripada dua keputusan untuk kontrak pilihan binari dua kemungkinan hasil ialah pelanggan runcit akan mempunyai peluang yang sama untuk kehilangan semua wang mereka dalam tempoh yang singkat.
Negara berhampiran Botswana

Jika anda tinggal atau bekerja di mana-mana negara ini, anda mungkin berminat dengan maklumat mengenai perdagangan pilihan binari di negara ini juga. Ikuti pautan di bawah untuk menerima maklumat daripada kami.
Botswana berkongsi sempadan dengan beberapa negara. Ini adalah:
Kesimpulan: Perdagangan Opsyen Binari boleh didapati di Botswana
Dengan 16 bank berfungsi di sana, sektor perbankan Botswana adalah agak kecil tetapi berkembang dengan baik. Aset empat bank terbesar itu membentuk kira-kira 75% daripada jumlah keseluruhan. Industri perbankan menguntungkan dan mempunyai permodalan yang baik, dengan nisbah kredit tidak berbayar kurang daripada 5%.
Semua broker pilihan binari perniagaan di negara ini mesti ditadbir dan diselia oleh Bank of Botswana. Untuk memastikan bank itu berjalan dengan baik dan kukuh, ia mempunyai beberapa kuasa dan alatan. Apabila datang ke perdagangan pilihan, kerana ia dikawal oleh BOB dan badan kawal selia kewangan terkemuka yang lain, pelaburan anda berada dalam tangan yang baik.
Apabila anda boleh membuat hampir 95% keuntungan daripada pelaburan anda, anda seharusnya bersedia untuk mengambil risiko sebanyak itu. Walau bagaimanapun, dengan berhati-hati dan dengan melabur dengan bijak, anda boleh mengurangkan risiko kehilangan wang dan mengekalkan keuntungan.
(Amaran Risiko: Modal anda boleh berisiko.)
Soalan Lazim (Soalan Lazim) tentang Pilihan Perduaan di Botswana:
Apakah langkah penting untuk melindungi privasi anda sebagai peniaga?
Langkah berjaga-jaga keselamatan adalah penting dalam perdagangan binari demi keselamatan wang anda. Jelas sekali, pengguna suka berurusan dengan broker binari yang melindungi maklumat peribadi mereka dan memberi mereka rasa selamat. Platform yang disebutkan di atas mengambil semua langkah yang perlu untuk memastikan tahap keselamatan yang tinggi untuk pedagang mereka. Tiada kebimbangan mengenai keselamatan platform atau keselamatan anda sebagai penggunanya.
Bagaimana untuk memilih platform dagangan terbaik untuk berdagang pilihan binari di Botswana?
Platform harus berfungsi dengan sempurna dan harus direka bentuk dengan pakar. Ia sepatutnya tidak mempunyai sebarang gangguan atau ketinggalan semasa digunakan. Apl mesti tersedia untuk apple iOS dan peranti android. Majoriti broker tidak menyediakan aplikasi iOS, oleh itu adalah satu lagi aspek penting untuk diperiksa.
Apl harus berfungsi sama seperti versi web. Kesimpulannya, fleksibiliti platform dagangan broker seharusnya menjadikannya berguna untuk semua pedagang.
Maklumat lain yang perlu dicari dalam platform dagangan ialah pelbagai tempoh, iaitu, carta 5 saat kepada pilihan carta harian, alat dan penunjuk percuma untuk analisis, pelbagai jenis carta, boleh disesuaikan dan mesra pengguna, pelaksanaan perdagangan yang sangat cepat, isyarat, pertandingan, dan perdagangan sosial.
Adakah selamat untuk berdagang pilihan binari di Botswana?
Sejak beberapa dekad kebelakangan ini, Botswana telah maju dengan ketara sambil menumpukan pada pentadbiran yang baik dan pembangunan ekonomi. Industri kewangan, yang telah melalui beberapa inisiatif dasar selama ini, adalah salah satu bidang utama yang telah dipilih untuk pembangunan.
Semua sektor ekonomi penting dikawal dengan baik dalam sistem kewangan Botswana. Agensi Perisikan Kewangan Botswana (BFIA) ialah organisasi kerajaan penting yang berusaha untuk mencegah pembiayaan keganasan dan pengubahan wang haram di negara ini.
Bank of Botswana (BoB), bank pusat negara, mengawal dan mengawasi industri kewangan negara dengan ketat. BoB bertanggungjawab menyelia institusi kewangan seperti bank serta memelihara kestabilan harga.