
Bolivia adalah sebuah negara terkurung daratan yang terletak di barat Amerika Selatan, berkongsi sempadan timur lautnya dengan Brazil. Sebagai negara kelima terbesar di Amerika Selatan, ia mempunyai penduduk yang pelbagai dan meluas. Majoriti penduduk berminat dalam perdagangan binari. Katakan anda adalah salah seorang pedagang dari Bolivia yang berminat untuk berdagang dan ingin menjana pendapatan daripadanya. Kemudian anda telah datang ke tempat yang betul. Artikel ini adalah mengenai pilihan perdagangan binari yang boleh didapati di Bolivia.
Pilihan binari popular hari ini, dan boleh dikatakan bahawa penduduk dan peniaga Bolivia tidak terkecuali. Dengan populariti yang semakin meningkat, mereka juga cenderung ke arah pilihan binari untuk membuat wang mudah.
Kami telah mengambil inisiatif melalui artikel ini untuk memberikan anda semua butiran broker terkawal yang anda boleh berdagang dengan selamat. Dan mendapat keuntungan yang besar.
(Amaran risiko: Modal anda boleh berisiko)
Panduan langkah demi langkah untuk berdagang pilihan binari di Bolivia
Apa yang anda akan baca dalam Post ini
Langkah mudah yang akan kami sediakan akan membimbing anda melalui perjalanan ini dan membantu anda memberikan kejelasan:
#1 Pilih broker tersedia yang menawarkan perkhidmatan di Bolivia
Lihat 4 broker Pilihan Perduaan terbaik di Bolivia:
100+ Pasaran
- Min. deposit $10
- tunjuk cara $10,000
- Platform profesional
- Keuntungan tinggi sehingga 95%
- Pengeluaran cepat
- Isyarat
300+ Pasaran
- Deposit minimum $10
- Akaun demo percuma
- Pulangan tinggi sehingga 100% (sekiranya ramalan yang betul)
- Platform ini mudah digunakan
- Sokongan 24/7
100+ Pasaran
- Menerima pelanggan antarabangsa
- Bayaran tinggi 95%+
- Platform profesional
- Deposit cepat
- Perdagangan Sosial
- Bonus percuma
100+ Pasaran
- Platform profesional
- Akaun demo percuma
- Deposit minimum $10
- Webinar dan pendidikan
- Bayaran yang tinggi
100+ Pasaran
- Min. deposit $10
- tunjuk cara $10,000
- Platform profesional
- Keuntungan tinggi sehingga 95%
- Pengeluaran cepat
- Isyarat
daripada $10
(Amaran risiko: Dagangan adalah berisiko)
300+ Pasaran
- Deposit minimum $10
- Akaun demo percuma
- Pulangan tinggi sehingga 100% (sekiranya ramalan yang betul)
- Platform ini mudah digunakan
- Sokongan 24/7
daripada $10
(Amaran risiko: Modal anda mungkin berisiko)
100+ Pasaran
- Menerima pelanggan antarabangsa
- Bayaran tinggi 95%+
- Platform profesional
- Deposit cepat
- Perdagangan Sosial
- Bonus percuma
daripada $50
(Amaran risiko: Dagangan adalah berisiko)
100+ Pasaran
- Platform profesional
- Akaun demo percuma
- Deposit minimum $10
- Webinar dan pendidikan
- Bayaran yang tinggi
daripada $10
(Amaran risiko: Dagangan adalah berisiko)
Binary Options adalah sejenis perdagangan pilihan yang kebanyakan pelabur Bolivia pergi ke hari ini. Terdapat banyak broker binari yang pedagang Bolivia boleh berdagang, tetapi bukan semua platform broker di luar sana berada di bawah sebarang bentuk pengawasan. Broker menawarkan instrumen pelabur yang boleh mereka gunakan untuk perdagangan.
5 Broker terbaik di Bolivia disenaraikan di bawah:
Senarai 5 broker Binari terbaik di Bolivia
Secara umumnya, terdapat banyak yang sesuai broker pilihan binari seluruh dunia. Dengan begitu banyak pilihan, sukar untuk menyimpan gambaran keseluruhan. Oleh itu, kami telah memilih yang terbaik untuk anda. Jadi, mari kita ketahui lebih lanjut tentang broker binari terbaik di Bolivia.
#1. Quotex
Broker ini adalah syarikat yang berpangkalan di UK yang bermula pada 2019. Pendaftaran akaun di platform ini adalah mudah. Quotex perdagangan instrumen adalah sehingga 100. Peniaga boleh memilih mana-mana aset pilihan mereka.
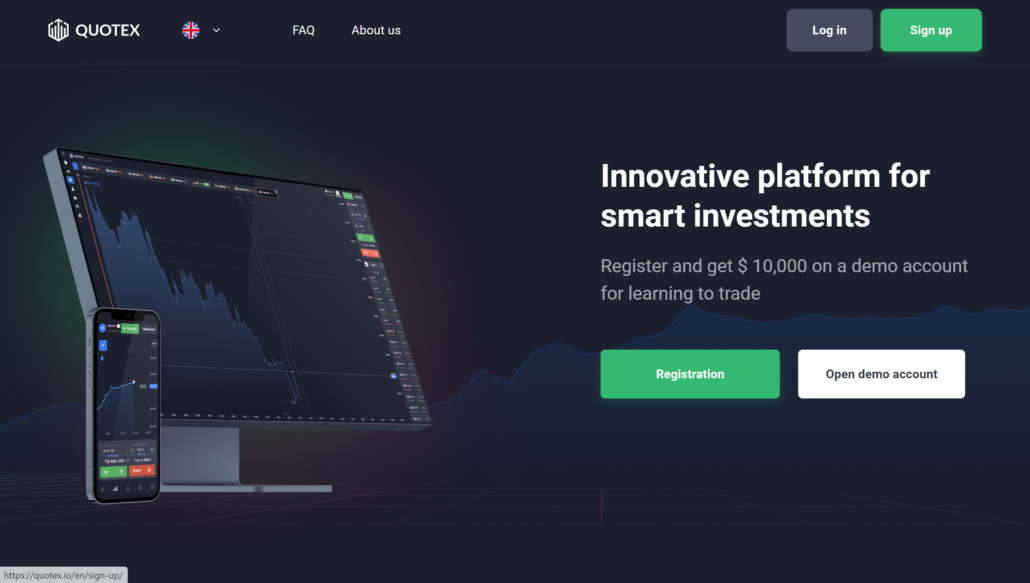
Walaupun syarikat itu agak baru, ia terkenal di kalangan peniaga di seluruh dunia. Platform Quotex ialah mesra pengguna. Platform mempunyai bot itu membantu pelabur membuat dagangan yang bertanggungjawab apabila meletakkan dagangan. Aplikasi mudah alih disediakan untuk pedagang berdagang. Aplikasi mudah alih ini seperti versi web. Jadi peniaga mempunyai pandangan perdagangan yang sama.
Adakah Quotex sah di Bolivia?
Perdagangan pilihan binari dengan Quotex adalah sah di Bolivia. Pedagang dari Bolivia dengan yakin boleh menggunakan semua ciri dan perkhidmatan yang disediakan oleh platform dagangan dalam talian yang bereputasi ini tanpa sebarang kebimbangan undang-undang.
ciri-ciri:
- The Deposit minimum Quotex: $10
- Aset: crypto, FX, komoditi
- Platform: apl mudah alih Quotex, web
- Sokongan Quotex: 24 jam setiap hari
- Leverage: 1:500
- Bonus: Tidak
(Amaran risiko: Modal anda boleh berisiko)
#2. IQ Option
Broker ini adalah syarikat yang berpangkalan di Cyprus yang diasaskan pada tahun 2013. Ia adalah syarikat Pilihan Binari yang terkenal. Selain daripada Pilihan Perduaan, IQ Option menyediakan pelanggannya dengan Alat forex. Syarikat menawarkan sokongan pengguna yang boleh berkomunikasi dengan pelanggan dalam 10 bahasa. Mereka mempunyai cawangan di UK untuk mengembangkan kapasiti kerja mereka.
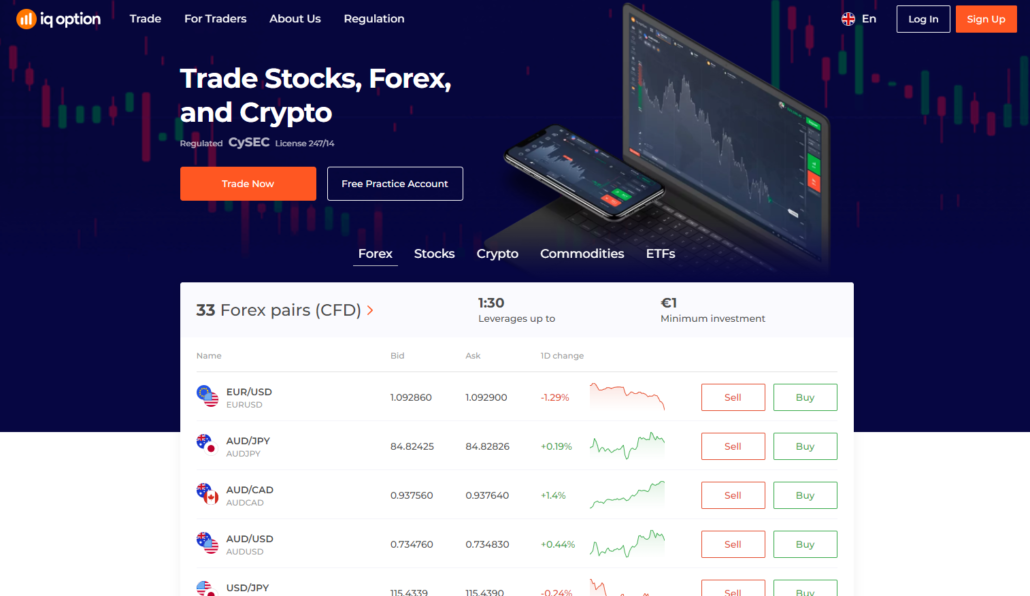
Peningkatan teknologi IQ Option pada 2016 menjadikan platform itu salah satu platform terbaik untuk berdagang. Membuka akaun dengan broker ini adalah mudah. Selepas membuka akaun, peniaga perlu membuat a deposit minimum $10 sebelum menggunakan platform untuk berdagang.
(Amaran risiko: Modal anda boleh berisiko)
Sebagai pelabur pada IQ Option, anda mempunyai akses kepada akaun demo. Akaun demo boleh digunakan untuk mengamalkan teknik perdagangan anda mungkin ingin mencuba sebelum menggunakan akaun sebenar anda.
Adakah IQ Option sah di Bolivia?
Sesungguhnya, IQ Option adalah sah di Bolivia. Platform dagangan eksklusif IQ Option memberikan pedagang Bolivia akses kepada pelbagai pasaran dan aset pilihan binari.
ciri-ciri:
- Deposit minimum IQ Option: $10
- Aset: indeks CFD, komoditi dan ETF.
- Platform: Apl mudah alih IQ Option, web, muat turun desktop
- Sokongan IQ Option: Setiap hari selama 24 jam
- Leverage: 1:500
- Bonus: tidak tersedia
(Amaran risiko: Modal anda boleh berisiko)
#3. Pocket Option
Pocket Option pejabat utama adalah di Kepulauan Marshall. Syarikat itu ditubuhkan pada 2017 oleh individu Fintech yang ingin mencuba dan membuat Pilihan Perduaan dilakukan pada platform unik.

Membuka akaun di broker adalah mudah. The deposit minimum jumlah untuk pelabur mula berdagang di platform adalah $50, dan dagangan boleh diletakkan dengan wang tunai bermula dari $1. Sebagai pelabur pada Pocket Option, anda akan mempunyai akses kepada akaun demo untuk latihan.
Mempunyai a Platform MetaTrader, broker ini digunakan dengan baik oleh banyak peniaga Pilihan Perduaan dan Forex.
Adakah Pocket Option sah di Bolivia?
Sudah tentu, pilihan Pocket boleh diakses secara sah di Bolivia. Adalah penting untuk ambil perhatian bahawa ia beroperasi tanpa pengawasan kawal selia khusus di negara ini. Peniaga mempunyai peluang untuk menggunakan pilihan Pocket untuk perdagangan pilihan binari.
(Amaran risiko: Modal anda boleh berisiko)
ciri-ciri:
- Deposit minimum Pocket Option: $50
- Aset: pasangan forex, ETF dan mata wang kripto.
- Platform: MT5.
- Sokongan: 24/7
- Leverage: 1:100
- Bonus: Kod promosi, pulangan tunai.
(Amaran risiko: Modal anda boleh berisiko)
#4. Olymp Trade
Olymp Trade telah ditubuhkan pada 2014 untuk menyediakan Pilihan Perduaan kepada pelabur dari Eropah dan benua lain. Broker boleh diakses pada kedua-dua peranti mudah alih dan komputer. Pelabur Olymp trade boleh mula berdagang di platform broker dengan mendepositkan sebarang amaun daripada $10 dan ke atas.
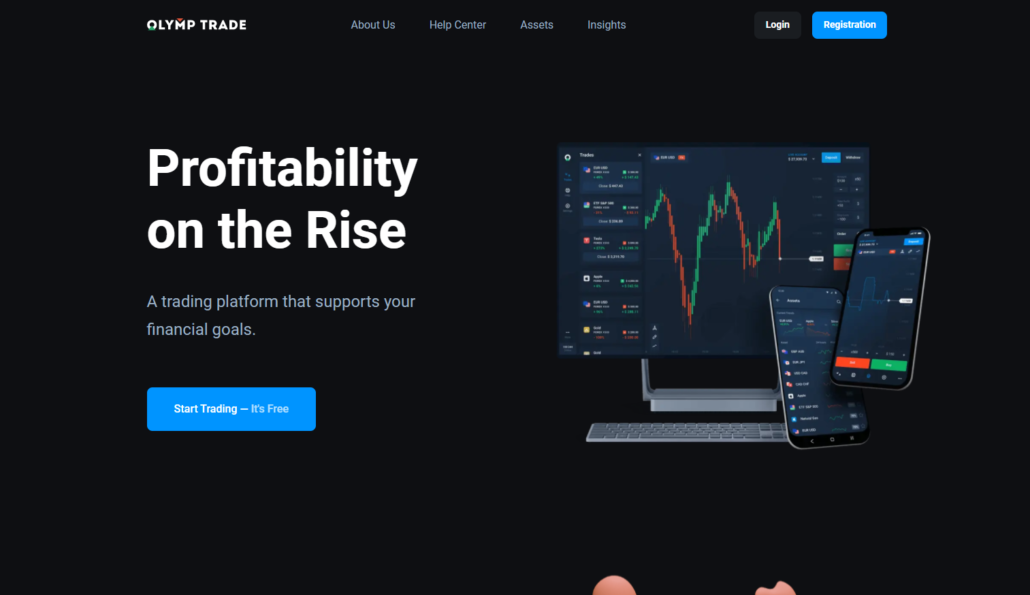
Akaun demo yang disediakan tersedia untuk semua pedagang. Akaun ini digunakan untuk merancang strategi yang boleh digunakan semasa berdagang dengan akaun sebenar anda. Tawaran broker kuliah peniaga, jadi jika anda seorang pelabur baru, anda akan dapat mempelajari semua yang perlu tentang Pilihan Perduaan.
Adakah Olymp Trade sah di Bolivia?
Olymp Trade ialah platform dagangan dalam talian yang sah dan bereputasi di Bolivia yang terkenal kerana menyediakan akses kepada pedagang kepada pelbagai aset, termasuk pilihan binari. Platform ini dikawal oleh IFC.
(Amaran risiko: Modal anda boleh berisiko)
ciri-ciri:
- Deposit minimum Olymp Trade: $10
- Aset: pasangan mata wang, kripto dan saham.
- Platform: MT4, platform perdagangan Olymp.
- Sokongan: 24 jam – 7 hari
- Leverage: 1:500
- Bonus: tiada
(Amaran risiko: Modal anda boleh berisiko)
Bagaimana untuk mendaftar untuk Pilihan Perduaan di Bolivia
Adakah anda sudah tahu broker yang anda ingin berdagang? Sebaik sahaja anda melakukannya, anda boleh meneruskan ke buka akaun pada platform. Prosedur membuka akaun pada broker adalah mudah, dan ia didigitalkan, bermakna bahawa prosedur adalah dalam talian melalui telefon bimbit anda atau mungkin komputer anda.

Selepas anda mesti memuat turun aplikasi mudah alih atau pergi ke laman web broker, pilih pendaftaran atau pendaftaran butang. Setelah melakukan ini, anda akan digesa untuk butiran input seperti alamat e-mel dan nombor telefon anda, dan anda akan membuat kata laluan yang boleh anda gunakan untuk log masuk jika anda log keluar daripada akaun anda.

Fasa seterusnya adalah untuk mengemukakan beberapa dokumen. Dokumen ini akan membantu syarikat broker mendaftarkan profil anda sebagai pedagang sebenar pada pelayan mereka. Dokumen ini termasuk kad pengenalan, lesen memandu atau pasport negara (untuk pengenalan) dan bil utiliti (untuk kediaman).
Sebaik sahaja anda menyelesaikan ini, broker akan mengambil masa beberapa jam untuk sepenuhnya sediakan akaun dagangan anda pada platform. Sebaik sahaja ia sedia, anda akan menerima mesej yang memberitahu anda demikian. Selepas itu, anda akan dapat mengakses akaun anda dan mula berdagang di platform broker.
(Amaran risiko: Modal anda boleh berisiko)
Adakah perdagangan Pilihan Perduaan sah di Bolivia?
ya, Perdagangan Opsyen Binari adalah sah di Bolivia. Walaupun tiada peraturan membimbing dan menyelia perdagangan Pilihan Perduaan di negara itu, pedagang Bolivia masih boleh berdagang aset Binary Options pada broker pilihan mereka.
Pelabur Bolivia sepatutnya berhati-hati semasa memilih broker tempatan kerana tiada organisasi yang mengawal mereka. Banyak kali broker yang tidak dikawal selia cenderung menipu. Sebagai pelabur Bolivia, adalah lebih baik untuk berdagang pada broker Pilihan Perduaan yang dikawal selia.
Peraturan kewangan di Bolivia
Bolivia sebagai sebuah negara terdiri daripada institusi kewangan tertentu yang pastikan ada aliran wang yang berterusan. Negara mempunyai a Bank Pusat, satu bank negara, dan 51 institusi kewangan yang dimiliki secara persendirian.

Bank Negara membuat peraturan kewangan keseluruhan Bolivia. Bank pusat bertanggungjawab melesenkan organisasi kewangan yang ingin beroperasi di Bolivia. Bank negara dan 51 institusi kewangan swasta mesti mematuhi mana-mana peraturan undang-undang yang diberikan oleh Bank Pusat Bolivia.
(Amaran risiko: Modal anda boleh berisiko)
Selain Bank Pusat, sebuah badan yang dipanggil ASFI juga dipertanggungjawabkan dengan tugas ASFI adalah untuk memastikan bahawa institusi kewangan di negara ini tidak melanggar mana-mana undang-undang diberikan oleh CBB.
Kerajaan Bolivia melakukannya tidak membuat sebarang undang-undang kewangan berkenaan Pilihan Perduaan di negara ini. Broker Pilihan Perduaan di Bolivia tempatan tidak dikawal oleh CBB atau ASFI. Tetapi ini tidak bermakna bahawa pedagang dari Bolivia tidak boleh berdagang dengan broker. Mereka harus memastikan bahawa broker berada di bawah peraturan institusi kewangan.
Bagaimana untuk mendepositkan dana untuk perdagangan Opsyen Binari
Pedagang yang telah mencipta akaun pada broker mempunyai akses kepada wang pendahuluan ke dalam akaun mereka untuk memulakan dagangan. Setiap broker mempunyai jumlah paling sedikit yang boleh didepositkan oleh pelabur sebelum mereka boleh meletakkan dagangan di platform broker.

(Amaran risiko: Modal anda boleh berisiko)
Untuk membiayai akaun anda, anda perlu menggunakan a kaedah pembayaran. Untuk membiayai akaun anda, anda boleh memilih kaedah pindahan bank, kad atau e-dompet. Kaedah bank melibatkan memasukkan wang ke dalam akaun anda terus dari bank anda. Ini dilakukan dengan memasukkan pin yang mengesahkan anda sedang melakukan transaksi.

Kaedah kad melibatkan anda memasukkan butiran kad anda. Selepas mengesahkan transaksi sedang dijalankan oleh anda, amaun yang anda ingin depositkan akan ditunjukkan pada baki dagangan anda sebaik sahaja ia berjaya.
The kaedah e-dompet adalah hampir sama. Anda perlu mengesahkan bahawa anda adalah orang yang menjalankan transaksi.
Bagaimana untuk menarik diri
Pengeluaran adalah mudah. Ia semudah memasukkan wang ke dalam akaun anda. Pertama, anda perlu memilih butang pengeluaran. Selepas itu, anda boleh memilih a kaedah pembayaran. Kaedah pembayaran akan menentukan ke mana anda mahu wang itu dihantar. Terdapat pemindahan bank dan pindahan e-dompet tersedia.
Kaedah pemindahan bank bermakna bahawa dana yang anda keluarkan daripada akaun dagangan anda akan dihantar terus ke bank anda. Anda juga perlu mengesahkan bahawa anda adalah orang yang melakukan transaksi. Sebaik sahaja anda mengesahkan ini, wang itu akan ditunjukkan dalam akaun bank anda dalam masa beberapa lama.

Memilih e-dompet bermakna bahawa perdagangan akan dihantar terus ke e-dompet anda akaun. Dari e-dompet anda, anda boleh memindahkan wang pada bila-bila masa ke bank anda untuk pengeluaran.
(Amaran risiko: Modal anda boleh berisiko)
Kadang-kadang, a peratusan akan ditolak oleh broker anda berdagang pada. Tidak semua broker mengenakan bayaran untuk pengeluaran. Caj mungkin berlaku apabila amaun yang anda keluarkan adalah daripada harga tertentu.
Bagaimana untuk berdagang Pilihan Perduaan di Bolivia
Untuk menjadi jelas, Pilihan Perduaan adalah perdagangan yang memerlukan tidak banyak daripada individu. Ia adalah salah satu pasaran cair untuk diterokai hari ini. Dengan langkah-langkah yang ditulis di bawah, anda akan memahami betapa mudahnya untuk berdagang Pilihan Perduaan sebagai pedagang Bolivia.

Selepas membuka akaun anda sebagai pedagang Bolivia pada broker pilihan anda dan mendepositkan wang untuk perdagangan, ikuti langkah mudah di bawah untuk mengetahui cara memulakan Pilihan Perduaan:
Langkah #1: Kaji pergerakan Pasaran
Kaji bagaimana pasaran bergerak. Pasaran Pilihan Perduaan ialah sangat cepat, begitu ramai peniaga gagal mengetahui bila dan di mana hendak meletakkan dagangan. Tetapi jika anda seorang peniaga itu sentiasa memerhatikan pergerakan pasaran, maka anda tidak akan menghadapi masalah di mana dan bila hendak meletakkan dagangan atau membuka pasaran.

Satu lagi cara untuk mengkaji pergerakan pasaran adalah dengan menyertai sembang forum pada broker (jika ada). Ramai peniaga cenderung untuk berbincang dalam forum bagaimana pasaran Pilihan Perduaan sedang berjalan. Sebagai orang baru, anda akan mengenali banyak perkara. Kadangkala webinar juga dianjurkan oleh pakar. Pakar-pakar ini mengambil masa mereka untuk memberitahu bagaimana pasaran mungkin berjalan dalam beberapa minggu akan datang.
(Amaran risiko: Modal anda boleh berisiko)
Langkah #2: Pilih pasaran
Orang ramai memilih pasaran kerana ingin mengaut keuntungan. Kamu perlu pilih pasaran anda berdasarkan bagaimana ia memihak kepada anda semasa berdagang. Terdapat dua kaedah yang tersedia - perdagangan tempoh dan faedah.
- Tempoh Dagangan

Perdagangan Opsyen Binari menggunakan apa yang dipanggil tempoh masa. Ini bermakna bahawa peniaga menetapkan masa tertentu perdagangan harus berakhir. Tetapan masa boleh dalam sehari, jam, minit atau minggu. Peniaga menetapkan masa kontrak yang akan bekerja untuk mereka.
- Minat Anda
Sebagai seorang peniaga yang berdagang Pilihan Perduaan, anda juga boleh memilih untuk berdagang dalam a pasaran kerana minat anda. Anda boleh memilih pasaran kerana alat Pilihan Perduaan tertentu yang anda suka berdagang dengan. Pedagang yang suka Cryptocurrencies memilih pasaran yang berdagang crypto.
(Amaran risiko: Modal anda boleh berisiko)
Langkah #3: Pilih jumlah dagangan dan tempoh dagangan
Untuk membuat perdagangan, anda perlu masukkan jumlah yang anda sanggup beli atau jual. Jumlah yang anda pilih akan bergantung pada pulangan anda jika anda berjaya selepas dagangan tamat. Tempoh perdagangan adalah berapa lama anda mahu perdagangan itu bertahan. Adakah minit, jam, atau sepanjang hari? Anda perlu memilih masa kontrak.

Langkah #4: Tempatkan perdagangan
Pilih "mengesahkan” butang untuk meletakkan dagangan. Kemudian lihat semasa pasaran bergerak.

Langkah #5: Keluar dari perdagangan sebelum ditutup atau tunggu masa perdagangan tamat
Ini bergantung kepada jika perdagangan berjalan lancar atau tidak. Jika ramalan anda berjalan lancar, anda boleh memilih untuk terus berdagang sehingga masa kontrak tamat. Tetapi jika tidak, anda boleh menarik diri daripadanya. Pilihan di tangan anda pada akhirnya. Hanya jika anda ramal betul anda akan untung.

Kaedah pembayaran untuk pedagang di Bolivia
Melalui artikel ini, kami akan cuba memberikan anda beberapa kaedah pembayaran terbaik yang boleh dilakukan oleh pedagang di Bolivia dengan mudah.
Pindahan Bank
Cara terbaik untuk menghantar dan menerima wang. Ini adalah salah satu cara pembayaran yang paling popular dan selamat mengenai pilihan perdagangan binari. Pindahan bank adalah cara paling murah untuk memindahkan wang. Peniaga mendapat manfaat dengan mudah daripada pindahan bank mudah ini yang memberi mereka peluang untuk membuat pembayaran dengan mudah. Untuk membuat pindahan bank, apa yang perlu dilakukan oleh perdagangan ialah, sahkan butiran bank mereka apabila ditanya. Dan mereka boleh dengan mudah memindahkan dana dari satu akaun ke akaun yang lain.
Cryptocurrency
Peniaga juga boleh membuat pembayaran melalui mata wang kripto. Pedagang boleh membuat pembayaran, memindahkan, dan juga mengeluarkan dana dengan bantuan mata wang kripto. Peniaga disediakan dengan pelbagai pilihan. Mata wang kripto digunakan secara meluas oleh ramai pedagang hari ini.
Dompet Elektronik
Peniaga dari Bolivia juga boleh mendapat manfaat daripada dompet Elektronik. Mereka boleh membuat pembayaran dengan mudah melalui e-dompet. Dompet elektronik berfungsi sama seperti kad debit atau kredit. Sebagai sistem pembayaran elektronik digital, ia menjejaki maklumat pembayaran pedagang.
Pembayaran Kad
Menjadi cara paling mudah untuk membuat pembayaran dalam talian. Pembayaran kad merujuk kepada debit, kredit atau mana-mana kad induk lain. Salah satu ciri terbaik pembayaran kad ialah ia boleh digunakan di mana-mana tempat dan pada bila-bila masa. Terpulang kepada peniaga untuk membuat pembayaran sama ada pada debit, kredit atau sebarang bentuk kad induk yang lain. Peniaga hanya perlu menggunakan mana-mana kad ini dan boleh membuat pembayaran dengan mudah.
Kebaikan dan keburukan perdagangan Opsyen Binari di Bolivia
Dalam bahagian ini, kami akan menyediakan kedua-dua ciri positif dan negatif perdagangan binari dalam talian adalah sisi positif dan negatif.
Kelebihan Dagangan Binari ialah:
- Kadar dan tahap risiko boleh dikawal, dijejaki dan diurus dengan mudah. Melalui spekulasi terdahulu, adalah mungkin untuk mengira dagangan.
- Keseluruhan proses perdagangan binari adalah mudah dan mesra pengguna; tidak seperti perdagangan tradisional, peniaga mempunyai peluang yang luas untuk pertumbuhan dan pengembangan.
- Peniaga mempunyai faedah tambahan untuk berdagang dari mana-mana dan pada bila-bila masa, tidak kira di sudut mana pun mereka berada.
Keburukan Perdagangan Binari ialah:
- Terdapat nisbah antara menang dan kalah selalunya tidak dikawal dan seimbang.
- Jika dibandingkan pilihan binari adalah lebih mahal untuk berdagang jika dibandingkan dengan kedudukan forex atau sebarang bentuk perdagangan lain.
- Jika seorang peniaga ingin berlatih berdagang terlebih dahulu, dia tidak akan mendapat peluang seperti itu. Terutama untuk pemula, ia menjadi satu isu.
Risiko Dagangan Pilihan Perduaan di Bolivia
Terdapat jumlah minimum risiko yang terlibat dengan perdagangan binari. Ia terletak di antara 1% hingga 2%, dan secara maksimum, ia mungkin berlanjutan kepada 5%. Mari kita terangkan beberapa daripada mereka secara terperinci:
- Pasar risiko terlibat dalam perdagangan binari adalah tinggi.
- Satu lagi faktor utama yang perlu diberi perhatian oleh peniaga ialah kadar keuntungan yang tetap dan terhad; tidak kira berapa banyak anda melabur; kadar keuntungan akan sama.
- Pilihan binari adalah pelaburan jangka pendek yang tidak dapat memberikan pulangan jangka panjang.
(Amaran Risiko: Modal anda boleh berisiko.)
Kesimpulan: Perdagangan Opsyen Binari boleh didapati di Bolivia
Untuk menyimpulkan artikel, kita boleh mengatakan bahawa pilihan perdagangan binari adalah platform sedemikian di mana pedagang ditawarkan pelbagai kemungkinan pelaburan yang besar, yang kami akan sentiasa menasihati ujian melalui akaun demo. Pada masa ini, anda mesti sedar bahawa perkara asas dalam perdagangan pilihan binari adalah untuk menentukan arah aliran yang sedia ada dan peluang bahawa perdagangan akan menaik atau menurun. Pilihan perdagangan binari sentiasa menarik pedagang di seluruh dunia.
Selepas membaca artikel tersebut, anda mesti sedar bahawa sebelum anda melabur dalam perdagangan binari, terdapat banyak faktor yang perlu dipertimbangkan. Semua broker yang telah kami nyatakan dalam artikel ini mempunyai akaun demo percuma yang boleh anda akses dengan menavigasi ke halaman web rasmi broker dan mengetik pada 'pilihan daftar. Secara tepat, boleh dikatakan bahawa perjalanan perdagangan boleh dimulakan dalam beberapa saat. Apa yang penting ialah anda hanya perlu berhati-hati tentang siapa anda melabur dan broker yang anda berurusan.
Soalan Lazim (Soalan Lazim) tentang Pilihan Perduaan di Bolivia:
Adakah perdagangan binari di Bolivia menyediakan pedagang dengan cara cepat untuk menghasilkan wang?
Ya, pilihan perdagangan binari adalah salah satu cara yang paling mudah dan cepat untuk membuat wang. Peniaga mempunyai peluang yang luas untuk menang besar jika spekulasi mereka betul.
Apakah platform dalam talian yang anda boleh berdagang pilihan binari dari Bolivia?
Perdagangan binari boleh dimulakan melalui pelbagai jenis platform. Di Bolivia, pedagang boleh berdagang dengan mudah melalui broker yang kami cadangkan di sini dalam artikel ini, seperti Quotex, Pocket Option dan IQ Option. Selain daripada itu, broker juga boleh pergi untuk broker lain juga.
Adakah perdagangan binari berisiko di Bolivia?
Ya, pilihan perdagangan binari di Bolivia boleh menjadi sangat berisiko. Ia boleh berisiko untuk kedua-dua broker dan pedagang, kerana kedua-duanya sentiasa berada di bawah beberapa jenis risiko. Inilah sebabnya kami sentiasa mengesyorkan bahawa pedagang mengarang dasar perdagangan yang betul sebelum mereka memulakan dagangan.
Berapa banyak wang yang anda perlukan di Bolivia untuk berdagang pilihan binari?
Modal permulaan untuk perdagangan pilihan binari boleh terdiri daripada serendah $10 atau $50 dengan beberapa broker kepada pelaburan yang lebih besar, selalunya antara $250 hingga $1,000 atau lebih. Jumlah yang diperlukan berbeza-beza dan ditentukan terutamanya oleh broker binari khusus yang anda pilih.
Apakah kaedah pembayaran biasa untuk broker pilihan binari di Bolivia?
Kebanyakan broker di Bolivia menerima kad kredit utama seperti Visa, MasterCard dan Citibank, bersama-sama dengan mata wang kripto seperti Bitcoin, Monero, LTC dan ETH. Pemindahan wayar juga biasa diterima oleh broker pilihan binari.
Apakah risiko pilihan perdagangan binari di Bolivia?
Perdagangan binari di Bolivia membawa risiko seperti kerugian kewangan yang besar, ketagihan, dan potensi kecurian identiti.
Bolehkah anda berdagang pilihan binari secara percuma di Bolivia?
Sudah tentu, peniaga di Bolivia boleh menggunakan akaun demo yang membolehkan pengguna memperoleh pemahaman yang lebih baik tentang perdagangan pilihan binari dan terlibat dalam perdagangan tanpa risiko dengan wang maya.
(Amaran Risiko: Modal anda boleh berisiko.)


