Êtes-vous un investisseur en options binaires à la recherche du meilleur système logiciel de trading pour votre approche stratégique ? Êtes-vous intéressé à mener une étude pratique sur les options binaires, les logiciels d’options binaires et les sociétés de courtage ?
Les trouver n’est pas du tout facile. L’industrie des options binaires regorge d’escrocs, de fraudeurs et de services épouvantables. Et il n’existe pas beaucoup de logiciels excellents et réputés. Dans cet article, nous avons comparé et examiné les meilleur logiciel de trading d'options binaires pour vous.
Consultez notre liste des logiciels binaires les plus fiables ici :
Logiciel:
Disponibilité:
Avantages :
Compte:
Internet, Androïd, iOS
- Rendement le plus élevé
- Exécution la plus rapide
- Signaux
- Négociation 24h/24 et 7j/7
- Demo gratuite
- $ 10 min. dépôt
(Avertissement sur les risques : votre capital peut être à risque)
Internet, Androïd, iOS
- Bonus
- Négociation 24h/24 et 7j/7
- Commerce social
- Demo gratuite
- $ 50 min. dépôt
(Avertissement sur les risques : votre capital peut être à risque)
Web, Bureau, Android, iOS
- Convivial
- Téléchargements
- Assistance 24h/24 et 7j/7
- Rendement élevé
- Demo gratuite
- $ 10 min. dépôt
(Avertissement sur les risques : votre capital peut être à risque)
Faits les plus importants sur le logiciel d’options binaires :
- Un logiciel de trading binaire que vous pouvez utiliser sur votre ordinateur et votre appareil mobile.
- La plupart des logiciels de trading binaire prennent en charge le trading automatisé.
- L'utilisation d'un logiciel de trading binaire auprès d'un courtier est généralement gratuite.
- Il n'y a aucun frais pour les données de marché.
Qu'est-ce qu'un logiciel de trading d'options binaires ?

Pour l'expliquer clairement, Le logiciel de trading d'options binaires est ce qui vous permet de négocier dans le options binaires marché. Il est généralement fourni par l'intermédiaire d'une société de courtage qui vous permet d'entrer sur un marché directement depuis la bourse elle-même.
C’est la seule façon de négocier des options binaires, donc le choix d’une plateforme décente n’est pas négociable. Cependant, toutes les applications logicielles ne sont pas égales – la différence entre un excellent système et une terrible plateforme de trading d’options binaires est tout à fait perceptible.
De plus, comme l’industrie des options binaires est en proie à des fraudeurs, vous souhaiterez choisir un site autorisé et enregistré. Et si vous voulez réussir dans le trading d’options binaires, vous devez prendre en compte d’autres éléments tels que l’analyse, les ressources pédagogiques et la rapidité d’exécution.
Top 3 des logiciels de trading d'options binaires / courtiers d'options binaires pour les débutants
Nous avons étudié, analysé et recherché de nombreux courtiers différents dotés de logiciels binaires pour vous proposer cette sélection des meilleur logiciel de trading d'options binaires pour débutants. Ce sont tous de fantastiques courtiers d’options binaires réglementés, mais chacun couvre des domaines différents, alors voyons qui est parfait pour vous.
Voir le meilleur logiciel binaire ici – Vous pouvez également lire nos critiques détaillées :
- Quotex – Meilleur logiciel binaire pour les signaux de trading et disponibilité dans tous les pays
- Pocket Option – Meilleur logiciel binaire pour le trading social
- IQ Option – Meilleur logiciel binaire pour débutants (le plus convivial)
1. Quotex – Meilleur logiciel binaire pour les signaux de trading et disponibilité dans tous les pays

Quotex, une marque de Maxbit LLC, est le meilleur logiciel binaire pour les signaux. Il a été lancé en 2020 et a immédiatement gagné en popularité, non seulement parce qu'il est disponible dans tous les pays, mais également en raison de ses solutions conviviales et de son architecture qui rendent le trading binaire si efficace.
- Ils disposent de développeurs et d'analystes qualifiés qui travaillent 24 heures sur 24, 7 jours sur 7 pour garantir que les clients de l'entreprise ont accès aux solutions de la meilleure qualité.
- La société est réglementée par l'IFMRRC (Centre de régulation des relations avec les marchés financiers internationaux).
- La technologie de trading de Quotex est très avancée et facile à utiliser. L'interface utilisateur est basée sur le Web et conçue pour répondre à tous vos besoins.
(Avertissement sur les risques : votre capital peut être à risque)
Actifs investissables :
Quotex vous permet de négocier facilement plus de 100+ actifs de trading. Ils sont classés en différents groupes :
- Actions
- Marchés des matières premières, tels que l'or, l'argent et le gaz.
- Des indices tels que le FTSE 100, le Dow Jones, etc.
- Paires de devises telles que JPY/GBP, USD/CAD, etc.
- Crypto-monnaies, telles que BTC, ETH et Litecoin.
Chaque instrument peut être échangé sans effort.
Variétés de compte :
Sur Quotex, vous pouvez découvrir une grande variété de types de comptes de trading. Il existe 3 types de comptes disponibles : Régulier, Professionnel et Premium, ainsi qu'un compte d'essai.

- Compte de base
C’est le compte le plus simple et un point de départ fantastique pour les débutants. Un dépôt $10 suffit pour ce compte.
- Compte Pro
Ceci est destiné aux commerçants professionnels. Ce compte vous permet de gagner plus d'argent et de participer à des incitations ou à des concours supplémentaires. Vous devez déposer $1000 pour être admissible au compte professionnel.
- Compte Premium
Pour garder votre compte VIP Quotex actif, déposez $5000 sur votre compte de trading. Les bénéfices et les promotions augmenteront. Ce compte est destiné aux investisseurs expérimentés.
- Compte démo

Le compte démo Quotex est livré avec un maximum de $10 000 en argent virtuel, qui peut être rechargé à tout moment. Ce compte vous permet d'affiner vos stratégies de trading. Il a également pour fonction de permettre aux comptes de démonstration et aux comptes réels d'utiliser des fonctionnalités et une expérience similaires. Le compte démo gratuit vous offre tout ce dont vous avez besoin pour apprendre les options binaires.
Retraits et paiements

Vous devez investir $10 pour ouvrir un compte réel auprès du courtier Quotex.
Vous pourrez effectuer des paiements des manières suivantes :
- Visa
- MasterCard
- Bitcoins
- XRP
- Avances de trésorerie
- argent parfaite
- Neteller
- Virement
- Skrill
- Yandex
Ces méthodes sont fiables et sécurisées, garantissant la sécurité de votre investissement.
Les retraits suivent le même processus que les dépôts. Ils sont également rapides et fiables. Selon la méthode de retrait, cela peut prendre 1 à 5 jours pour que les fonds apparaissent sur votre compte bancaire.
Avantages :
- Disponible dans de nombreux pays
- Version Web, pour Android et iOS
- Dépôt minimum de $ 10
- Compte démo gratuit
- Signaux de trading
- Convivial
- Exécution rapide des transactions
- Échange minimum de $1
Désavantages:
- /
(Avertissement sur les risques : votre capital peut être à risque)
2. Pocket Option – Meilleur logiciel binaire pour le trading social

Le deuxième meilleur logiciel d'options binaires est Pocket Option. Il est connu pour son riche ensemble de fonctionnalités et ses capacités de trading social, ce qui vous permet de copier facilement d'autres traders et de réaliser des bénéfices.
La plateforme est en activité depuis 2017 sous le nom de Gembell Ltd, basée aux Îles Marshall. La société de courtage a gagné un grand nombre de clients depuis ses débuts.
- Pocket Option utilise la plateforme MetaTrader 5 (MT5), qui garantit la sécurité des données et des paiements. Ce courtier accepte des clients du monde entier et leur propose une excellente solution logicielle. La plateforme est actuellement utilisée par des utilisateurs de 95 pays différents.
- Le courtier est membre du Centre de régulation des relations avec les marchés financiers internationaux (IFMRRC). Pocket Option est populaire pour ses politiques anti-blanchiment d’argent.
- L'équipe de Pocket Option est composée de professionnels qui travaillent sans relâche pour que les standards du site soient excellents pour ses utilisateurs. Ils s'engagent à recueillir les commentaires des clients et à les intégrer dans les futurs produits.
De plus, le logiciel Pocket Option est constamment mis à jour pour répondre aux besoins des utilisateurs, ce qui en fait un excellent choix pour les traders.
(Avertissement sur les risques : votre capital peut être à risque)
Actifs investissables
Sur Pocket Option, vous pouvez échanger plus de 100 actifs. Ces actifs sont classés comme suit :
- Paires de devises (Forex) telles que EUR/USD, CAD/USD et JPY/GBP.
- Matières premières telles que l'or, l'argent, le pétrole, le gaz et les produits pétroliers
- Indices L'AUS 100 OTC, le 100 GBP OTC et le SP500 OTC sont tous inclus.
- Crypto-monnaies telles que Ether, BTC et Litecoin.
- Titres : actions telles que Facebook, eBay, Amazon et Apple.
Types de compte
Avant même de vous inscrire auprès d'un courtier, il est recommandé de lire de nombreuses informations factuelles et de prendre votre temps pour décider quel compte vous convient le mieux.
- Compte démo

Toutes les entreprises n'offrent pas la possibilité d'un compte de trading d'essai, et beaucoup ne vous permettront pas de l'utiliser à moins de vous inscrire. Souvent, ils s’attendent à ce que vous leur fournissiez vos informations de connexion ainsi que les paiements à partir d’un compte réel.
- Pocket Option adopte une approche plus détendue, vous permettant de négocier avec des fonds fictifs en un seul clic. Vous serez immédiatement redirigé vers la page où vous pourrez échanger $10 000 en monnaie fictivey.
- Le compte démo vous permet de comprendre pleinement la plateforme de trading et ses fonctionnalités sous-jacentes en quelques secondes. Les plateformes étant différentes, cela est utile pour les professionnels.
- C'est également un excellent moyen pour les débutants de voir si le trading est fait pour eux avant de mettre leur argent en jeu.
- Vrai compte
Si vous voulez trader pour de vrai, vous devriez faire un dépôt minimum de $50 pour obtenir la meilleure expérience de trading binaire.
Nous vous recommandons de commencer avec un compte démo, puis de passer à un compte standard. Pocket Option offre à ses clients une option d'investissement sans souci. Vous pouvez commencer à trader avec seulement US$1. Une fois inscrit, vous pouvez négocier un large éventail d'instruments, notamment les marchés de matières premières, les indices, les actions et le forex. Vous aurez accès à des incitations en cashback, au trading social, à des ressources pédagogiques, à des concours, à des indicateurs et à des alertes.
Retraits et paiements

L'investissement minimum sur Pocket Option est de $50, tandis que le retrait maximum n'est que de $10. La devise principale du logiciel est désormais le dollar américain, toutes les transactions sont donc effectuées en USD.
Les paiements sont rapides et faciles. Dans certains cas, cela peut prendre 1 à 2 jours ouvrables. Les retraits s'effectuent dans un délai de 24 heures et n'ont aucune limite de temps. Cependant, en cas de problèmes techniques, le rétablissement des fonds peut prendre 1 à 3 jours ouvrables.
Les meilleures alternatives de dépôt et de retrait faciles et globales de Pocket Option sont les suivantes :
- Cartes de crédit VISA, Maestro et Master Card.
- Crypto-monnaies comme Bitcoin, Litecoin et Ripple.
- Webmoney, Perfect Money et Skrill sont des exemples de portefeuilles électroniques.
- Transferts d'argent depuis les banques
Cependant, comme les transactions sont en USD, les dépôts et les retraits sont gratuits ; une entité étrangère (telle que des banques) peut facturer des frais de change.
Avantages :
- Entreprise réglementée
- Dépôt minimum bas de $ 50
- Logiciel MetaTrader 5
- Version Web, Android et iOS
- Commerce social disponible
- Pas de frais cachés
- Montant minimum d'échange $ 1
Désavantages:
- Non disponible dans tous les pays
(Avertissement sur les risques : votre capital peut être à risque)
3. IQ Option – Meilleur logiciel binaire pour débutants (le plus convivial)

Le troisième sur notre liste est le IQ Option, qui est le meilleur logiciel binaire pour les débutants. Fondée en 2013 et basée à Saint-Vincent-et-les Grenadines, c'est l'une des plus grandes sociétés de courtage d'options binaires disponibles aujourd'hui.
Leurs produits et leur site Web offrent tous les outils dont vous avez besoin pour sécuriser vos récompenses, ainsi qu'une gamme d'analyses et de suggestions.
Avant de vous lancer à tapis, testez vos compétences avec $10 000 en fonds virtuels avec un compte démo. Lorsque vous êtes prêt, passez au compte réel où vous pouvez gagner jusqu'à 95% sur chaque transaction réussie.
(Avertissement sur les risques : votre capital peut être à risque)
Actifs investissables

IQ Option propose une large gamme de produits commerciaux. Les utilisateurs peuvent négocier plus de 90 actifs différents, notamment des actions, des matières premières, des crypto-monnaies, des devises, des ETF, etc.
- Marchés boursiers
Sur IQ Option, vous pouvez acheter plus de 180 actions. Certaines des entreprises avec lesquelles vous pouvez échanger sont Tesla, FB, Google, Amazon et autres.
- Cryptos
Vous pouvez échanger du ZCash, Trx, Bitcoin, Ripple, Eth, Litecoin, Qtum, Ethereum et bien d'autres crypto-monnaies.
- Marchés des matières premières
Quatre matières premières principales sont disponibles avec IQ Option : Platine, Argent, Or et Pétrole.
- ETF
Plus de 4 000 ETF sont disponibles sur IQ Option, permettant aux traders de choisir parmi une large gamme d'ETF.
Types de compte

En plus d'un compte démo, IQ Option propose plusieurs comptes parmi lesquels choisir : un compte normal et un compte VIP.
- Compte démo
Les utilisateurs peuvent jouer avec $10 000 d'argent virtuel sur un compte d'essai IQ Option, qui peut être rechargé aussi souvent qu'ils le souhaitent. Avec un compte démo, vous pouvez mieux comprendre le site et ses fonctionnalités.
Si vous hésitez à investir avec de l'argent réel, vous pouvez toujours vous entraîner avec un compte démo pour améliorer vos compétences en trading. Une fois que vous avez acquis suffisamment d’expérience avec un compte démo, vous pouvez rapidement passer à un compte réel et commencer à trader en temps réel.
- Compte régulier
Un investissement de $10 est requis pour commencer à trader avec un compte régulier. Vous serez présenté à une gamme d’instruments de trading ainsi qu’à des indicateurs et analyses techniques. Vous pouvez également gagner de l'argent supplémentaire en participant aux compétitions hebdomadaires de IQ Option.
- Compte Premium
Pour utiliser le compte Premium, vous devez effectuer un dépôt important en quelques jours. Ce compte est uniquement disponible pour les clients non européens. Un compte Premium vous permet de gagner jusqu'à 3% de bonus. Si vous disposez d'un compte Premium, vous pourrez également recevoir des mises à jour fréquentes.
Dépôts et retraits

Ce logiciel de trading prend en charge un large éventail de méthodes de dépôt et de retrait, notamment les virements électroniques, les portefeuilles électroniques et les cartes de crédit et de débit.
Voir un aperçu ici :
- Virements bancaires
- Portefeuilles électroniques (Neteller, Paypal, Perfect Money, Skrill et autres portefeuilles électroniques)
- Cartes de crédit et de débit (y compris Visa, MasterCard et Maestro).
Les paiements par portefeuille électronique prennent moins de temps. Les transactions avec le portefeuille électronique peuvent être effectuées en une journée ou en quelques heures. Les paiements effectués par virement bancaire ou par carte de crédit et de débit des deux côtés prennent beaucoup plus de temps. Si vous effectuez un retrait par virement bancaire ou par carte de crédit, le processus peut prendre jusqu'à 10 jours.
Avantages :
- Le logiciel le plus convivial
- Dépôt minimum bas de $ 10
- Montant minimum d'échange $ 1
- Exécution rapide des transactions
- Assistance 24h/24 et 7j/7
- Télécharger pour n'importe quel appareil
Désavantages:
- Non disponible dans tous les pays
(Avertissement sur les risques : votre capital peut être à risque)
Considérations importantes lors du choix d'un bon logiciel d'options binaires
Maintenant que nous avons comparé les 3 meilleurs logiciels de trading binaire, examinons de plus près les considérations importantes que vous devez prendre en compte lors du choix d'une plateforme fiable.
Réglementation et licences – garantir la sécurité et la responsabilité
Avant tout, veuillez toujours faire attention aux réglementation et licence du logiciel ou son courtier associé. C'est impératif. Être réglementé par une autorité financière reconnue garantit non seulement la responsabilité, mais vous procure également une tranquillité d'esprit en réduisant les risques de fraude.
Interface utilisateur – naviguer dans votre parcours de trading

L'interface utilisateur est la fenêtre de votre activité de trading. Une bonne plateforme sera intuitive et offrira des visualisations claires, des graphiques faciles à lire et une exécution simple des ordres. N'oubliez pas que parfois les secondes comptent dans le trading et vous ne voulez pas tâtonner.
Diversité des actifs – explorer diverses opportunités de trading

Il est également impératif d'avoir un gamme diversifiée d'actifs a ta disposition. Une plateforme polyvalente vous permettra de vous lancer dans les devises, les matières premières, les actions et les indices. Cette diversité peut être particulièrement utile si vous souhaitez explorer différents marchés.
Différents types de transactions et délais d’expiration – garantissant la variété

Comme vous le savez, toutes les transactions d'options binaires ne sont pas identiques, alors recherchez les logiciels qui prennent en charge différents types de transactions et délais d'expiration. Au-delà des options classiques haut/bas, il est avantageux que le logiciel prenne en charge les types de transactions tels que les options à une touche, aux limites et en échelle. Parallèlement à cela, tenez compte des délais d’expiration proposés par le logiciel. Une gamme allant de transactions rapides de 60 secondes à des expirations quotidiennes ou même hebdomadaires vous donnera de la flexibilité dans vos stratégies.
Taux de distribution – en quête de transparence et de compétitivité

Veiller à ce que taux de versement pour que les transactions réussies soient transparentes et compétitives.
Le paiement maximum représente l'argent qu'un utilisateur recevra si son option binaire est rentable. Pour illustrer, si vous achetiez un binaire pour $10 avec un paiement de 80%, s'il était dans l'argent, vous récupéreriez votre $10 + 80% de $10, ou $8, pour un total de $18.

Notez qu’il existe d’énormes bonus – certains pouvant atteindre 900%. Cependant, la plupart sont extrêmement dangereux ou constituent un gadget pour attirer de nouveaux traders. En général, le moyen le plus simple de déterminer si les récompenses d’une plateforme sont raisonnables est de les comparer à celles de ses concurrents.
Trading mobile – Négociez des options binaires en déplacement
À l'ère numérique d'aujourd'hui, où tout va très vite, vous souhaiterez peut-être exécuter une transaction tout en sirotant un café dans un café ou en attendant un ami. C'est là que commerce mobile les capacités entrent en jeu. Une application mobile ou une plate-forme adaptée aux mobiles peut être inestimable.
Comptes démo – pratiquer sans risque

Si vous débutez dans le monde des options binaires ou souhaitez tester une stratégie, les plateformes proposant un compte démo sont dorés. Cela vous permet d'avoir une idée de la plateforme et de pratiquer le trading sans risquer de perdre de l'argent réel.
Support client – un pilier essentiel de votre expérience de trading

Que vous rencontriez des difficultés techniques ou ayez besoin d'éclaircissements sur une fonctionnalité, en temps opportun, un accompagnement de qualité peut faire toute la différence.
Ne sous-estimez jamais l’importance du service client. Même si nous aimerions tous penser que nous n’aurons jamais besoin de contacter le service client, la vérité est que nous le ferons. Une réponse rapide et utile peut empêcher qu’un problème mineur ne dégénère en problème majeur et peut grandement contribuer à apaiser vos émotions dans un scénario par ailleurs tendu.

Lors de l'évaluation du service client d'une plateforme, réfléchissez à la manière de les contacter, quand ils sont disponibles et s'ils fournissent ou non une assistance dans plusieurs dialectes. Si possible, contactez le support client avant de vous abonner à une plateforme particulière. Cela vous donnera une expérience directe de la manière dont l’entreprise traitera vos problèmes.
(Avertissement sur les risques : votre capital peut être à risque)
Sécurité – protéger votre argent et vos informations personnelles

En matière de sécurité, vos fonds et vos données doivent être sous la protection d'un cryptage haut de gamme et de normes strictes. Sécurité protocoles.
Outils d’analyse technique et trading social – s’équiper pour prendre des décisions éclairées

De nombreux commerçants ne jurent que par outils d'analyse technique. Si vous en faites partie, recherchez des plateformes qui fournissent indicateurs, des graphiques et des outils de dessin. En attendant, si vous croyez en la sagesse des foules, les plateformes dotées de fonctionnalités de trading social peuvent être attrayantes.
Transparence des frais et commissions – éviter les coûts cachés

On ne saurait trop insister sur l'importance de la transparence, surtout lorsqu'il s'agit de frais et commissions. Il est toujours sage d'être conscient de tous les coûts associés à la plateforme que vous avez choisie.
Dépôt initial faible – garantissant des coûts de négociation modestes

Pour tous les comptes de trading, les dépôts initiaux devraient rester modestes. C'est un cadeau mortel si vous tombez sur une entreprise qui demande des milliers de dollars.
Le fait qu’un courtage vous soit accessible ne signifie pas nécessairement que vous pourrez y recourir. Si vous pouvez vous inscrire et ouvrir un compte mais que vous ne disposez pas de fonds suffisants pour le financer, vous êtes de retour à la case départ.
(Avertissement sur les risques : votre capital peut être à risque)
Ressources pédagogiques – soutenir l’apprentissage et l’amélioration

Enfin, pour ceux qui ont envie d'apprendre et de se perfectionner, des plateformes qui proposent généreusement Ressources pédagogiques, que ce soit sous forme de webinaires, d’articles ou de tutoriels, sont une aubaine.
Les options binaires peuvent sembler simples à première vue, mais afin de protéger systématiquement vos bénéfices, vous devez disposer d'une base de connaissances assez étendue et d'une compréhension approfondie des conditions du marché. Pour ce faire, vous avez besoin de deux choses : des études et une éducation.
Le moins important des deux est le matériel pédagogique. Même si un site Web ne propose pas beaucoup de contenu éducatif, vous pouvez toujours découvrir des sources légitimes en ligne. Avoir tout à portée de main est un grand avantage. D’un autre côté, l’analyse, qui comprend l’analyse du marché des options binaires, les outils graphiques, les suggestions de trading, la recherche de tendances et les conseils d’experts, est un sujet très vaste.
Comment télécharger le logiciel de trading d'options binaires

Le logiciel binaire est disponible pour n’importe quel appareil. Pour télécharger le logiciel depuis votre courtier personnel, vous devez suivre certaines étapes.
Si vous souhaitez télécharger le logiciel pour les appareils Android, accédez simplement à la Jouer au magasin et recherchez votre courtier. De plus, vous pouvez vous rendre sur le site Web de votre courtier et voir les boutons de téléchargement. Une façon similaire de procéder est pour les appareils iOS.
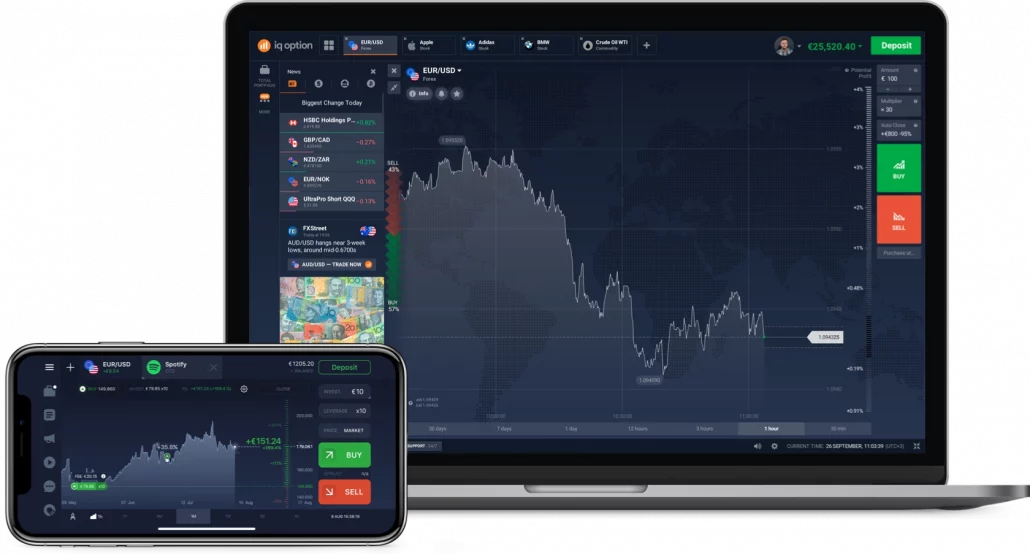
Certains courtiers comme IQ Option proposent des logiciels d'options binaires à télécharger sur votre ordinateur. Il fonctionne également sous Windows et MAC. Vous pouvez le télécharger depuis la page d'accueil officielle (voir la capture d'écran ci-dessus).
(Avertissement sur les risques : votre capital peut être à risque)
Logiciel de trading automatisé d'options binaires
Si vous êtes familier avec les options binaires, vous savez qu'il s'agit d'un type de trading financier dans lequel vous prédisez la direction de l'évolution du prix d'un actif dans un délai défini. Maintenant, imaginez avoir un logiciel effectuant cette prédiction et négociant en votre nom ; c'est là qu'un logiciel automatisé de trading d'options binaires entre en jeu.
Premièrement, si vous envisagez d'utiliser logiciel automatisé, il est crucial de reconnaître l'importance de la réglementation et des licences. Tout comme vous le feriez avec un logiciel de trading traditionnel, vous voudriez vous assurer que le logiciel ou le courtier auquel il est affilié est supervisé par une autorité financière reconnue. Ce n’est pas seulement une question de formalité ; il s'agit de garantir que vous êtes protégé contre la fraude potentielle et les activités sans scrupules.

Bien que l’attrait du trading automatisé soit fort, vous vous interrogez peut-être sur l’expérience utilisateur. Après tout, si le logiciel fait l’essentiel du travail, l’interface est-elle importante ? La réponse est un oui catégorique. Même les plateformes automatisées doivent avoir une interface conviviale et intuitive. Cela garantira que vous pourrez facilement surveiller ce que fait le logiciel et effectuer des ajustements si nécessaire.
Lors de la recherche de différentes options logicielles, portez une attention particulière à la gamme d'actifs qu'ils proposent pour le trading. Une gamme diversifiée vous offre plus d'options, des devises et matières premières aux actions et indices. Il est également avantageux que le logiciel prenne en charge différents types de transactions, allant au-delà des options binaires haut/bas classiques vers d'autres telles que les options à une touche ou en échelle.
Même s'il semble que le logiciel puisse tout faire, n'oubliez pas qu'il fonctionne en fonction des paramètres que vous définissez. C'est pourquoi les plateformes de trading en ligne proposant des outils d’analyse technique peuvent être extrêmement utiles. Les indicateurs, les graphiques et les outils de dessin peuvent vous aider à décider quels paramètres définir, même si vous n'effectuez pas les transactions manuellement.
En parlant de définition de paramètres, considérons les plateformes de trading binaires qui offrent un compte démo. Cela vous permet de tester des stratégies de trading et d'avoir une idée du logiciel sans mettre de l'argent réel en danger. Comme vous le savez, rien ne vaut une expérience pratique et un compte de trading démo offre exactement cela, sans risque. Sur un compte démo, vous pouvez suivre tous les paramètres importants de gestion des risques et améliorer votre style de trading.
Négoce automatisé peut changer la donne, mais il est important de conserver un élément de contrôle. Choisissez donc toujours une plateforme de trading d’options binaires qui fournit des informations claires sur les paiements potentiels et des frais transparents. Vous ne voulez pas de mauvaises surprises en fin de compte.

Drapeaux rouges dans les logiciels binaires
Nous vous recommandons de faire attention à certains signaux d'alarme dans les logiciels binaires.
Malheureusement, de nombreux courtiers font de fausses promesses ou recourent à des escroqueries pour vous amener à remettre votre argent. Vérifiez toujours la réputation de tout fournisseur de logiciels. Si vous remarquez qu'une entreprise a un nombre élevé de mauvaises critiques en ligne, c'est un signal d'alarme.
Nous vous recommandons également de choisir un prestataire proposant des cycles de retrait courts. Après tout, vous ne voulez pas attendre des semaines pour récupérer votre argent si vous avez réalisé un bénéfice. Si la le délai de rétractation est supérieur à trois jours, c'est aussi un signal d'alarme et un signe clair que vous devez choisir une autre alternative.
L'équipe d'assistance du fournisseur de logiciels doit toujours être disponible pour répondre à vos questions. Si vous constatez que l'équipe d'assistance prend un temps inutilement long pour répondre ou ne répond pas adéquatement à vos questions, vous souhaiterez peut-être rester à l'écart de ces entreprises. Cependant, les fournisseurs répertoriés ici ont tous été soigneusement testés par nos soins, vous ne pouvez donc pas vous tromper avec eux.
Conclusion : Quotex est le meilleur logiciel d'options binaires, mais il existe aussi d'excellentes alternatives
Enfin, nous sommes arrivés à la conclusion, et peut-être maintenant, vous comprenez mieux à quel point l’utilisation de logiciels de trading est désormais essentielle dans le secteur en évolution rapide des options binaires. C’est l’une des rares fois où vous pouvez réellement obtenir un avantage, alors saisissez-le.
Dans notre comparaison, Quotex est de loin le meilleur logiciel de trading pour les options binaires. Mais vous pouvez également utiliser des alternatives. Par exemple, Pocket Option et Deriv offrent des interfaces et des logiciels très conviviaux.
En conclusion, vous devez décider quel logiciel vous convient le mieux. Alors ouvrez un compte démo gratuit d’options binaires et commencez à télécharger le logiciel :
- Quotex – Meilleur logiciel binaire pour les signaux et la disponibilité dans tous les pays
- Pocket Option – Meilleur logiciel binaire pour le trading social
- IQ Option – Meilleur logiciel binaire pour débutants (le plus convivial)
(Avertissement sur les risques : votre capital peut être à risque)
Quelques questions fréquemment posées (FAQ) sur les logiciels de trading d'options binaires :
Un logiciel de trading d'options binaires est-il gratuit ?
Oui, les logiciels de trading d’options binaires sont généralement fournis gratuitement par le courtier. Vous pouvez le télécharger et l'utiliser à tout moment. D’après nos recherches, il n’y a pas de coûts supplémentaires. Le courtier gagne de l'argent grâce aux commissions de négociation et fournit le logiciel gratuitement à ses traders.
Sur quels appareils puis-je utiliser un logiciel de trading d'options binaires ?
Un logiciel de trading d'options binaires est disponible pour chaque appareil. Téléchargez-le pour votre ordinateur (PC), vos appareils Android ou iOS.
Les logiciels d’options binaires sont-ils sûrs et sécurisés ?
Oui, les logiciels de trading d'options binaires sont sûrs si vous utilisez un courtier réglementé. Nous ne recommandons pas d'utiliser un courtier non enregistré pour négocier des options binaires. Faites attention à l'endroit où vous vous inscrivez. Le bilan de l’entreprise est également important. Si vous faites appel à un courtier bien réglementé et bien connu, il est très sûr d'utiliser un logiciel d'options binaires.
Quel est le meilleur logiciel de trading d’options binaires ?
Après nos tests approfondis, les logiciels de trading d'options binaires de Quotex, Pocket Option et IQ Option se sont révélés être les meilleurs. Nous recommandons le Quotex pour son excellente expérience utilisateur.


