
Il Cile è situato tra Perù a nord e Argentina a est ea sud. In Cile, il trading binario è ben noto in tutto il paese e ha una solida base nel settore del commercio internazionale. La nazione espande il suo commercio con altre nazioni, in particolare quelle in Asia ed Europa, senza incidenti. Il mercato commerciale in quest'area sta osservando una spina dorsale finanziaria stabile grazie al suo collegamento con la regione sudamericana.
Molte multinazionali esprimono fervente coinvolgimento nelle loro industrie. L'ammissione di trader della razza più giovane ha portato a un'espansione del trading binario in Cile. La nazione sta attualmente mostrando una notevole redditività in trading di opzioni binarie. A causa del suo enorme fascino e degli alti tassi di successo, gli investitori in opzioni binarie sono alla ricerca di broker affidabili.
Il trading di opzioni binarie in Cile è possibile con un'ampia varietà di broker affidabili, autorizzati e riconosciuti. Inoltre, grazie a elementi sofisticati e redditizi, l'esecuzione delle negoziazioni e l'intera procedura sono state molto più semplici e allettanti. Il più votato e il più raffinato opzioni binarie le imprese devono essere note ai commercianti. Pertanto, abbiamo raccolto tutti i dettagli necessari di seguito sul trading di opzioni binarie in Cile.
(Avviso di rischio: il tuo capitale può essere a rischio.)
Una guida passo passo per fare trading di opzioni binarie in Cile
Cosa leggerai in questo Post
Gli investitori e i trader in Cile devono seguire la semplice procedura che è stata menzionata di seguito per fare trading di opzioni binarie.
#1 Scegli un broker di opzioni binarie disponibile in Cile
Oltre 100 mercati
- min. deposito $10
- $10,000 demo
- Piattaforma professionale
- Alto profitto fino a 95%
- Prelievi veloci
- Segnali
Oltre 100 mercati
- Accetta clienti internazionali
- Alte vincite 95%+
- Piattaforma professionale
- Depositi veloci
- Trading sociale
- Bonus gratuiti
Oltre 100 mercati
- Piattaforma professionale
- Conto demo gratuito
- Deposito minimo $10
- Webinar e formazione
- Pagamenti elevati
Oltre 100 mercati
- min. deposito $10
- $10,000 demo
- Piattaforma professionale
- Alto profitto fino a 95%
- Prelievi veloci
- Segnali
a partire dal $10
(Avviso di rischio: il trading è rischioso)
Oltre 100 mercati
- Accetta clienti internazionali
- Alte vincite 95%+
- Piattaforma professionale
- Depositi veloci
- Trading sociale
- Bonus gratuiti
a partire dal $50
(Avviso di rischio: il trading è rischioso)
Oltre 100 mercati
- Piattaforma professionale
- Conto demo gratuito
- Deposito minimo $10
- Webinar e formazione
- Pagamenti elevati
a partire dal $10
(Avviso di rischio: il trading è rischioso)
Scegliendo un broker di opzioni binarie è uno dei passaggi più significativi da compiere prima di iniziare a fare trading di opzioni binarie. Questo passaggio, considerato giusto o sbagliato, decide anche il risultato del tuo trading.
Ciò che rende importante questo passaggio è il fatto che ci sono molti falsi broker presenti nel mercato del trading binario. Questo è il motivo per cui la scelta del broker di trading corretto è fondamentale.
Ci sono state abbastanza storie che affermano che investitori e trader hanno perso denaro a causa di frodi compiute da broker di trading binario. Per salvarti da questo tipo di frode, devi sapere chi scegliere come broker.
Ci sono molte opzioni disponibili in termini di broker di trading di opzioni binarie in ogni paese. Quindi, fallo in Cile. Per scegliere il broker corretto e adatto a te stesso, dovresti verificare se il broker disponibile ti aiuta a soddisfare i tuoi desideri nel trading binario. Una volta ottenuto il broker di trading binario desiderato, puoi iniziare a fare trading sulla piattaforma.
Abbiamo elencato alcuni dei popolari e migliori broker di trading binario disponibili in Cile come riferimento.
1. Quotex

Quotex è una piattaforma popolare utilizzata da molti investitori e trader per il trading di opzioni binarie, anche in Cile. È un'interfaccia comoda e intuitiva che offre un processo ad alta velocità ai suoi utenti.
Gli utenti possono iniziare a fare trading dopo essersi registrati sulla piattaforma di trading. Alcuni dei vantaggi offerti ai suoi trader dal Quotex sono stati elencati di seguito. Puoi fare riferimento a loro per saperne di più sui vantaggi dell'utilizzo di questa piattaforma.
- Quotex offre rendimenti elevati, fino a 95%.
- Fornisce un'esecuzione rapida degli scambi.
- Offre ai suoi trader una vasta gamma di asset su cui fare trading.
- Ha la possibilità di depositi istantanei.
- Su questa piattaforma di trading è disponibile anche un bonus gratuito.
- Fornisce il limite minimo di deposito, solo $10.
- Poiché è un'interfaccia user-friendly, è comodo da usare.
- Fornisce depositi e prelievi veloci e sicuri.
- La piattaforma è disponibile in molte lingue a seconda dei paesi.
Info: (Avviso di rischio: il tuo capitale può essere a rischio.)
2. Pocket Option

Pocket Option è un'altra opzione come broker di trading di opzioni binarie disponibile anche in Cile. Le sue semplici procedure lo rendono comodo e facile da usare per i suoi trader. Inoltre, offre ai suoi investitori centinaia di asset su cui fare trading.
Anche questa piattaforma, come altre piattaforme, si basa sulla previsione del movimento del prezzo di un asset. Lo stesso concetto è seguito da Opzione tascabile inoltre, come piattaforma di trading.
Alcuni dei vantaggi offerti dall'Pocket Option sono indicati di seguito per riferimento.
- Ottieni un bonus di 50% sui tuoi primi depositi.
- Il processo di deposito e prelievo è veloce rispetto a molte altre piattaforme di trading binario.
- Ai suoi utenti viene inoltre fornita una funzione di account demo.
- Il limite minimo di negoziazione è impostato come $1.
- Anche i trader statunitensi sono accettati su questa piattaforma per fare trading.
- Ci sono circa 100+ asset disponibili su cui fare trading.
- Il social trading e i risultati sono alcune altre funzionalità fornite da Pocket Option.
- Rientra nella categoria delle piattaforme ben regolamentate.
- Una piattaforma affidabile.
Info: (Avviso di rischio: il tuo capitale può essere a rischio.)
3. Olymp Trade
Olymp Trade ha un display interattivo che consente ai trader di configurare come dovrebbe apparire l'interfaccia. Offre un importo di scambio di $1e gli operatori non possono depositare importi inferiori a $10 nel proprio conto di trading. Olymp Trade è stato avviato nel 2014, fornendo a varietà di beni ai trader per effettuare operazioni.
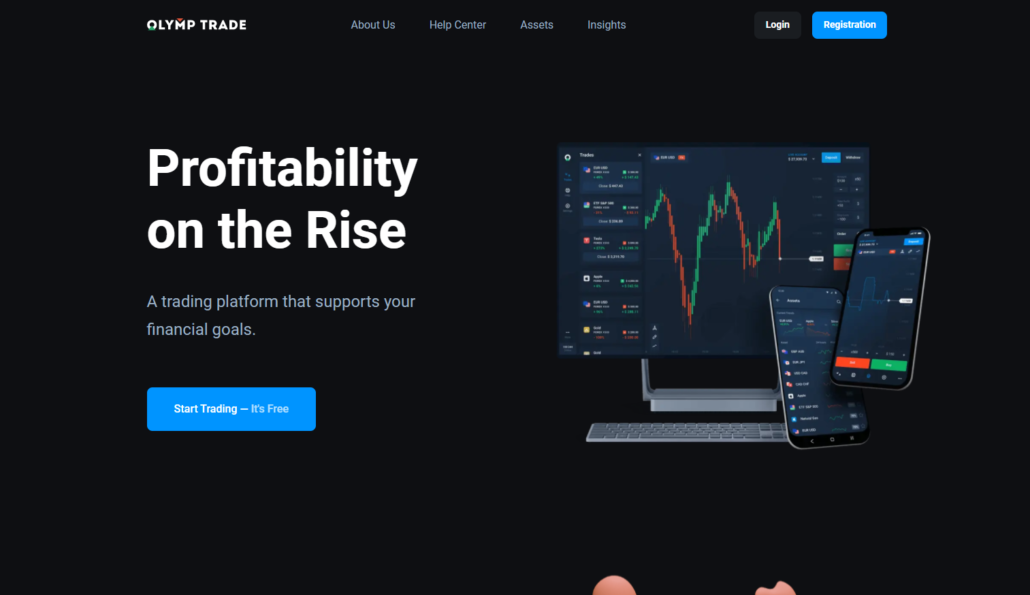
Offre agli operatori un Conto demo Olymp Trade che possono utilizzare per esercitarsi su come funziona il trading di opzioni binarie. Se stai cercando un broker sicuro, Il commercio Olymp è sicuro. Il broker è amichevole e si preoccupa del sviluppo dei propri clienti. All'interno del broker, ci sono materiali di lezione a cui i trader possono accedere.
Caratteristiche:
- Deposito minimo Olymp Trade di $10
- OTC, azioni, CFD e metalli sono strumenti di trading su Olymp Trade.
- ragnatela e piattaforma mobile
- UN affidabile Servizio Clienti
- Leva di 1:500
- Bonus variabile
(Avviso di rischio: il tuo capitale può essere a rischio)
#2 Registrati per un conto di trading

Puoi iniziare a configurare il conto di trading per il trading di opzioni binarie dopo aver scelto un broker di trading di tua scelta. È necessario seguire i passaggi indicati di seguito per impostare un conto di trading per il trading binario.
#1 Apri la piattaforma sul tuo dispositivo, sia esso un telefono o un personal computer.
#2 Fare clic sul pulsante denominato Registrati.
#3 Inizia a compilare le informazioni richieste dopo aver fatto clic per registrarti.
#4 Fare clic su Invia dopo aver inserito le informazioni richieste.
Avrai la possibilità di un conto demo o di un conto live. Puoi scegliere uno qualsiasi di quelli secondo il tuo desiderio e iniziare a fare trading con le opzioni binarie di tua scelta.
(Avviso di rischio: il tuo capitale può essere a rischio.)
#3 Usa un conto demo

Una volta che hai inviato il processo di registrazione nel trading binario, sulla scelta della tua piattaforma, hai la possibilità di aprire un conto demo. Puoi aprire quell'account demo invece di un account live.
La maggior parte delle piattaforme di trading nel trading di opzioni binarie fornisce un conto demo nel caso in cui il trader desideri utilizzarlo per primo. Il vantaggio del conto di trading che fa una differenza significativa è l'uso di denaro virtuale invece di denaro reale.
Non devi preoccuparti della perdita dei tuoi soldi se non hai alcuna esperienza nel trading di opzioni binarie prima. Anche un principiante può ora aprire un conto di trading sotto forma di conto demo.
L'apertura e l'utilizzo di un conto demo offre l'opportunità di apprendere il concetto di trading in opzioni binarie prima di passare a un conto reale. Questo rende il trading meno rischioso.
Quelli di voi che hanno già esperienza nel trading di opzioni binarie possono aprire direttamente un conto live e iniziare a fare trading con denaro reale.
#4 Scegli un asset da scambiare

La raccolta di un asset, chiamato anche asset sottostante, è una parte significativa delle procedure di trading nel trading di opzioni binarie. C'è una vasta gamma di attività offerte da quasi tutte le piattaforme di trading binario su cui fare trading. Puoi scegliere uno qualsiasi di questi asset per il trading.
Il fatto che rende un asset una parte importante è che la vincita o la perdita nel trading binario dipende dal movimento del prezzo di un asset sottostante. Devi prevedere il movimento del prezzo di un asset sottostante. Se la tua previsione va bene, sei in the money. E, nel caso in cui la tua previsione vada male, sei senza soldi.
Il gioco del trading di opzioni binarie è tutto vincere o perdere. O la tua previsione è corretta o non corretta. La decisione se sei ancora in the money o meno. Tuttavia, ci sono molti altri fattori che determinano una vincita o una perdita di denaro anche nel trading binario.
#5 Eseguire un'analisi

Fare un'analisi è un altro passo di grande importanza nel trading di opzioni binarie, anche in Cile. L'analisi, prima di andare avanti nel trading, ti aiuta a fare trading meglio e aiuta anche a mitigare il rischio.
Tutti vogliono ridurre al minimo il rischio e aumentare la dimensione del profitto. Quindi, per guadagnare più soldi e avere meno rischi mentre guadagni quei soldi, devi analizzare il mercato e i fattori coinvolti che ti aiutano ad analizzare meglio il mercato delle opzioni binarie.
Alcuni suggerimenti e trucchi possono portarti molto lontano nel trading binario. Puoi usarne alcuni menzionati di seguito per ottenere il profitto desiderabile.
- Segui lo slancio mentre ti mostrano quanto sono forti le tendenze del mercato e dove vanno.
- Analizza il volume, in quanto mostrano quante unità sono in grassetto e vendute, su fattori particolari. Anche questo indicatore aiuta, ma tuttavia non è necessario su tutte le piattaforme di trading binario.
- Volatilità, in quanto mostra quanto il denaro si sta muovendo su e giù nel mercato.
- Tendenze, in quanto devono essere seguite per vedere come si muove il mercato.
(Avviso di rischio: il tuo capitale può essere a rischio.)
#6 Piazza lo scambio

Dopo aver terminato l'analisi dell'asset sottostante nel mercato del trading binario, è possibile piazzare l'operazione. Per effettuare l'operazione, devi prima selezionare il tempo di scadenza e il prezzo di esercizio considerando l'asset sottostante selezionato. Dopo aver selezionato, puoi andare avanti per piazzare finalmente lo scambio.
#7 Attendere il risultato

Per ottenere il risultato dell'operazione appena effettuata, dovrai attendere la scadenza. Puoi ottenere risultati più velocemente chiudendo l'operazione prima della scadenza. Tutto dipende da come si desidera che il commercio venga chiuso.
Il risultato si basa sulla tua previsione relativa al movimento del prezzo dell'asset sottostante su cui hai scelto di fare trading. Se la tua previsione sul movimento del prezzo è corretta, sei in the money. E, se la tua previsione sul movimento del prezzo è sbagliata, sei senza soldi. Ciò rende anche l'analisi del mercato un passo importante per prevedere meglio il movimento dei prezzi.
Come in altri paesi, anche in Cile la disponibilità delle migliori piattaforme di trading rende la procedura di trading binario molto più semplice e agevole. Per ulteriori informazioni sulle opzioni binarie, è necessario fare riferimento alle informazioni fornite di seguito.
Che cos'è un'opzione binaria?

Un'opzione binaria è un tipo di strumento che dipende interamente dalla proposta di un sì o di un no. È correlato al fatto che la previsione del movimento del prezzo sia corretta o meno.
Nel trading di opzioni binarie, il profitto o la perdita dipendono da una previsione del prezzo di un asset sottostante. A differenza di molti altri strumenti, dove devi comprare o vendere per fare trading.
Come per questo trading, se la tua previsione sul movimento del prezzo di un asset sottostante è corretta, guadagni denaro. E, se la previsione va male, non guadagni soldi.
Una volta che hai piazzato l'operazione nel trading binario, non puoi esercitare ulteriormente le opzioni. Vengono esercitati automaticamente e non è necessario che il titolare eserciti lo stesso. Nel trading binario o vinci tutto o niente.
Il trading binario è legale in Cile?
Alla domanda se Il trading di opzioni binarie è legale in Cile o no, la risposta è sì. Sì, è assolutamente legale negoziare opzioni binarie in Cile.
È conveniente scambiare opzioni binarie perché è legale. Il trading di opzioni binarie, infatti, è uno dei mercati di trading fiorenti in questi paesi. Nessuna restrizione è stata imposta al commercio in quanto tale.
Quindi, i trader in Cile possono continuare a fare trading di opzioni binarie senza esitazione. Tuttavia, i trader devono prestare attenzione a qualsiasi modifica o aggiornamento delle norme e dei regolamenti sul trading di opzioni binarie in Cile.
(Avviso di rischio: il tuo capitale può essere a rischio.)
Regolamento finanziario in Cile
Il Commissione per i mercati finanziari fa la maggior parte dei regolamenti finanziari fatti nel paese. La legge ha istituito l'organismo nel 2017 per eseguire obblighi regolamentari sui titoli finanziari in Cile. Il FMC ha il compito di assicurarsi che le organizzazioni finanziarie in Cile seguano le regole da esso stabilite. Il Cile è costituito da organizzazioni finanziarie ben organizzate, dalle banche commerciali alle banche ipotecarie. Il FMC supervisiona tutte le organizzazioni.

A parte la FMC, il Cile ha il Banca Centrale del Cile. La Banca centrale è la banca globale del paese. Ha anche i suoi doveri stabiliti dalla legge del paese. CBC è l'organizzazione che emette contanti nel paese. Ha anche la funzione di supervisione di qualsiasi società finanziaria che opera nel paese.

Responsabile di titoli e cambio in Cile è ancora il FMC. A parte FMC e CBC, c'è il ufficio del ministro delle finanze. L'ufficiale deve promuovere e valutare qualsiasi organizzazione finanziaria in Cile. Tutte le organizzazioni lavorano insieme per fare in modo che il Cile abbia un'economia finanziariamente stabile.
(Avviso di rischio: il tuo capitale può essere a rischio)
Metodo di pagamento per i commercianti in Cile
Hai diverse opzioni di pagamento quando si tratta di effettuare pagamenti nel trading di opzioni binarie. Alcuni di questi metodi sono menzionati di seguito come riferimento.
Bonifici bancari
Il bonifico bancario è l'unico metodo popolare per effettuare pagamenti nel trading di opzioni binarie. Per utilizzare questo metodo, devi prima inserire i dettagli relativi alla banca sulla piattaforma di trading scelta. Dopo aver inserito le informazioni richieste, è necessario convalidare il pagamento da effettuare.
In questo metodo, i pagamenti richiesti vengono accreditati sulla piattaforma di trading. Potrebbero essere addebitati o meno costi per l'utilizzo di questo metodo da parte del broker. Tuttavia, potrebbero esserci delle spese bancarie addebitate dalla banca durante l'utilizzo dei bonifici bancari.
Portafogli elettronici
Un altro metodo tra i più facili da usare sono i portafogli elettronici. Questo metodo è ancora più comodo da usare rispetto a molti altri metodi di pagamento.
Se parliamo delle opzioni del portafoglio elettronico, ci sono così tante opzioni disponibili in Cile che sono considerate rapide e facili da usare durante il loro utilizzo.
Altri metodi di pagamento
- Pagamento tramite bancomat/carte di credito.
- Pagamento sotto forma di criptovalute.
Come effettuare depositi e prelievi?
Per depositare e prelevare l'importo in qualsiasi piattaforma di trading binario, è disponibile un'opzione per entrambi. Devi solo fare clic sull'opzione secondo il tuo requisito di deposito o prelievo.
Pro e contro del trading di opzioni binarie in Cile
Alcuni dei pro e dei contro del trading di opzioni binarie sono menzionati di seguito come riferimento.
I vantaggi del trading binario sono:
- Un piccolo budget può anche essere scambiato nel trading di opzioni binarie.
- C'è un'enorme possibilità di grandi ritorni.
- Semplice e comodo da usare.
- Sono presenti molte opzioni di strumenti digitali su cui fare trading.
I contro del trading binario sono:
- Maggiori restrizioni sulle grandi dimensioni del commercio.
- Troppo semplice per capire che la procedura di trading può essere sottovalutata nell'avidità di guadagnare di più.
- Non c'è abbastanza struttura di test demo.
- Regole e regolamenti scadenti delle piattaforme di trading binario.
Rischi del trading di opzioni binarie in Cile
Alcuni dei più comuni rischi che sono coinvolti nel trading di opzioni binarie sono menzionati di seguito. Puoi fare riferimento a quelli e agire di conseguenza.
- Esiste la possibilità di frode in quanto non ci sono molte piattaforme di trading autentiche disponibili per il trading di opzioni binarie.
- C'è la possibilità che i trader diventino dipendenti dall'impulso di guadagnare sempre più soldi. Inoltre, a volte porta alla perdita di denaro.
Conclusione: il trading di opzioni binarie è disponibile in Cile
Il trading di opzioni binarie è un modo fiorente per realizzare maggiori profitti, anche dopo essere stato un modo rischioso per guadagnare denaro. Devi solo prenderti cura di alcune cose in modo da mitigare il rischio.
Dovresti essere in grado di scegliere una piattaforma autentica che sia la più adatta ai risultati desiderati. Inoltre, analizzare i rischi e altri fattori è un ottimo modo per andare avanti con il trading binario. Quindi, continua a guadagnare di più.
Domande frequenti (FAQ) sulle opzioni binarie in Cile:
È legale negoziare opzioni binarie in Cile?
Sì, è assolutamente legale negoziare opzioni binarie in Cile.
Il commercio è considerato illegale nei paesi musulmani, compreso il Cile?
No, il trading di opzioni binarie non è considerato illegale nella maggior parte dei paesi musulmani, incluso il Cile.
Disponi di autentiche piattaforme di trading disponibili per il trading di opzioni binarie in Cile?
Sì, hai molte piattaforme di trading autentiche disponibili anche in Cile. Quelli sopra menzionati sono anche veri broker e quindi possono essere utilizzati per il trading binario.
(Avviso di rischio: il tuo capitale può essere a rischio.)


