Lihat 10 broker Opsi Biner terbaik dan keuntungannya tercantum di bawah ini:
- Pocket Option – Pialang terbaik secara keseluruhan untuk pedagang biner
- Quotex – Sinyal perdagangan gratis dan pembayaran tinggi
- IQ Option – Antarmuka ramah pengguna terbaik
- Turunan – Terbaik untuk perdagangan otomatis
- Perdagangan Olymp – Terbaik untuk pedagang India
- Opsi Pakar – Fitur perdagangan sosial yang luar biasa
- Sentra Biner – Broker biner teratas untuk copy trading
- Opsi Balap – Broker biner terbaik untuk bonus
- Binarium – Broker biner terbaik yang tidak diatur
- Exnova – Broker biner terbaik untuk trader kompetitif
100+ Pasar
- Menerima klien internasional
- Pembayaran tinggi 95%+
- Platform profesional
- Setoran cepat
- Perdagangan Sosial
- Bonus gratis
100+ Pasar
- min. setor $10
- $10.000 demo
- Platform profesional
- Keuntungan tinggi hingga 95%
- Penarikan cepat
- sinyal
300+ Pasar
- Setoran minimum $10
- Akun demo gratis
- Pengembalian tinggi hingga 100% (jika prediksi benar)
- Platformnya mudah digunakan
- dukungan 24/7
200+ Pasar
- Mendukung perdagangan otomatis
- Perdagangan yang diatur
- Beberapa platform
- Produk keuangan yang berbeda
- MetaTrader 5
- Hasil tinggi 90%+
100+ Pasar
- Platform profesional
- Akun demo gratis
- Setoran minimum $10
- Webinar dan pendidikan
- Pembayaran tinggi
100+ Pasar
- Teratur & aman
- Perdagangan kripto
- Pengembalian tinggi
- Eksekusi cepat
- Perdagangan sosial
- Setoran minimum rendah $ 50
100 Pasar
- Menerima klien internasional
- dukungan 24/7
- Biner & CFD
- Pengembalian tinggi
- bonus gratis
- Grafik TradingView
50+ Pasar
- Bonus tinggi
- Perdagangan sosial
- Menerima klien internasional
- Hadiah GRATIS
50+ Pasar
- Setoran minimum $5
- Akun demo gratis
- Bonus 100% mungkin
- Tidak ada biaya tambahan
250+ Pasar
- 250+ aset
- Akun demo gratis
- Setoran minimum $10
- Spread dan biaya mentah
- Bagian pendidikan
- Kondisi perdagangan yang sangat baik
100+ Pasar
- Menerima klien internasional
- Pembayaran tinggi 95%+
- Platform profesional
- Setoran cepat
- Perdagangan Sosial
- Bonus gratis
dari $50
(Peringatan risiko: Perdagangan berisiko)
100+ Pasar
- min. setor $10
- $10.000 demo
- Platform profesional
- Keuntungan tinggi hingga 95%
- Penarikan cepat
- sinyal
dari $10
(Peringatan risiko: Perdagangan berisiko)
300+ Pasar
- Setoran minimum $10
- Akun demo gratis
- Pengembalian tinggi hingga 100% (jika prediksi benar)
- Platformnya mudah digunakan
- dukungan 24/7
dari $10
(Peringatan risiko: Modal Anda mungkin berisiko)
200+ Pasar
- Mendukung perdagangan otomatis
- Perdagangan yang diatur
- Beberapa platform
- Produk keuangan yang berbeda
- MetaTrader 5
- Hasil tinggi 90%+
dari $10
(Modal Anda berisiko)
100+ Pasar
- Platform profesional
- Akun demo gratis
- Setoran minimum $10
- Webinar dan pendidikan
- Pembayaran tinggi
dari $10
(Peringatan risiko: Perdagangan berisiko)
100+ Pasar
- Teratur & aman
- Perdagangan kripto
- Pengembalian tinggi
- Eksekusi cepat
- Perdagangan sosial
- Setoran minimum rendah $ 50
dari $10
(Peringatan risiko: Perdagangan berisiko)
100 Pasar
- Menerima klien internasional
- dukungan 24/7
- Biner & CFD
- Pengembalian tinggi
- bonus gratis
- Grafik TradingView
dari $250
(Modal Anda bisa berisiko)
50+ Pasar
- Bonus tinggi
- Perdagangan sosial
- Menerima klien internasional
- Hadiah GRATIS
dari $250
(Peringatan risiko: Perdagangan berisiko)
50+ Pasar
- Setoran minimum $5
- Akun demo gratis
- Bonus 100% mungkin
- Tidak ada biaya tambahan
dari $5
(Peringatan risiko: Perdagangan berisiko)
250+ Pasar
- 250+ aset
- Akun demo gratis
- Setoran minimum $10
- Spread dan biaya mentah
- Bagian pendidikan
- Kondisi perdagangan yang sangat baik
dari $10
(Peringatan risiko: Modal Anda bisa berisiko)
Saat ini, banyak broker opsi biner online yang dianggap scam dan sulit menemukan platform yang tepat dan aman. Ada banyak broker opsi biner teregulasi yang dapat dipilih, namun banyak broker biner berhenti bekerja karena peraturan dan undang-undang baru.
Dalam perbandingan ini, kami akan memberi Anda a gambaran komprehensif tentang platform mana yang masih tersedia, cara memilih broker opsi biner terbaik, dan broker mana yang akan memberi Anda pengalaman dan ketentuan perdagangan paling nyaman.
Binaryoptions.com menggunakan standar tertinggi untuk menguji broker dan platform perdagangan. Ini milik kita meninjau metodologi dan bagaimana kami menguji.
Lihat video perbandingan lengkap ulasan broker Opsi Biner kami:

Dengan memuat video, Anda menyetujui kebijakan privasi YouTube.
Belajarlah lagi
10 broker & platform perdagangan Opsi Biner teratas dibandingkan
Memilih broker biner yang dapat dipercaya adalah salah satu langkah pertama yang harus Anda ambil untuk meminimalkan kerugian Anda dan memastikan keamanan dana Anda. Setiap broker memiliki setoran minimum yang berbeda, menawarkan pengembalian yang berbeda, dan memiliki serangkaian aset unik yang dapat Anda perdagangkan.

Seperti perdagangan instrumen keuangan lainnya, perdagangan Binary Options mengharuskan Anda untuk mendaftar dengan broker. Meskipun tidak ada kekurangan broker, menemukan satu yang menawarkan fitur yang Anda inginkan dan membebankan biaya yang Anda rasa nyaman dapat menjadi tantangan.
Menemukan broker yang menawarkan semua fitur yang Anda butuhkan tidaklah sulit dengan menggunakan perbandingan kami. Dalam daftar di bawah ini, kami membandingkan setiap broker Opsi Biner secara detail. Untuk membantu Anda menemukan broker yang tepat untuk kebutuhan perdagangan opsi biner Anda, kami telah meninjau sepuluh broker teratas di industri ini.
1. Pocket Option – Broker terbaik secara keseluruhan untuk trader biner
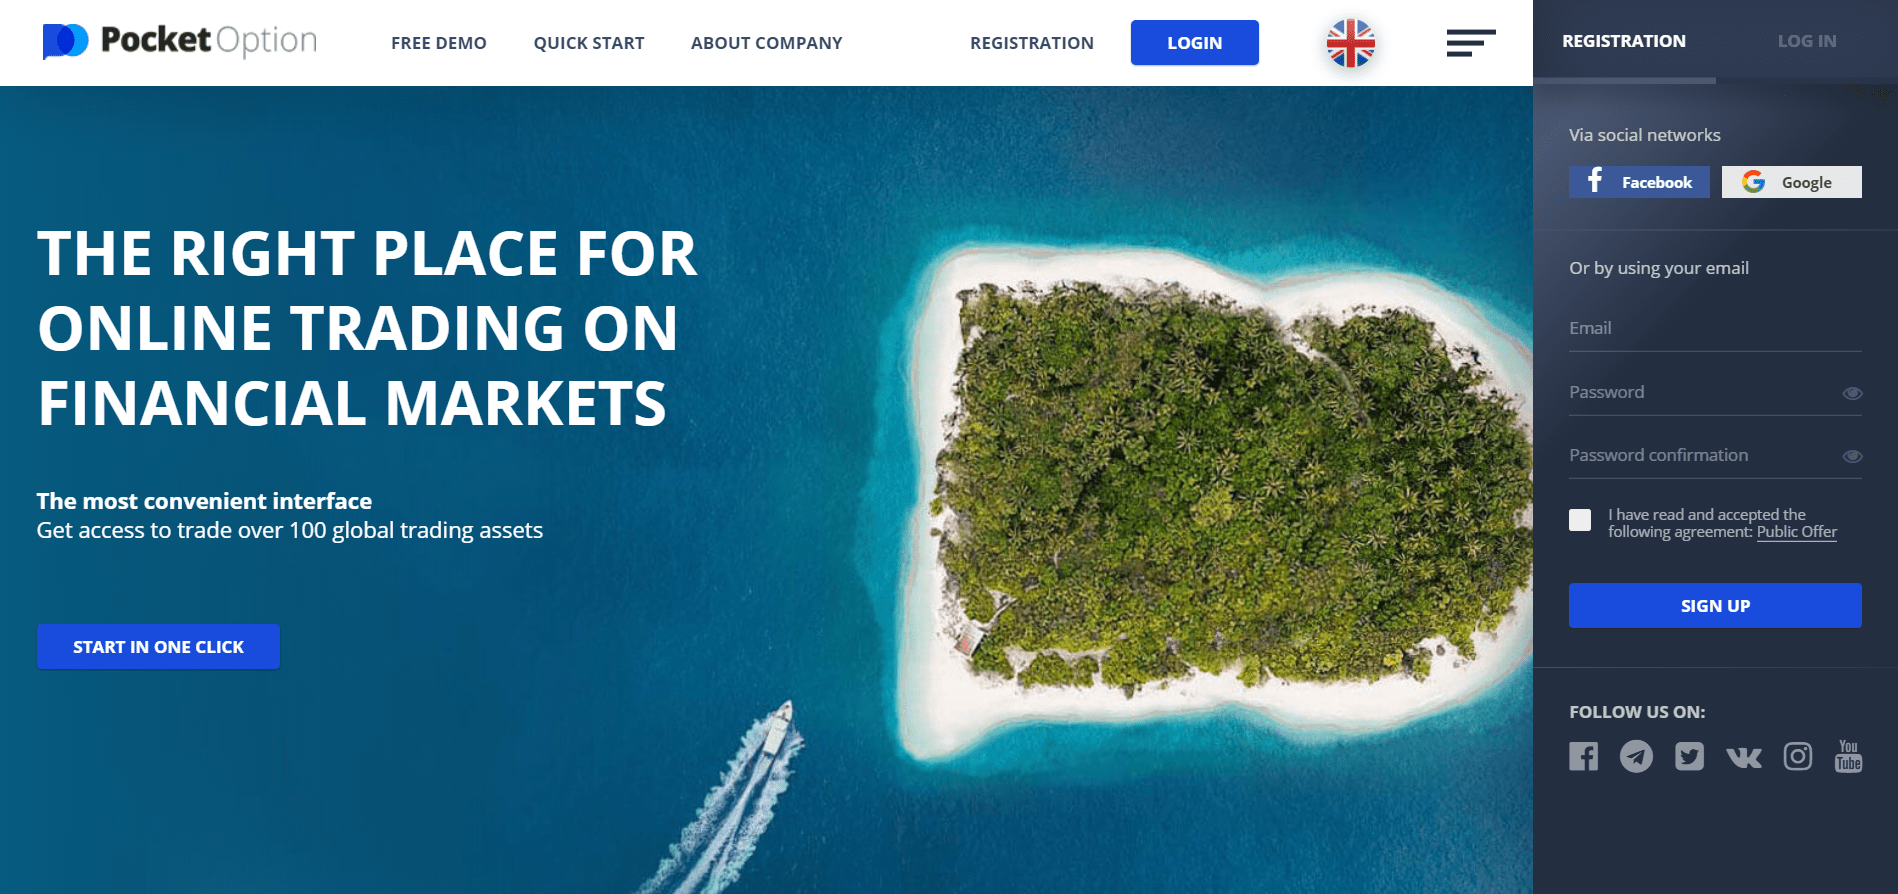
Pocket Option adalah broker Opsi Biner terbaik dalam perbandingan kami karena menawarkan pengembalian tinggi, eksekusi perdagangan opsi biner cepat, banyak pilihan investasi, dan tersedia di banyak negara. Ini adalah broker baru yang muncul di industri pada tahun 2017. Dimiliki oleh Gembell Limited, berbasis di Kepulauan Marshall, broker ini diatur oleh IFMRRC.
Rangkaian fitur yang sangat baik dan kepastian regulasi yang tepat menjadikannya broker pilihan bagi banyak pedagang binary options di AS.
Anda dapat dengan cepat membuka akun dan mulai memperdagangkan salah satu dari 130+ aset yang ditawarkan broker. Anda juga tidak akan mengalami masalah dalam mendanai akun Anda karena broker menawarkan beberapa metode pembayaran opsi biner.
Pocket Option menawarkan opsi tinggi/rendah, memudahkan pedagang dari semua tingkat keahlian untuk melakukan perdagangan yang sukses dan mendapatkan pembayaran yang tinggi. Pembayaran broker bervariasi dari perdagangan binary options hingga perdagangan binary options; namun, Anda dapat mengharapkan pembayaran 80%-100% pada sebagian besar perdagangan.
Pembayaran terendah yang ditawarkan broker adalah 50%, dan situs web menyatakan bahwa beberapa perdagangan dapat memberi Anda pembayaran 218%.
(Peringatan risiko: Modal Anda bisa berisiko)
Saat pertama kali mendanai akun Anda, Anda akan menerima bonus deposit sebesar 50%. Semakin banyak Anda menyetor, semakin tinggi bonus 50%. Itu Setoran awal minimal Pocket Option adalah $50, yang sedikit lebih tinggi dibandingkan dengan pialang lainnya. Perhatikan bahwa Anda tidak dapat menarik diri dari akun Anda sebelum Anda melakukan perdagangan.
Sebagian besar perdagangan menggunakan versi browser web Pocket Option. Namun, aplikasi desktop, Android, dan iOS tersedia untuk membuat perdagangan biner lebih nyaman.

Pocket Option menawarkan fitur tambahan seperti perdagangan sosial, turnamen, dan pencapaian. Perdagangan sosial memungkinkan Anda untuk mempelajari kebiasaan perdagangan pedagang sukses di platform dan mengambil keterampilan mereka.
Anda juga dapat bersaing dengan perdagangan lain untuk memenangkan hadiah. Turnamen Pocket Option memiliki hadiah hingga $50.000, dan jika Anda menang, Anda dapat menggunakan semua dana tersebut untuk berdagang dan menghasilkan lebih banyak uang.
Platform memberi Anda penghargaan untuk mencapai tonggak tertentu. Menggunakan platform secara konsisten akan memberi Anda keuntungan seperti pembayaran yang lebih tinggi dan dana perdagangan bonus untuk meningkatkan pengalaman perdagangan Anda.
ssinyal dan indikator di platform memudahkan Anda untuk menavigasi pasar dan melakukan perdagangan yang masuk akal.
Pocket Option adalah salah satu broker binary options yang paling dicari, dan tidak sulit untuk mengetahui alasannya.
Fakta singkat tentang broker ini:
| Ditemukan di: | 2017 |
| Setoran minimum: | $50 |
| Akun demo: | ✔ (tersedia, tidak terbatas) |
| Tingkat pembayaran maksimum: | Hingga 97%+ |
| Mendukung: | Telepon 24/7, obrolan, email |
| Perdagangan otomatis: | Tersedia oleh pihak ketiga |
| Aplikasi seluler: | Tersedia untuk Android dan iOS |
(Peringatan risiko: Modal Anda bisa berisiko)
2. Quotex – Sinyal perdagangan gratis dan pembayaran tinggi

Quotex.io adalah salah satu broker baru di industri ini. Meskipun didirikan pada tahun 2020, ia berhasil mendapatkan popularitas dengan cepat. Peningkatan cepat platform menuju kesuksesan berkat semua fitur canggih yang ditawarkannya.
Perusahaan ini adalah merek dagang dari Awesomo Ltd yang berbasis di Seychelles, yang diatur oleh IFMRRC. Jika Anda berada di Amerika Serikat, Hong Kong, Kanada, atau Jerman, Anda perlu mendanai akun biner Anda menggunakan mata uang kripto. Namun, tidak ada batasan untuk membuka akun di wilayah ini jika Anda seorang penjual.
Quotex adalah broker yang andal dan menawarkan sinyal terintegrasi gratis kepada penggunanya membanggakan akurasi 87%. Sinyal ini dapat menguntungkan pedagang baru saat mereka membangun keterampilan analisis mereka dan mencoba menghasilkan uang. Pedagang berpengalaman juga menggunakan sinyal untuk menentukan perdagangan binary options terbaik yang dapat mereka lakukan.

(Peringatan risiko: Modal Anda bisa berisiko)
Keuntungan lain menggunakan Quotex adalah menawarkan fitur copy trading yang ampuh. Hasilnya, pelanggan dapat menemukan pedagang terbaik di platform dan mereplikasi portofolio mereka hanya dalam satu klik.
Antarmuka yang dirancang dengan rapi menampilkan daftar 20 pedagang teratas, dan pengguna dapat memilih satu untuk ditiru tanpa kesulitan. Anda juga akan menemukan sinyal pasar dan rekomendasi analis di terminal, yang dapat membantu Anda menavigasi pasar keuangan dengan lebih mudah.

Selain menawarkan antarmuka yang mudah digunakan, Quotex memberi pengguna akses ke berbagai opsi digital untuk berdagang. Platform menawarkan lebih dari 410 opsi, memberi Anda akses ke 27 pasangan mata uang, menjadikannya salah satu broker forex binary options yang lebih serbaguna.
Anda juga dapat memperdagangkan opsi biner pada cryptocurrency, komoditas, dan indeks di Quotex. Mendaftar akan memberi Anda bonus setoran 100%, dan Anda dapat mulai berdagang hanya dengan $10 di akun Anda.

Akun demo gratis untuk digunakan dan memungkinkan Anda melakukan perdagangan bebas risiko. Namun saat Anda merasa nyaman berdagang di platform dan menggunakan akun live, Anda berpotensi memperoleh keuntungan sebesar 95% pada setiap perdagangan yang menang. Tentu saja, biayanya bervariasi dari satu perdagangan ke perdagangan lainnya, tetapi biasanya rendah.
Karena platform ini diatur, Anda tidak perlu khawatir tentang keamanan. Anda dapat menggunakan Quotex di komputer Anda dan juga di ponsel Android dengan menginstal aplikasi.
Secara keseluruhan, Quotex adalah salah satu broker biner paling mengesankan di industri ini.
Fakta singkat tentang broker ini:
| Ditemukan di: | 2020 |
| Setoran minimum: | $10 |
| Akun demo: | Gratis dan tidak terbatas |
| Tingkat pembayaran maksimum: | Hingga 95%+ |
| Mendukung: | Obrolan dan email 24/7 |
| Perdagangan otomatis: | Tidak diperbolehkan |
| Aplikasi seluler: | Tersedia untuk Android (aplikasi iOS tidak tersedia saat ini) |
(Peringatan risiko: Modal Anda bisa berisiko)
3. IQ Option – Antarmuka ramah pengguna terbaik
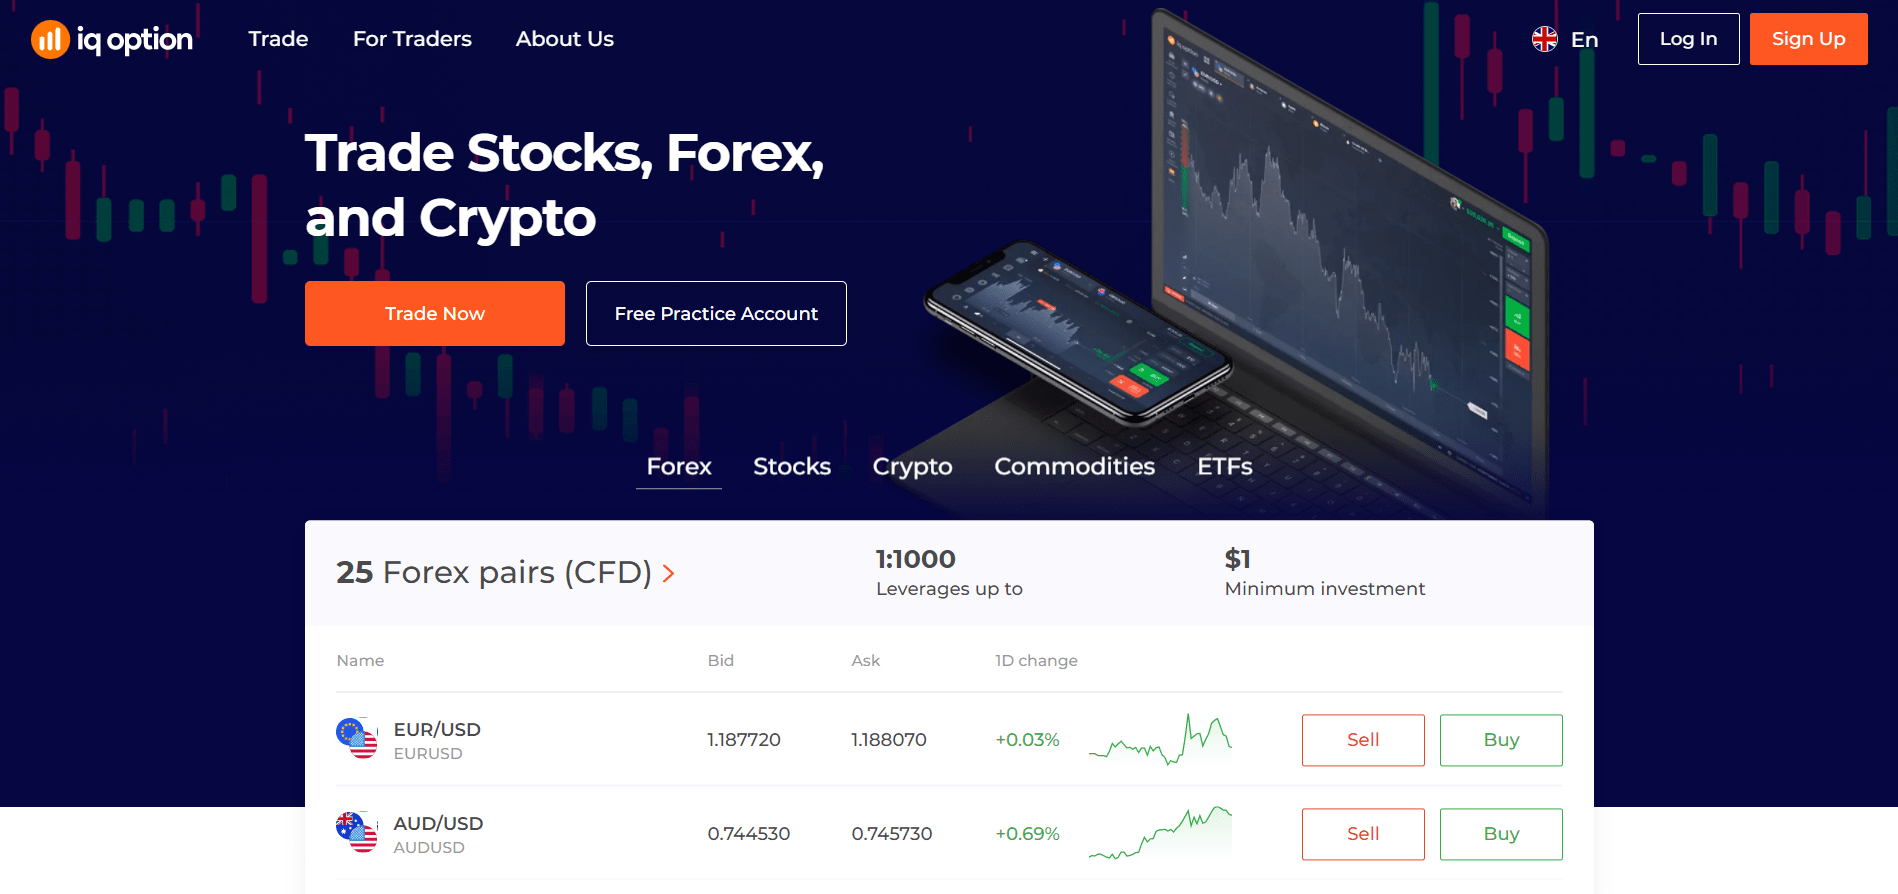
Jika Anda lebih suka mendaftar pada broker yang telah membuktikan dirinya sebagai broker terpercaya, IQ Option mungkin merupakan pilihan yang tepat untuk Anda. Broker ini membebankan biaya yang kompetitif dan membuat perdagangan opsi biner menjadi cepat dan mudah. Pengembalian opsi biner bisa mencapai 100% per perdagangan, salah satu pembayaran tertinggi di industri.
Perusahaan ini didirikan pada tahun 2013, menjadikannya salah satu broker opsi biner teratas di industri.
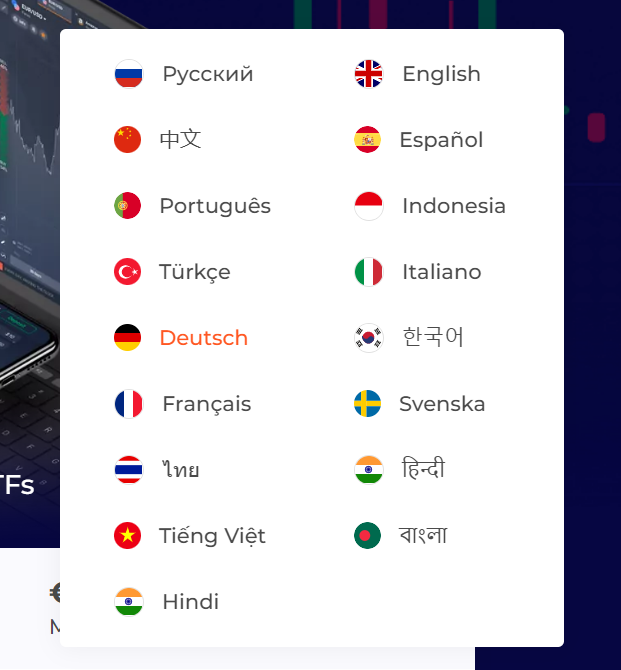
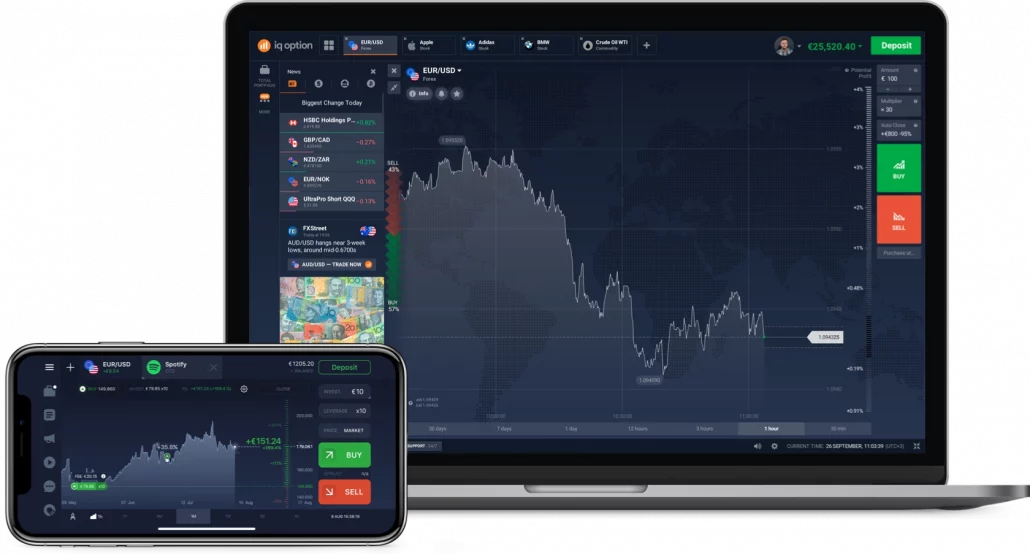
IQ Option menawarkan platform perdagangan pemenang penghargaan yang dilengkapi dengan beberapa alat perdagangan yang berguna. Ia memiliki segalanya mulai dari kalender ekonomi dan penyaringan saham hingga kutipan historis dan peringatan volatilitas. Selain itu, platform ini tersedia dalam 13 bahasa sehingga lebih mudah digunakan.
Broker mengizinkan perdagangan opsi biner pada berbagai aset. Dengan akun IQ Option, Anda dapat memperdagangkan binari di pasar valas, saham, komoditas, mata uang kripto, dan ETF. Opsi dan indeks digital juga tersedia.
(Peringatan risiko: Modal Anda bisa berisiko)
Jika Anda berada di UE, Anda juga dapat menggunakan opsi FX. Meskipun mereka memiliki risiko tetap dan potensi keuntungan yang telah ditentukan sebelumnya, pembayaran untuk opsi forex dapat mencapai hingga 2000%. FX Options menjadikan IQ Option salah satu broker forex biner terbaik yang dapat Anda ikuti.
Pedagang dapat berdagang sambil berjalan menginstal aplikasi IQ Option di ponsel mereka. Ini menampilkan antarmuka berpemilik yang sama dan dilengkapi dengan semua alat seperti versi peramban dari platform perdagangan biner terbaik.
Salah satu hal terbaik tentang IQ Option adalah transparansi lengkap dengan biayanya. Kecuali untuk cryptocurrency (komisi 2.9%), Anda dapat memperdagangkan instrumen keuangan apa pun secara gratis. Jika Anda menahan posisi semalaman, Anda harus membayar antara 0,1% – 0,5% dari nilai posisi sebagai biaya swap.
Broker juga membebankan biaya tidak aktif jika Anda tidak berdagang selama 90 hari berturut-turut. Tidak ada biaya penarikan jika Anda menggunakan layanan pembayaran, tetapi jika Anda menarik menggunakan transfer bank, Anda harus membayar $31.
Dukungan pelanggan yang luar biasa dan akun demo menjadikannya platform perdagangan pilihan bagi banyak orang. Jika Anda ingin memulai perdagangan langsung, IQ Option hanya memerlukan jumlah deposit minimum $10.
Fakta singkat tentang broker ini:
| Ditemukan di: | 2013 |
| Setoran minimum: | $10 |
| Akun demo: | ✔ (tersedia, tidak terbatas) |
| Tingkat pembayaran maksimum: | Hingga 100%+ |
| Mendukung: | Telepon 24/7, obrolan, email |
| Perdagangan otomatis: | Perdagangan algoritmik tidak tersedia |
| Aplikasi seluler: | Tersedia |
(Peringatan risiko: Modal Anda bisa berisiko)
4. Deriv – Terbaik untuk perdagangan otomatis
Regent Markets Group awalnya mendirikan BetOnMarkets.com pada tahun 2000 untuk memfasilitasi perdagangan online yang mudah. Pada tahun 2013, platform ini berganti nama ke Binary.com, yang sekarang menjadi broker terkenal di industri ini.
Untuk mengekspresikan komitmen baru mereka untuk membuat perdagangan binary options dapat diakses dan semudah mungkin, Regent Markets Group baru-baru ini mengganti nama Binary.com menjadi Deriv. Lebih dari dua dekade, platform telah berkembang dan sekarang menawarkan fitur yang disempurnakan, jenis perdagangan baru, dan beberapa aplikasi grafik tambahan.
Deriv memberikan kesan pertama yang kuat pada para pedagang karena empat otoritas berbeda mengaturnya. Pengawasan peraturan membuatnya menonjol sebagai broker opsi biner yang andal.
(Peringatan risiko: Modal Anda bisa berisiko)

Anda dapat memperdagangkan salah satu dari 100+ aset yang ditawarkan broker, dan Anda juga dapat berdagang di akhir pekan. Deriv memiliki setoran minimum $5 dan menawarkan pembayaran hingga 100%. Trader dapat memanfaatkan hingga 1:1000 dan melakukan perdagangan valas dan perdagangan CFD selain perdagangan opsi biner.
Empat platform perdagangan berbeda ditawarkan untuk memungkinkan pedagang berdagang sesuai kekuatan mereka dan mendapatkan pengalaman perdagangan yang mereka inginkan. Platform perdagangan online adalah:
- DTrader: Ini adalah platform berbasis web yang mudah digunakan yang menawarkan 50+ aset dengan potensi pembayaran lebih dari 200%. Ini dapat disesuaikan dan menawarkan kemampuan pembuatan bagan yang sangat baik.
- DBot: Ini adalah bot otomatis yang tidak memerlukan pengkodean. Anda dapat memasukkan strategi perdagangan ke bot menggunakan 'blok' yang telah dibuat sebelumnya yang dapat Anda seret dan lepas secara berurutan. Beberapa alat analisis, indikator, dan fitur logika cerdas membantu Anda memaksimalkan keuntungan. Bot hadir dengan tiga strategi bawaan dan tersedia secara gratis.
- DMT5: Platform MetaTrader 5 memberi pedagang akses ke lebih dari 70 aset dan menawarkan leverage 1:1000. Anda dapat mengganti indikator teknikal antara mode tingkat lanjut dan profesional. Selain itu, indikator luar biasa memungkinkan Anda berdagang tanpa kerumitan apa pun tingkat keahlian Anda.
- SmartTrader: Muncul dengan fungsi dan opsi terbanyak dari semua platform Deriv. Antarmuka membuat analisis grafik dan penempatan pesanan menjadi mudah. Bagian "cara berdagang" membantu pedagang belajar menggunakan antarmuka dengan cepat.
Jika Anda mencari platform yang aman dan teregulasi yang menawarkan beberapa cara untuk berdagang, Deriv adalah salah satu broker opsi biner terbaik.
Fakta singkat tentang broker ini:
| Ditemukan di: | 1999 |
| Setoran minimum: | $5 |
| Akun demo: | ✔ (tersedia, tidak terbatas) |
| Tingkat pembayaran maksimum: | Hingga 90%+ |
| Mendukung: | Telepon 24/7, obrolan, email |
| Perdagangan otomatis: | Tersedia (DBot) |
| Aplikasi seluler: | Tersedia |
(Peringatan risiko: Modal Anda bisa berisiko)
5. Olymp Trade – Terbaik untuk Trader India
Dengan lebih dari 25.000 pedagang menggunakan platform setiap hari, Olymp Trade adalah salah satu broker paling populer di luar sana. Meskipun paling populer di Asia Selatan, kantor pusatnya berada di St. Vincent dan Grenadines. Pialang telah beroperasi sejak 2014 dan saat ini diatur oleh IFC.
Selama bertahun-tahun di industri, Olymp Trade telah memenangkan banyak penghargaan, bukti fokus broker pada kemudahan penggunaan. Antarmuka yang bersih dan terorganisir memudahkan untuk menemukan apa yang Anda cari.
Anda dapat berdagang dari komputer Mac atau Windows menggunakan browser web atau menginstal aplikasi khusus. Perdagangan Olymp juga memungkinkan perdagangan saat bepergian dengan aplikasi selulernya.
(Peringatan risiko: Modal Anda bisa berisiko)
Meskipun tidak ada biaya pemeliharaan akun atau kustodian, Anda harus membayar biaya 15% untuk posisi di Olymp Trade yang Anda pegang semalaman. Selain itu, jika Anda tidak menggunakan akun Anda selama 180 hari berturut-turut, Anda mungkin perlu membayar biaya berlangganan tergantung pada jenis akun Anda. Selanjutnya, rekening yang dananya tidak mencukupi akan ditutup secara otomatis.

Broker mengenakan biaya per perdagangan jika Anda memutuskan untuk memperdagangkan pasangan mata uang (forex). Biayanya bervariasi sesuai dengan jumlah, leverage, dan kondisi pasar. Yang lebih penting lagi, Anda harus ingat bahwa broker menawarkan leverage variabel untuk berbagai jenis perdagangan. Meskipun situs webnya mungkin menampilkan leverage yang menarik sebesar 1:400, untuk sebagian besar pasangan mata uang populer, Anda hanya akan mendapatkan leverage 1:30.
Namun, akun demo $10.000 Olymp Trade, bonus perdagangan, dan bonus deposit 50% lebih dari sekadar menutupi keterbatasan platform.
Ini adalah salah satu broker binary options terbaik untuk digunakan jika tersedia di negara Anda.
Fakta singkat tentang broker ini:
| Ditemukan di: | 2014 |
| Setoran minimum: | $10 |
| Akun demo: | ✔ (tersedia, tidak terbatas) |
| Tingkat pembayaran maksimum: | Hingga 90%+ |
| Mendukung: | Telepon 24/7, obrolan, email |
| Perdagangan otomatis: | Tidak diperbolehkan (robot dan alat otomatis dilarang) |
| Aplikasi seluler: | Tersedia untuk Android dan iOS |
(Peringatan risiko: Modal Anda bisa berisiko)
6. Expert Option – Fitur perdagangan sosial yang luar biasa
Expert Option menawarkan antarmuka yang memberikan keseimbangan yang tepat antara kemudahan penggunaan dan utilitas. Ini adalah platform yang tepat untuk trader pemula dan trader opsi biner berpengalaman.
Pialang telah melayani pedagang sejak 2014, dan sejak didirikan di Vanuatu, diatur oleh VFSC. Pada 2022, ia memiliki lebih dari 74 juta pengguna yang dapat memperdagangkan salah satu dari 100+ aset di platform tanpa kerumitan.
Platform kaya fitur Expert Option membanggakan eksekusi hampir instan, dan umpan harga yang akurat dan memungkinkan perdagangan akhir pekan.
Akun demo dengan $10.000 tersedia untuk setiap trader yang mengunjungi situs web. Anda tidak perlu mendaftar untuk menggunakan akun perdagangan demo Expert Option – Anda dapat menggunakannya dengan mengunjungi https://app.expertoption.com/.
(Peringatan risiko: Modal Anda bisa berisiko)
Salah satu hal terbaik tentang Opsi Pakar adalah ia memiliki aplikasi seluler dan desktop. Jadi Anda dapat memperdagangkan opsi biner dengan nyaman di mana pun Anda berada, baik menggunakan aplikasi opsi biner atau versi browser.
Broker sekarang menawarkan Bonus setoran 100% kepada pengguna pertama kali. Saat Anda menginvestasikan uang, semakin banyak Anda menyetor, semakin banyak Anda dapat berdagang dengan bonus.
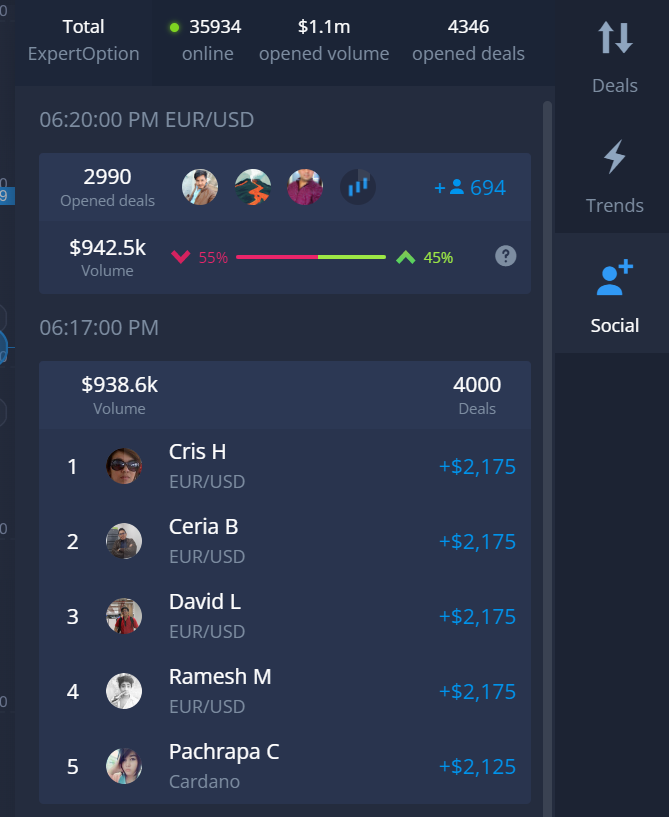
Selain itu, fitur perdagangan sosial kemungkinan merupakan fitur platform yang paling mengesankan. Anda dapat berdagang dengan teman-teman Anda dan juga melihat apa saja pedagang sukses dan berinvestasi.
Beberapa alat analisis teknis, empat jenis grafik, dan banyak indikator dan garis tren membantu Anda memahami pergerakan harga dan melakukan perdagangan yang masuk akal.
Penawaran Opsi Pakar banyak pendidikan perdagangan sumber daya untuk membantu pedagang dari semua tingkat keahlian belajar dan berkembang. Anda akan menemukan segalanya mulai dari tutorial video dan webinar online hingga analisis pasar harian dan pembaruan di Expert Option.
Set fitur platform yang sangat baik membuatnya sangat populer. Namun, penting untuk dicatat bahwa itu tidak melayani pedagang di AS, Kanada, Australia, dan banyak negara lainnya.
Fakta singkat tentang broker ini:
| Ditemukan di: | 2014 |
| Setoran minimum: | $50 |
| Akun demo: | ✔ (tersedia, tidak terbatas) |
| Tingkat pembayaran maksimum: | Hingga 90%+ |
| Mendukung: | Telepon 24/7, obrolan, email |
| Perdagangan otomatis: | Tersedia melalui pihak ketiga |
| Aplikasi seluler: | Tersedia untuk Android dan iOS |
(Peringatan risiko: Modal Anda bisa berisiko)
7. BinaryCent – Broker teratas untuk copy trading
BinaryCent telah memantapkan dirinya sebagai broker tepercaya dalam empat tahun di industri ini. Pialang dimiliki oleh Finance Group Corp dan dikelola oleh Cent Projects Ltd. Didirikan di Vanuatu pada tahun 2017, dan selain menawarkan perdagangan binary options, BinaryCent juga memungkinkan perdagangan valas dan CFD.
Pembayaran broker biasanya berkisar dari 60% hingga 80%; namun, Anda dapat menerima pembayaran hingga 95% dari nilai posisi. Waktu kedaluwarsa bisa sesingkat 60 detik, dan Anda bisa tempatkan perdagangan hanya dengan 10 sen.
Selain saham, komoditas, dan pasangan valas, BinaryCent juga memungkinkan perdagangan binary options pada mata uang kripto. Bergantung pada gaya perdagangan Anda, Anda dapat memilih untuk memperdagangkan aset dengan strategi turbo, intraday, atau jangka panjang.
(Peringatan risiko: Modal Anda bisa berisiko)
Anda dapat menggunakan platform browser atau aplikasi seluler untuk berdagang menggunakan BinaryCent. Anda dapat mengunduh aplikasi seluler dari Google Play Store atau Apple App Store. Penting untuk dicatat bahwa Anda harus memasukkan nomor ponsel Anda untuk menggunakan aplikasi seluler.
Broker ini memiliki tiga level akun: perunggu, perak, dan emas. Rekening ini memiliki persyaratan setoran minimum Binarycent masing-masing sebesar $250, $1000, dan $3000.

Akun tingkat yang lebih tinggi menawarkan beberapa keuntungan, seperti kelas master perdagangan gratis, fitur obrolan langsung, dan manajer akun gratis. Sentra Biner juga menawarkan bonus deposit 20%, 50%, dan 100%, sesuai dengan tingkat akun Anda.
Tapi mungkin hal terbaik tentang BinaryCent adalah fitur copy-tradingnya. Broker memudahkan trader untuk meniru kesuksesan trader lain.
Banyak pedagang pemula menggunakan fitur perdagangan salinan BinaryCent untuk meningkatkan ukuran perdagangan mereka dan meningkatkan peluang mereka menghasilkan uang.
Kontes perdagangan yang menarik, akses akun demo, dan bonus setoran yang luar biasa jadikan BinaryCent salah satu pilihan utama kami.
Fakta singkat tentang broker ini:
| Ditemukan di: | 2016 |
| Setoran minimum: | $250 |
| Akun demo: | ✔ (tersedia, tidak terbatas) – Setelah minimum deposit $250 atau gratis dengan kode promo 'BOFREE' |
| Tingkat pembayaran maksimum: | Hingga 90%+ |
| Mendukung: | Telepon 24/7, obrolan, email |
| Perdagangan otomatis: | Tersedia melalui pihak ketiga |
| Aplikasi seluler: | Tersedia |
(Peringatan risiko: Modal Anda bisa berisiko)
8. RaceOption – Broker terbaik untuk bonus

Berkantor pusat di London, RaceOption didirikan pada tahun 2014 dan menarik para pedagang dari seluruh dunia dengan antarmuka yang ramah pengguna dan berbagai fasilitas.
Platform perdagangannya sederhana; Namun, setiap alat yang mungkin Anda butuhkan diletakkan di depan Anda dengan mudah mengakses. Meskipun sederhana, antarmukanya membuat perdagangan lebih mudah, ia tidak menampilkan statistik mendalam dan menawarkan beberapa alat analisis yang ampuh seperti platform opsi biner lainnya. Oleh karena itu, jika Anda seorang trader berpengalaman yang mencari platform dengan banyak fitur, Opsi Balap mungkin tidak tepat untuk Anda.
Broker menawarkan tiga jenis akun: perunggu, perak, dan emas. Jika Anda menyetor $250 di RaceOption, Anda mendapatkan akses ke akun tingkat perunggu. Anda perlu menyetor $1000, dan $3000 untuk mendapatkan akses ke akun tingkat perak dan emas.
(Peringatan risiko: Modal Anda bisa berisiko)
Setiap tingkat menawarkan beberapa keuntungan – semakin tinggi tingkat Anda, semakin baik bonus setoran, dan semakin banyak fitur yang akan Anda buka. Fitur seperti kelas master perdagangan, manajer akun, dan analisis teknis terintegrasi hanya dibuka di tingkat yang lebih tinggi.
RaceOption dapat menawarkan sejumlah besar aset karena pengawasan peraturan yang terbatas oleh Finance Group Corp.

Anda dapat memperdagangkan lebih dari 150 aset dengan RaceOption, dan karena platform ini menawarkan lima jenis perdagangan yang berbeda, Anda tidak akan dibatasi oleh platform saat merancang strategi perdagangan.
Pembayaran berkisar antara 60% dan 90%, dan setiap pengguna baru menerima bonus setoran sesuai dengan tingkat akun mereka. Fitur-fitur ini, ditambah dengan aplikasi perdagangan seluler, akun demo, dan beberapa opsi penarikan dan penyetoran, menjadikan RaceOption sebagai broker yang tepat untuk pedagang baru.
Fakta singkat tentang broker ini:
| Ditemukan di: | 2019 |
| Setoran minimum: | $250 |
| Akun demo: | ✔ (hanya tersedia setelah deposit pertama) ATAU dapatkan akun demo gratis dengan memasukkan kode promo khusus 'BOFREE' |
| Tingkat pembayaran maksimum: | Hingga 90%+ |
| Mendukung: | Telepon 24/7, obrolan, email |
| Perdagangan otomatis: | Tersedia melalui pihak ketiga |
| Aplikasi seluler: | Tersedia |
(Peringatan risiko: Modal Anda bisa berisiko)
9. Binarium – Broker biner terbaik yang tidak diatur
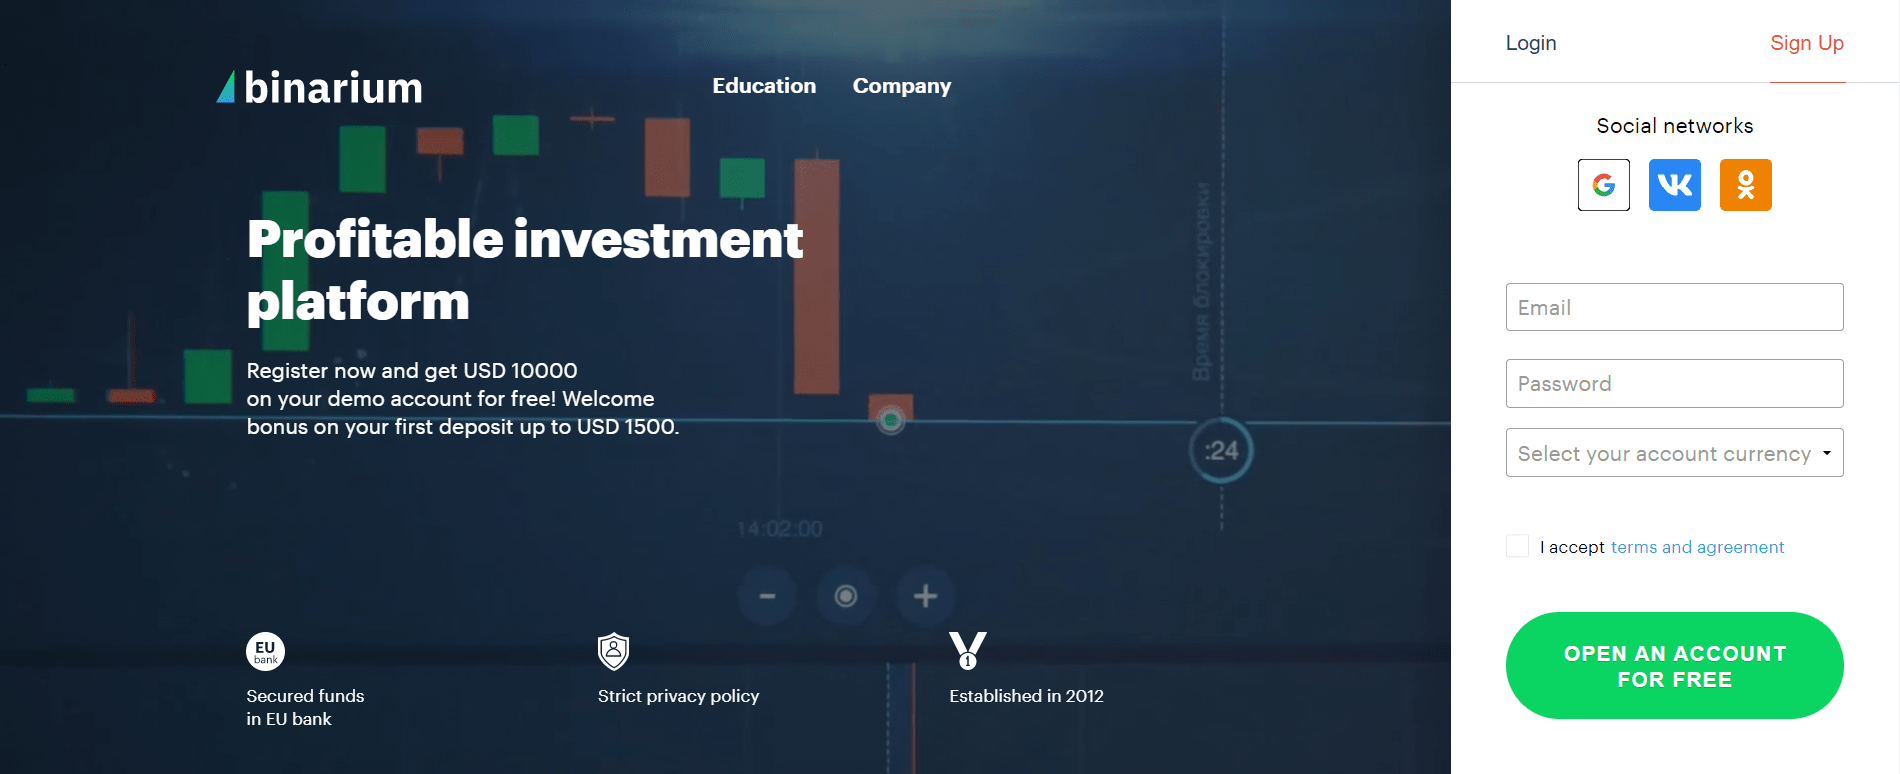
Binarium yang berbasis di Siprus telah melayani pedagang dari seluruh dunia sejak 2012. Meskipun otoritas mana pun tidak mengatur platform, ia memiliki basis pengguna aktif dan dianggap sebagai platform yang aman dan andal.
Membuka akun tidak memakan waktu lama, dan platform browser memiliki antarmuka yang mudah digunakan. Selain itu, tim dukungan bekerja sepanjang waktu untuk memastikan setiap pedagang mendapatkan bantuan yang mereka butuhkan paling awal.
(Peringatan risiko: Modal Anda bisa berisiko)
Dalam hal keamanan pengguna, broker tidak membuat kompromi. Kebijakan privasi yang ketat, sistem keamanan 3D, dan metode pembayaran bersertifikasi SSL menjadikannya platform yang tepercaya.
Untuk memulai perdagangan, Anda harus menyetor minimal $5 Binarium atau buat akun demo gratis. Pialang ini menawarkan 33 aset perdagangan, dan pilihannya mencakup mata uang, mata uang kripto, indeks saham, dan komoditas.
Binarium memungkinkan Anda untuk berdagang tujuh hari seminggu dan menawarkan bonus setoran 100%. Anda bisa mendapatkan pembayaran hingga 90% di platform. Selanjutnya, setelah akun Anda diverifikasi, Anda akan dapat menarik dana Anda dalam satu jam.
Anda dapat berdagang dengan Binarium menggunakan browser web atau aplikasi seluler.
Fakta singkat tentang broker ini:
| Ditemukan di: | 2012 |
| Setoran minimum: | $10 |
| Akun demo: | ✔ (tersedia, tidak terbatas) |
| Tingkat pembayaran maksimum: | Hingga 80%+ |
| Mendukung: | Telepon 24/7, obrolan, email |
| Perdagangan otomatis: | Tidak tersedia (Tidak ada perdagangan algoritmik) |
| Aplikasi seluler: | Tersedia |
(Peringatan risiko: Modal Anda bisa berisiko)
10. Exnova – Broker terbaik untuk trader kompetitif

Bersaing melawan trader lain bisa menjadi cara terbaik untuk mempelajari teknik trading dan memahami cara kerja pasar. Jika Anda mencari platform yang memungkinkan Anda mengaplikasikan diri dengan cara ini, Exnova adalah broker terbaik untuk mendaftar. Pengguna dapat mengikuti kontes perdagangan secara gratis dengan broker ini.
Itu didirikan oleh Digital Smart LLC yang berbasis di Seychelles pada tahun 2022 dan telah mengumpulkan basis pengguna lebih dari 500.000 pedagang di seluruh dunia. Menjadi salah satu broker paling populer di Asia Selatan, Brasil, dan Turki, platform ini memfasilitasi lebih dari 30 juta perdagangan setiap minggunya.
Binomo adalah salah satunya brokers binary options paling aman dan terkemuka Anda dapat mendaftar dengan. Selain membuat perdagangan menjadi mudah, platform perdagangan berpemilik mengenkripsi semua data pengguna menggunakan SSL.
(Peringatan risiko: Modal Anda bisa berisiko)
Antarmuka memiliki lebih dari 20 alat grafis, memungkinkan penggunaan hotkey, dan juga memiliki kalender ekonomi yang memfasilitasi perdagangan informasi. Perusahaan menawarkan banyak level akun, masing-masing dengan persyaratan dan fasilitas unik.
Beberapa fitur platform yang kurang mengesankan termasuk akun demo dengan dana virtual $10.000 dan penawaran aset dasar yang relatif terbatas.
Namun, setoran minimum rendah dan turnamen platform reguler lebih dari sekadar menutupi keterbatasan platform.
Biaya masuk untuk turnamen berkisar dari gratis hingga $30, dan pemenang dapat memperoleh antara $300 hingga $40.000. Trader dengan akun Gold dan VIP mendapatkan keuntungan tambahan saat mereka memenangkan turnamen.
Fitur perdagangan akhir pekan, pembayaran hingga 90%, dan dukungan pelanggan yang responsif membuat sulit untuk tidak merekomendasikan Exnova.
Fakta singkat tentang broker ini:
| Ditemukan di: | 2022 |
| Setoran minimum: | $10 |
| Akun demo: | ✔ (Akun perdagangan latihan gratis tersedia) |
| Tingkat pembayaran maksimum: | Hingga 90%+ |
| Mendukung: | Dukungan pelanggan 24×7 melalui obrolan dan email |
| Perdagangan otomatis: | Tidak tersedia |
| Aplikasi seluler: | Tersedia |
(Peringatan risiko: Modal Anda bisa berisiko)
Sekarang Anda telah melihat broker opsi biner terbaik, mari kita bahas secara detail dan lihat beberapa informasi penting yang harus Anda ketahui sebelum memutuskan untuk memperdagangkan opsi biner dengan broker.
→ Kita akan mulai dengan dasar-dasarnya, menjelaskan apa itu broker dan bagaimana mereka menghasilkan uang. Selanjutnya, kami akan melihat cara kami mengevaluasi broker dan membandingkan berbagai jenis broker karena, seperti yang Anda ketahui, terdapat perbedaan besar. Terakhir, Anda akan mempelajari broker mana yang mengizinkan penggunaan robot perdagangan biner, ditambah beberapa tip dan trik bermanfaat.
Apakah kamu siap? Mari kita mulai dengan dasar-dasarnya.
Apa itu broker Opsi Biner?

Broker opsi biner adalah penyedia layanan yang menawarkan kesempatan kepada pedagang untuk memperdagangkan opsi biner. Intinya, broker bertindak sebagai jembatan antara trader dan pasar. Mereka memfasilitasi penempatan pesanan dan biasanya menghasilkan pendapatan melalui biaya platform, umumnya dikenal sebagai spread dan komisi, yang jumlahnya dapat bervariasi.
Selain itu, broker menyediakan banyak indikator dan alat analisis kepada trader untuk membantu upaya trading mereka. Beberapa broker menekankan sumber daya pendidikan yang luas atau komunitas yang dinamis, sementara broker lain mungkin fokus pada manfaat unik seperti algoritme perdagangan tingkat lanjut atau kemampuan perdagangan frekuensi tinggi.
Bagaimana kami mengevaluasi broker Opsi Biner tepercaya:
Mengingat setiap broker mengklaim menawarkan pengalaman perdagangan yang luar biasa, tinjauan independen menjadi sangat penting. Itu sebabnya kami telah menetapkan kriteria tertentu untuk membantu Anda memahami bagaimana kami mengevaluasi broker opsi biner.
Sekarang setelah Anda mengenal pialang terbaik di industri ini, memilih satu dari banyak pialang bisa jadi menantang.
Seperti yang disebutkan sebelumnya, tidak ada broker yang sempurna. Namun, jika Anda tahu apa yang Anda butuhkan dari broker, menemukan broker binary options terbaik yang memenuhi kebutuhan Anda seharusnya tidak terlalu merepotkan.
Berikut adalah faktor-faktor yang harus Anda pertimbangkan ketika memilih broker untuk berdagang. Kita tidak hanya memiliki semuanya pedoman editorial berlaku ketika kami mengevaluasi broker opsi biner yang dapat dipercaya, tapi kami juga memiliki keseluruhan metodologi tinjauan mendalam untuk mengevaluasi broker opsi biner yang dapat dipercaya.
1. Peraturan
Aspek terpenting dari broker opsi biner terkemuka adalah apakah broker tersebut teregulasi atau tidak. Broker yang teregulasi jauh lebih dapat diandalkan dibandingkan broker yang tidak teregulasi. Pengawasan memastikan bahwa pihak yang tepat memegang uang dan memberikan protokol jika terjadi perselisihan.
Misalnya, di Amerika Serikat, broker perdagangan Opsi Biner disetujui oleh Komisi Perdagangan Berjangka Komoditi (CFTC) dan Komisi Bursa Efek (DETIK).

Pialang terbaik untuk opsi biner dapat diatur di bawah banyak badan berbeda, termasuk:
- Dewan Layanan Keuangan
- Otoritas Perilaku Keuangan
- Komisi Perdagangan Berjangka Komoditi
- Komisi Sekuritas dan Investasi Australia
- Komisi Sekuritas dan Bursa Siprus
Sementara sebagian besar pialang terkemuka diatur oleh hanya satu otoritas, beberapa pialang memilih untuk diatur oleh beberapa badan.
Pengawasan peraturan oleh lebih dari satu otoritas menjadi semakin umum, terutama di UE, karena pasar opsi biner kini berada dalam pengawasan yang semakin ketat.
Memastikan bahwa pialang Anda diawasi oleh setidaknya satu otoritas adalah cara yang tepat.
Namun penting untuk diingat bahwa jika suatu broker tidak diatur, belum tentu broker tersebut curang. Peraturan sering kali membatasi pialang untuk menawarkan lebih banyak aset dasar. Karena alasan ini, beberapa broker terkemuka memilih untuk tetap tidak diatur. Selain itu, lihat daftar kami broker binary options teregulasi.
Broker perdagangan mana yang teregulasi oleh SEC untuk Opsi Biner?
Hanya ada 2 broker biner yang teregulasi oleh SEC untuk Opsi Biner: Ini adalah Nadex dan CX Markets. Warga negara AS dapat menggunakan broker ini untuk memperdagangkan Opsi Biner dengan aman.
Apakah perdagangan biner legal di AS?
Ya, Perdagangan Opsi Biner legal di AS dan disetujui oleh otoritas regulasi CFTC dan SEC. Di AS, instrumen keuangan pertama kali ditemukan dan diatur. Namun, jika Anda adalah warga negara AS, Anda hanya diperbolehkan berdagang dengan broker regulator AS untuk Binary Options.
Apakah perdagangan biner legal di Eropa?
Perdagangan Opsi Biner legal di Eropa tetapi hanya tersedia untuk pedagang profesional. Pada tahun 2018, regulator Eropa menghentikan broker menjual Opsi Biner kepada investor ritel. Secara hukum, ini tidak ilegal, tetapi Anda harus menjadi pedagang profesional untuk instrumen keuangan tersebut Eropa.
(Peringatan risiko: Modal Anda bisa berisiko)
2. Ketersediaan platform Opsi Biner
Saat ini, sangat penting bagi trader swasta untuk memiliki platform trading yang fleksibel. Artinya, platform juga harus dapat digunakan dari jalan raya. Dengan platform yang kami rekomendasikan, Anda dapat mengakses portofolio Anda kapan saja, 24/7 seminggu. Unduh aplikasi biner untuk perangkat seluler Anda.
Keuntungannya adalah Anda hanya perlu mengakses platform dan mengontrol akun Anda satu kali. Platform perdagangan tersedia untuk browser (web), perangkat seluler, dan pengunduhan komputer. Secara umum, mengunduh platform ke PC disarankan karena pengembang mengklaim platform ini berjalan lebih lancar.

- Satu akses untuk setiap perangkat
- Gunakan komputer, browser, atau perangkat seluler
- Terima peringatan dan pesan
- Manajemen akun 24/7
Instalasi platform dan perangkat lunak perdagangan Opsi Biner sangat mudah dan hanya memerlukan sedikit pengetahuan. Unduh platform biner di browser atau Appstore Anda hanya dengan satu klik. Pabrikan juga selalu memberi tahu Anda tentang pembaruan terkini. Berdasarkan pengalaman kami, platform sering diperbarui dan ditingkatkan.
Pastikan semua fungsi versi komputer juga tersedia di versi seluler. Sebagian besar broker menawarkan fitur ini.
3. Bonus untuk perdagangan opsi biner
Broker menawarkan bonus pendaftaran untuk menarik lebih banyak klien yang memperdagangkan opsi biner. Paling sering, bonusnya dalam bentuk kecocokan deposit. Pembayaran satu kali dan perdagangan bebas risiko adalah beberapa contoh lainnya bonus populer. Ingatlah bahwa semua ini tunduk pada syarat dan ketentuan.
Perlu meluangkan waktu untuk baca syarat dan ketentuannya sebelum memutuskan untuk mendaftar. Jika bonus adalah salah satu alasan terbesar Anda untuk mendaftar, didiskualifikasi dari menerima bonus membuatnya kehilangan daya tariknya.

Selain itu, menggunakan bonus secara efektif bisa jauh lebih sulit daripada yang terlihat. Sebagian besar broker tidak mengizinkan Anda untuk menarik bonus setelah mendaftar. Itu hanya dapat digunakan ketika membuat pesanan tertentu.
Hal ini dapat mempengaruhi gaya trading Anda secara signifikan dan terkadang menyebabkan trader melakukan trading melebihi anggaran mereka, meninggalkan sistem pengelolaan uang mereka untuk trading biner.
Jika bonus tidak cocok untuk Anda, sebaiknya lihat beberapa broker lain.
(Peringatan risiko: Modal Anda bisa berisiko)
4. Setoran minimum dan perdagangan minimum
SEBUAH setoran minimum rendah memudahkan Anda untuk memulai perdagangan biner. Selain itu, simpanan yang lebih kecil meminimalkan risiko. Broker biner yang menawarkan deposit minimum di bawah $50 adalah pilihan yang masuk akal. Namun, beberapa broker memiliki setoran minimum $100+.

Periksa metode pembayaran penarikan dan deposit
Umumnya ada batasan setoran dan penarikan untuk broker opsi biner. Jika Anda menarik atau menyetor sebagian dari batas di bawah yang ditetapkan, ini akan dianggap penarikan. Pastikan Anda mengetahui batas deposit dan penarikan Broker sebelumnya membuat keputusan akhir Anda.
Periksa apakah masalah dapat diatasi jika memang demikian. Perusahaan pialang dengan batasan yang Anda rasa nyaman akan menjadi pilihan terbaik jika Anda belum memilikinya. Proses penyetoran dan penarikan uang juga harus mudah.
Beberapa metode pembayaran populer untuk Setoran Binary Options adalah:
- Kartu kredit (Visa, MasterCard, Kartu American Express)
- Kartu debit
- Cryptocurrency (Bitcoin, USDT, Ethereum, dan lainnya)
- dompet elektronik (Skrill, Neteller, ADVCash, Qiwi, dan lainnya)
- Yandex, UnionPay
- pembayaran cepat
- Transfer bank (bank online, transfer bank lokal)
- PayPal
Penting juga untuk memeriksa ukuran dan jumlah perdagangan minimum. Ini bisa sangat bervariasi dari satu broker ke broker lainnya. Platform perdagangan opsi biner terbaik biasanya memiliki ukuran perdagangan minimum antara $1 dan $50. Idealnya, Anda menginginkan ukuran perdagangan minimum $25 atau kurang.
Ukuran perdagangan minimum yang lebih tinggi mungkin bukan pemecah kesepakatan bagi beberapa pedagang, tetapi bisa menjadi pemecah masalah bagi banyak pedagang lainnya.
Jika Anda seorang pemula dan baru mulai belajar atau ingin mencoba instrumen atau strategi perdagangan biner baru, menggunakan akun latihan atau demo akan mengurangi risiko Anda hingga nol.
(Peringatan risiko: Modal Anda bisa berisiko)
5. Persentase pembayaran
Pertimbangan penting lainnya adalah persentase pembayaran yang ditawarkan broker. Namun, membandingkan pembayaran antar broker lebih rumit dari yang terlihat.
Pembayaran berubah berdasarkan beberapa faktor, seperti sebagai aset dasar dan waktu kadaluwarsanya. Pembayaran juga berubah dari satu broker ke broker lainnya karena mereka mengelola risiko mereka sendiri. Jadi, meskipun Anda mendaftar pada broker yang menawarkan pembayaran terbaik di atas kertas, Anda mungkin menemukan broker lain yang menawarkan pembayaran lebih baik nantinya.

Oleh karena itu, mendaftar dengan broker berdasarkan pembayaran yang mereka tawarkan bukanlah cara yang tepat.
Yang dapat Anda lakukan hanyalah mengunjungi situs web broker, periksa mereka pembayaran dan waktu kedaluwarsa, dan persempit pilihan Anda ke platform perdagangan opsi biner terbaik yang menawarkan pembayaran bagus. Secara umum, broker yang diperdagangkan di bursa menyukai Nadex (Pertukaran Derivatives Amerika Utara) menawarkan pembayaran yang lebih baik daripada broker over-the-counter.
Ingatlah bahwa Anda bebas untuk beralih antar broker sesuka Anda. Jika satu broker tidak memenuhi harapan Anda, Anda dapat menghapus akun Anda dan pindah ke broker lain.
Anda juga dapat membuat banyak akun dengan pialang berbeda dan membuka perdagangan dengan pialang yang menawarkan pembayaran terbaik untuk perdagangan tersebut.
(Peringatan risiko: Modal Anda bisa berisiko)
6. Kemudahan penggunaan:
Jika Anda baru mengenal perdagangan opsi biner, antarmuka sederhana akan memudahkan Anda memahami pergerakan harga, memesan, dan menghasilkan uang. Beberapa broker bertujuan untuk membuat binari perdagangan sesederhana mungkin bagi pedagang baru.
Sebaliknya, jika Anda seorang trader berpengalaman, Anda mungkin mencari platform yang menawarkan alat analisis tingkat lanjut.
Sebagian besar broker menawarkan akun demo gratis, dan menggunakan akun demo biner untuk merasakan platformnya akan memastikan Anda mendapatkan pengalaman trading tanpa kerumitan di kemudian hari.
Anda dapat menggunakan akun demo gratis untuk menguji platform sendiri!
7. Dukungan dan layanan untuk pedagang biner
Sebagai seorang trader, Anda membutuhkan dukungan dan layanan yang baik. Kebanyakan broker menunjukkan pengalaman dan pengetahuan dalam Binary Options. Broker Opsi Biner dalam ulasan ini memberi Anda dukungan terbaik dan tercepat. Oleh karena itu, terkadang mereka memberikan edukasi yang baik kepada trader melalui webinar, video, atau strategi. Bagi pemula, penting untuk mempelajari secara teoritis tentang pasar Opsi Biner. Ini adalah produk keuangan yang berisiko.
Anda dapat mempelajari dasar-dasar dan pengetahuan perdagangan lanjutan di webinar bersama para ahli. Kebanyakan broker pertama-tama menunjukkan kepada Anda dasar-dasarnya seperti fungsi kandil dan penggunaan indikator teknis. Biasanya, platform perdagangan opsi biner menawarkan lebih dari 30 indikator berbeda. Terkadang sulit menemukan strategi kerja yang baik dengan mereka. Selain itu, mereka memberi Anda pengetahuan dan informasi tingkat lanjut untuk menguasai pasar. Kebanyakan broker menawarkan pendidikan yang lebih baik jika jumlah setoran awal Anda lebih tinggi (lihat jenis akun).

Pilihan layanan lainnya adalah jenis akun. Untuk pedagang besar dengan setoran tinggi dan volume perdagangan tinggi, beberapa broker menawarkan jenis akun yang berbeda. Sebagai seorang trader, Anda bisa mendapatkan keuntungan besar. Mereka menawarkan Anda hasil yang lebih tinggi, dukungan yang lebih baik, bonus, atau program cashback. Ini adalah cara untuk mendapatkan lebih banyak keuntungan dalam perdagangan. Misalnya, broker menawarkan keuntungan aset yang lebih tinggi sebesar 5%. Itu bisa sangat membantu.
Perusahaan dalam ulasan ini menawarkan kepada Anda:
- Dukungan obrolan
- Dukungan telepon
- Dukungan email
- Pusat pendidikan
- Webinar, video, strategi
- Jenis akun
- Manajer akun
8. Akun demo gratis dan tidak terbatas diperlukan untuk setiap trader
Broker harus memberi Anda akun demo gratis. Ini adalah akun dengan uang virtual. Itu dibuat untuk mempraktikkan produk keuangan dan untuk menguji platform perdagangan opsi biner. Anda dapat memperdagangkan Opsi Biner tanpa risiko apa pun dengan uang virtual ini. Ini sepenuhnya gratis untuk digunakan. Selain itu, trader berpengalaman dapat mengembangkan strategi baru atau meningkatkan keterampilan trading mereka. Pedagang tingkat lanjut atau pemula mencoba memperdagangkan aset dasar baru dengan Opsi Biner untuk mendapatkan kesuksesan terbaik dengan akun ini.

Di sisi lain, terkadang broker memberikan tips trading kepada tradernya untuk analisis atau strategi opsi biner. Itu akun demo biner sangat cocok untuk berlatih pengetahuan baru itu. Trading sangatlah kompleks dan seringkali tidak mudah untuk menemukan cara yang tepat. Inilah alasan utama menggunakan akun demo. Kebanyakan pedagang mendapatkan pengalaman terlebih dahulu sebelum mereka menginvestasikan uang. Dari pengalaman saya sendiri, adalah mungkin untuk mendapatkan keuntungan yang tinggi dengan melakukan perdagangan ke arah yang benar.
(Peringatan risiko: Modal Anda bisa berisiko)
Cara mendaftar dengan broker Opsi Biner
Pada langkah-langkah berikut, kami akan menjelaskan kepada Anda cara mendaftar dan mendaftarkan akun perdagangan Opsi Biner Anda. Langkah-langkah ini serupa untuk setiap broker dan dapat Anda lakukan dalam beberapa detik.
Langkah 1 – Daftar dengan alamat email Anda

Untuk membuat akun, broker hanya meminta sedikit detail dari Anda. Anda bisa memulai dengan alamat email Anda atau profil media sosial seperti Google, LinkedIn atau Facebook. Dengan mendaftar melalui Email, Anda harus menambahkan kata sandi yang aman.
Langkah 2 – Konfirmasikan alamat email Anda
Langkah selanjutnya adalah mengkonfirmasi alamat email Anda. Setelah mendaftar, broker langsung mengirimkan Email ke pelanggan barunya.
Langkah 3 – Verifikasi data Anda

Sekarang, Anda harus mengisi data profil Anda: Ini termasuk nama depan, nama belakang, telepon, dan tanggal lahir Anda. Data ini diperlukan untuk verifikasi yang datang nanti. Pada kebanyakan broker, Anda dapat memulai tanpa verifikasi, namun ketika Anda mulai menarik keuntungan, broker Opsi Biner meminta verifikasi penuh dari Anda.
Verifikasi apa yang diperlukan untuk mendaftar dengan broker opsi biner online?
Verifikasi berikut diperlukan:
- Nama depan
- nama keluarga
- Tanggal lahir
- dokumen tanda pengenal
Dengan menyerahkan dokumen identitas, broker akan memeriksa data pribadi Anda dan mengonfirmasinya dengan profil Anda. Anda harus selalu menambahkan data yang benar ke akun Anda; jika tidak, Anda mungkin mengalami masalah dengan verifikasi dan penarikan.
Langkah pertama untuk kesuksesan binary options Anda:
- Pelajari dasar-dasar Binary Options. Informasi untuk trading Binary tersedia di platform broker atau di internet. Untuk pertanyaan, ada forum tertentu yang tersedia.
- Kembangkan strategi yang sukses. Sebagian besar pialang akan membantu Anda menemukan cara untuk berdagang dengan sukses.
- Gunakan akun Demo. Ini adalah akun dengan uang virtual. Jadi Anda berdagang tanpa mempertaruhkan pasar.
Anda harus bertanya pada diri sendiri pertanyaan-pertanyaan ini:
- Apa yang ingin saya capai dengan perdagangan Binary Options?
- Berapa banyak yang ingin saya investasikan?
- Di mana, dan di pasar mana saya ingin berdagang?
- Bagaimana saya bereaksi terhadap kerugian?
- Apa peluang untuk menang?
Negara yang tersedia untuk pedagang
Opsi Biner tidak diperbolehkan di semua opsi negara Di dalam dunia. Selain itu, beberapa negara melarang perdagangan menggunakan broker asing. Kebanyakan broker menerima trader internasional, namun ada batasan untuk negara terlarang. Anda tidak bisa menggeneralisasikannya karena brokerlah yang memutuskan pelanggan mana yang akan diterimanya.
Saat ini, Binary Options sebagai instrumen perdagangan menjadi semakin populer. Mereka adalah produk keuangan yang sederhana dan efisien. Dimungkinkan untuk menghasilkan pembayaran tinggi dalam waktu singkat. Asia dan Afrika berkembang sangat pesat dan orang-orang menyukai fungsi instrumen perdagangan ini. Broker dalam ulasan ini mencoba meningkatkan layanan mereka di wilayah dunia ini karena permintaan yang sangat tinggi. Mereka meningkatkan dukungan pelanggan mereka dengan berbagai bahasa dan layanan lainnya.
Negara dengan pertumbuhan tercepat:
(Peringatan risiko: Modal Anda bisa berisiko)
Penipuan broker Binary Options: Perhatikan di mana Anda mendaftar!
Di internet, Anda mungkin secara acak menemukan beberapa situs scammers atau broker yang buruk. Organisasi pemerintah AS, Kanada, Eropa, dan Australia telah menerbitkan artikel informasi tentang penipuan dan broker penipuan. Anda dapat memeriksa peringatan risiko penuh kami dengan informasi lebih lanjut di sini dan daftar hitam broker Binary Options!
Berikut adalah beberapa tips untuk memeriksa situs web broker sebelum mendaftar:
- Jangan percaya siapa pun yang menjanjikan keuntungan terjamin
- Periksa situs web untuk alamat perusahaan resmi
- Periksa otoritas regulasi broker
- Periksa rekam jejak broker – Berapa lama perusahaan ini berdiri?
- Kumpulkan informasi di situs web ulasan seperti https://www.binaryoptions.com/
Kau butuh belajar cara membela diri dari scammer biner. Mereka kebanyakan menargetkan pemula dalam trading. Di situs web ini, kami telah memberi Anda banyak tips tentang bagaimana Anda dapat memeriksa broker biner sebelum mendaftar. Selanjutnya, baca Daftar Hitam Broker Biner kami di sini!
Apa Broker Opsi Biner terbaik dengan pembayaran tertinggi?
Pembayaran yang tinggi pada broker Opsi Biner menghasilkan lebih banyak keuntungan dan peluang menghasilkan uang yang lebih tinggi. Rumusnya sederhana: Semakin tinggi pembayarannya, semakin sedikit perdagangan yang menang yang Anda perlukan untuk menghasilkan keuntungan secara keseluruhan.
Lihat daftar 3 broker opsi biner terbaik dengan pembayaran tertinggi:
- IQ Option – Hingga 100% + – Hasil dan penghasilan yang sangat tinggi
- Pocket Option – Hingga 97% + Dipercaya oleh ribuan trader di seluruh dunia
- Quotex – Hingga 95% + Broker teratas dengan pembayaran tinggi
(Catatan: Semua pembayaran bergantung pada aset dasar dan kondisi pasar. Ini dapat berubah dan berfluktuasi.) Seperti yang Anda lihat, IQ Option menawarkan pembayaran tertinggi, hingga 100%, namun bukan tempat 1 dalam perbandingan keseluruhan kami. Inilah sebabnya mengapa Pocket Option menawarkan lebih banyak fitur tambahan untuk memperdagangkan opsi biner.
Lihat video YouTube selengkapnya tentang broker Opsi Biner dengan bayaran tinggi:
Dengan memuat video, Anda menyetujui kebijakan privasi YouTube.
Belajarlah lagi
Apa alasan mengapa trader kalah di broker Binary Options?
Alasan paling umum mengapa trader kehilangan uang saat memperdagangkan Opsi Biner di broker adalah:
| Alasan kehilangan uang: | Penjelasan |
|---|---|
| 1. Kurangnya pengetahuan | Pemula sering kali cenderung memasuki pasar Opsi Biner tanpa pengetahuan atau rencana apa pun. Akibatnya mereka tidak tahu apa yang mereka lakukan. Dengan tidak memahami platform trading dan tidak memiliki strategi yang tepat, trader dengan cepat kehilangan semua uangnya. |
| 2. Broker Opsi Biner yang tidak dapat diandalkan | Alasan kedua kehilangan uang adalah platform tidak dapat diandalkan yang mencoba menipu pelanggan. Jadi berhati-hatilah saat memilih broker. Gunakan metode ulasan kami untuk menemukan yang terbaik. |
| 3. Tidak ada pengelolaan uang | Untuk sukses dengan platform perdagangan biner, Anda memerlukan strategi perdagangan. Pedagang yang menguntungkan membuat seperangkat aturan tentang kapan harus berdagang dan kapan tidak boleh berdagang. Tanpa strategi, hasil Anda didasarkan pada keberuntungan dan Anda dapat dengan cepat kehilangan semua uang Anda. |
| 4. Perdagangan emosional | Hindari perdagangan emosional dengan cara apa pun karena dapat menyebabkan keputusan yang buruk bagi dompet Anda! Selalu lakukan analisis teknis yang baik dan fokus pada data daripada emosi Anda. |
| 5. Tidak ada strategi perdagangan yang ketat | Strategi perdagangan diperlukan untuk berhasil dalam perdagangan biner. Pedagang yang menguntungkan membuat seperangkat aturan ketika mereka melakukan dan tidak melakukan perdagangan. Tanpa strategi, hasil Anda didasarkan pada keberuntungan dan Anda dapat dengan cepat kehilangan semua uang Anda. |
Pertukaran vs. OTC (over the counter) Broker Opsi Biner
Sekarang kami ingin membahas lebih detail tentang perbedaan antara broker bursa dan broker OTC.
Pialang pertukaran
Pialang bursa bertindak lebih seperti perantara tradisional. Peran utama mereka adalah menghubungkan penjual suatu aset dengan calon pembeli, dengan imbalan komisi. Dinamika pasar, seperti penawaran dan permintaan, menentukan harga. Jika penjual lebih banyak daripada pembeli, harga cenderung turun. Sebaliknya jika pembeli lebih banyak dibandingkan penjual maka harga cenderung naik.
Broker tersebut tetap netral mengenai hasil perdagangan. Mereka tidak menanggung risiko apa pun dalam perdagangan kecuali jika melibatkan kredit dan mendapatkan komisi, apa pun hasil perdagangannya. Dengan meminimalkan risiko broker, trader sukses sering kali memperoleh keuntungan lebih tinggi. Komisi, yang relatif kecil dibandingkan dengan besarnya perdagangan, tidak mempengaruhi pembayaran secara signifikan.
Broker OTC (Over the Counter).
Sebaliknya, broker OTC adalah hal yang umum, namun tidak sesuai dengan definisi tradisional tentang broker. Mereka bertindak sebagai pihak lawan perdagangan. Artinya ketika seorang trader membuka posisi, broker akan mendapat untung atau rugi, tergantung pada hasil perdagangan. Keuntungan broker hanya dijamin jika trader lain melakukan perdagangan yang berlawanan. Mengingat meningkatnya risiko, broker ini biasanya menawarkan pembayaran yang lebih rendah untuk mengimbangi beberapa risiko.
Perbedaan antara broker bursa dan broker OTC
Hasil dari, pembayaran dari broker OTC umumnya lebih rendah dibandingkan dengan broker bursa. Beberapa broker telah memperkenalkan mekanisme untuk memitigasi risiko lebih lanjut. Kesederhanaan opsi biner tetap ada pada broker OTC. Mereka juga mulai menawarkan fitur seperti nilai 'cash out' untuk opsi, memungkinkan pedagang menutup posisi lebih awal dan menetapkan stop loss. Seiring waktu, ketika fitur-fitur ini menjadi standar, kesenjangan antara OTC dan broker bursa mungkin menyempit.
Untuk saat ini, banyak pedagang mungkin merasakan manfaatnya berdagang di bursa, namun harus membiasakan diri dengan perbedaannya, mungkin menggunakan akun demo.
Biaya dan komisi broker Opsi Biner:
Selain mengetahui perbedaan antara broker bursa dan broker OTC, penting bagi Anda untuk memahami biaya dan komisi, karena ini adalah biaya yang Anda bayarkan kepada broker. Seperti yang Anda ketahui, semakin rendah biaya yang harus Anda bayarkan, semakin tinggi margin keuntungan yang dapat Anda peroleh dalam perdagangan biner jika Anda membuat prediksi yang tepat. Secara umum, biaya broker terdiri dari komisi perdagangan, yang bersifat tetap atau variabel. Spread, yaitu selisih antara harga beli dan jual, dibebankan per perdagangan dan bervariasi dari satu broker ke broker lainnya. Hal ini menjadikannya lebih penting untuk berbelanja untuk menghindari membayar biaya yang berlebihan.
Kami telah menganalisis biaya dan komisi dari broker yang ditampilkan di sini dan menimbangnya sesuai dengan itu. Itu biaya broker biner Pocket Option relatif rendah, menjadikan broker ini titik masuk yang baik ke dalam perdagangan biner bagi banyak orang.
Manfaat menggunakan beberapa broker Opsi Biner

Seperti yang baru saja Anda pelajari, struktur biaya dan penawaran berbeda secara signifikan dari satu broker ke broker lainnya, yang menghasilkan berbagai manfaat menggunakan beberapa broker opsi biner.
- Meskipun satu broker membebankan biaya yang relatif tinggi untuk aset tertentu, broker lain mungkin menawarkan aset yang sama untuk diperdagangkan dengan kondisi yang lebih menguntungkan. Terutama jika Anda memperdagangkan beberapa instrumen, disarankan untuk membandingkan biaya dari beberapa broker berulang kali.
- Kedua, manajemen risiko juga memainkan peran penting. Dengan menggunakan beberapa broker opsi biner, the risiko tersebar di beberapa platform. Misalnya, jika satu platform ditutup, Anda tidak mempertaruhkan seluruh uang Anda dan dapat melindungi diri Anda sendiri.
- Juga, broker yang berbeda memiliki akses ke bidang pengetahuan yang berbeda. Jadi jika Anda ingin menjadi pedagang biner dan memperoleh pengetahuan yang luas, umumnya disarankan untuk memiliki akun di beberapa broker untuk memanfaatkan peluang belajar dan memperdalam pengetahuan Anda.
Haruskah Anda menggunakan beberapa broker Opsi Biner?
Karena alasan yang disebutkan di atas, mungkin masuk akal untuk memilih beberapa broker opsi biner terkemuka. Namun pada akhirnya, harus dikatakan demikian mudah macet jika Anda memiliki beberapa akun dan ada risiko kehilangan jejaknya. Perdagangan juga tidak boleh terlalu rumit – kami menyarankan Anda untuk memilih 1-3 broker terbaik untuk memiliki akun. Yang terbaik adalah memilih broker yang teregulasi. Misalnya, Pocket Option diatur oleh IFMRRC, menawarkan kondisi yang sangat baik, dan oleh karena itu merupakan pilihan yang baik jika Anda mencari broker opsi biner yang dapat dipercaya.
Di broker mana saya bisa menggunakan robot Binary Options?
Dalam dunia perdagangan opsi biner, otomatisasi telah menjadi fitur yang banyak dicari. Banyak pedagang mencari cara untuk mengotomatiskan strategi perdagangan mereka untuk memaksimalkan efisiensi dan profitabilitas. Salah satu cara untuk mencapai hal ini adalah melalui penggunaan robot opsi biner. Ini adalah program perangkat lunak yang dirancang untuk mengeksekusi perdagangan secara otomatis berdasarkan kriteria yang telah ditentukan sebelumnya tanpa intervensi pedagang. Meskipun banyak broker menawarkan berbagai alat dan platform trading, tidak semua menawarkan opsi untuk menggunakan robot trading otomatis.
Mari kita lihat dua broker yang menawarkan fitur ini:
Deriv – Perdagangan otomatis dengan DBot

Deriv adalah rekomendasi yang jelas bagi siapa pun yang mencari broker opsi biner bagus yang memungkinkan perdagangan otomatis. Broker opsi biner ini memiliki platform bernama DBot yang memungkinkan para pedagang membuat robot perdagangan otomatis mereka sendiri. Mereka melakukan ini dengan menggunakan pembuat strategi drag-and-drop yang ada di platform mereka. Keuntungan menggunakan robot ini sangat besar. Ini memungkinkan Anda membuat strategi sendiri tanpa harus menulis kode apa pun. DBot berbasis web dan berjalan 24/7, bahkan saat komputer Anda dimatikan.
(Peringatan risiko: Modal Anda bisa berisiko)
Pocket Option – Berbagai robot perdagangan tersedia melalui pihak ketiga

Platform unggulan yang tidak memiliki robot perdagangan sendiri tetapi mengizinkan penggunaan robot perdagangan adalah Pocket Option. Di sini, pedagang dapat menemukan beberapa alat pihak ketiga untuk digunakan. Berbeda dengan Deriv, Anda tidak terikat dengan alat seperti DBot, tetapi dapat memilih bot mana yang akan digunakan. Pasar menawarkan berbagai alat, tidak semuanya memiliki reputasi baik, itulah sebabnya banyak orang mempertanyakan apakah robot Pocket Option adalah penipuan atau bukan.
Jawaban singkatnya adalah tidak semua robot adalah penipuan, namun Anda harus memberikan perhatian yang besar. Hal ini menjadikannya semakin penting untuk menemukan robot yang tepat untuk Pocket Option.
Setelah Anda menemukan robot Pocket Option yang bagus, Anda dapat mengotomatiskan perdagangan Anda dan fokus pada sisi strategis perdagangan, seperti pengelolaan uang atau menjalankan strategi manajemen risiko. Tentu saja parameter robot harus diatur dengan benar, yang harus selalu Anda perhatikan.
(Peringatan risiko: Modal Anda bisa berisiko)
Kesimpulan: Broker Binary Options terbaik adalah Pocket Option!
Menyimpulkan secara pasti bahwa broker tertentu adalah yang terbaik yang dapat Anda ikuti tidaklah mudah. Beberapa pengguna menyukai tata letak yang sederhana, sementara yang lain lebih suka memiliki semua data di layar mereka. Dengan kata lain, ini masalah selera pribadi.
Pocket Option dalam perbandingan kami adalah pilihan terbaik bagi para pedagang! Platform perdagangan opsi biner unik dan menawarkan banyak fungsi untuk analisis dan strategi perdagangan. Deposit dan penarikan bekerja sangat cepat tanpa biaya apapun. Selain itu, Anda dapat menggunakan akun demo Pocket Option gratis atau memulai hanya dengan $ 10! Dibandingkan dengan broker Opsi Biner lainnya, Pocket Option memiliki laba atas investasi tertinggi!
Namun demikian, platform perdagangan dapat bervariasi dalam hal kualitas. Platform yang memiliki tata letak sederhana dapat lebih atau kurang mudah digunakan dibandingkan.
Secara umum, broker opsi biner tepercaya yang menawarkan Opsi Biner dan CFD memiliki platform yang lebih banyak fitur.
Posting ini menyoroti semua pro dan kontra dari broker teratas di industri ini. Langkah Anda selanjutnya adalah mempersempit broker dan memilih broker yang paling cocok untuk Anda. Pilihan kami pasti Pocket Option, seperti yang Anda lihat dalam perbandingan kami!
Lihat daftar broker opsi biner teratas di sini: (lihat semua ulasan)
- Pocket Option
- Quotex
- IQ Option
- Turunan
- Opsi Pakar
- Perdagangan Olymp
- Binarycent
- Opsi Balap
- Binarium
- Exnova
(Peringatan risiko: Modal Anda bisa berisiko)
Pertanyaan yang sering diajukan tentang broker Binary Options:
Di mana saya bisa melakukan perdagangan biner? Di mana untuk memperdagangkan Binary Options?
Anda dapat memperdagangkan opsi biner dengan mendaftar di opsi biner broker terbaik yang memungkinkan perdagangan tanpa batasan. Anda dapat menemukan broker yang tepat dengan membaca panduan kami di atas dan membaca ulasan broker opsi biner. Broker opsi biner terbaik disajikan kepada Anda di situs web ini.
Broker Binary Options mana yang terbaik?
Platform perdagangan biner yang bagus menawarkan fasilitas unik dan memiliki kelemahan unik. Selanjutnya, pedagang memiliki kebutuhan yang berbeda, dan apa yang terbaik untuk satu pedagang mungkin tidak bekerja untuk pedagang lain.
Untuk menemukan broker Binary Options terbaik, perhatikan fitur yang tidak dapat Anda lewatkan, dan temukan broker yang menawarkan setiap fitur yang Anda inginkan. Dari perbandingan kami, Quotex adalah broker biner terbaik karena menawarkan hasil tinggi, banyak aset, dan platform yang ramah pengguna.
Bagaimana Anda tahu jika broker Binary Options itu sah?
Cara terbaik untuk mengetahui apakah broker itu sah adalah dengan memastikannya diatur. Pengawasan peraturan memastikan bahwa uang Anda masuk ke tangan yang tepat, mengurangi risiko penipuan.
Jika broker tidak diatur, itu tidak menunjukkan bahwa itu tidak sah. Banyak pialang terkenal menghindari peraturan sehingga mereka dapat menawarkan lebih banyak aset kepada pedagang.
Broker mana yang memiliki Binary Options?
Tidak setiap broker menawarkan Binary Option – beberapa hanya menawarkan pasangan forex sementara yang lain menawarkan CFD. Saat mencari broker untuk memperdagangkan Binary Option, periksa aset yang ditawarkannya dan pastikan itu memungkinkan perdagangan Binary Option.
Apa yang dianggap sebagai pembayaran broker Opsi Biner yang tinggi?
Kisaran pembayaran Opsi Biner adalah antara 50 – 100%. Pembayaran Opsi Biner yang tinggi dapat dianggap di atas 90%. Tidak semua broker menawarkan ketentuan ini.
Perusahaan apa yang terbaik untuk mendapatkan uang Anda kembali dari broker Binary Options yang menipu?
Tidak ada perusahaan terbaik untuk mendapatkan uang Anda kembali; perusahaan-perusahaan ini sering kali merupakan penipuan, jadi berhati-hatilah! Kami menyarankan Anda untuk melakukan pengisian ulang oleh bank atau penyedia pembayaran Anda untuk mendapatkan uang Anda dikembalikan.
Bagaimana Broker Opsi Biner menghasilkan uang?
Broker opsi biner biasanya menghasilkan uang dengan spread dan komisi. Biaya platform dibebankan setiap kali perdagangan dieksekusi. Beberapa juga membiayai diri mereka sendiri melalui langganan bulanan atau penawaran lain, seperti sumber belajar tingkat lanjut dengan biaya tertentu.