Índia, como China, é o segundo país mais populoso do mundo. Houve um desenvolvimento gigantesco no comércio baseado na web em nível mundial, e a Índia não fica atrás. Desde a introdução do comércio binário na Índia, opções binárias como Quotex ganharam destaque na Índia rapidamente.

No entanto, com mais financiadores precisando colocar recursos no Quotex, a Índia tem mais indivíduos desinformados sobre o uso de opções binárias e regularmente perguntas do Google como 'O comércio binário é legal na Índia?'
Um guia passo a passo para negociar opções binárias na Índia
O que você vai ler neste Post
Se você estiver interessado em negociação de opções binárias, o primeiro e mais crucial passo é se familiarizar com as principais plataformas de corretores de opções binárias da Índia.
#1 Escolha um corretor de opções binárias disponível na Índia
Primeiro, você precisa escolher uma plataforma de corretor on-line disponível que permita aos indianos negociar opções binárias. Antes de selecionar um corretor, é essencial estudá-lo bem. Certifique-se de escolher uma plataforma confiável onde você não terá problemas para coletar seus ganhos. Em segundo lugar, cada plataforma tem um conjunto diferente de regras e regulamentos. Portanto, você deve estar completamente familiarizado com os regulamentos.
Aqui estão algumas das melhores plataformas de corretores para indianos:
Mais de 100 mercados
- Min. depósito $10
- $10,000 demo
- Plataforma profissional
- Lucro alto até 95%
- Retiradas rápidas
- Sinais
Mais de 300 mercados
- Depósito mínimo $10
- Conta de demonstração gratuita
- Alto retorno até 100% (no caso de uma previsão correta)
- A plataforma é fácil de usar
- Suporte 24/7
Mais de 100 mercados
- Plataforma profissional
- Conta de demonstração gratuita
- Depósito mínimo $10
- Webinars e educação
- Pagamentos altos
Mais de 100 mercados
- Aceita clientes internacionais
- Pagamentos elevados 95%+
- Plataforma profissional
- Depósitos rápidos
- Negociação Social
- Bônus grátis
Mais de 100 mercados
- Min. depósito $10
- $10,000 demo
- Plataforma profissional
- Lucro alto até 95%
- Retiradas rápidas
- Sinais
a partir de $10
(Aviso de risco: negociar é arriscado)
Mais de 300 mercados
- Depósito mínimo $10
- Conta de demonstração gratuita
- Alto retorno até 100% (no caso de uma previsão correta)
- A plataforma é fácil de usar
- Suporte 24/7
a partir de $10
(Aviso de risco: seu capital pode estar em risco)
Mais de 100 mercados
- Plataforma profissional
- Conta de demonstração gratuita
- Depósito mínimo $10
- Webinars e educação
- Pagamentos altos
a partir de $10
(Aviso de risco: negociar é arriscado)
Mais de 100 mercados
- Aceita clientes internacionais
- Pagamentos elevados 95%+
- Plataforma profissional
- Depósitos rápidos
- Negociação Social
- Bônus grátis
a partir de $50
(Aviso de risco: negociar é arriscado)
#2 Inscreva-se para uma conta de negociação

Depois de escolher o corretor correto, a próxima fase é criar uma conta online para negociação de opções binárias. O procedimento padrão ao registrar uma conta requer alguns detalhes típicos do titular da conta. Os detalhes podem incluir nome, sobrenome, número de telefone, ID de e-mail, senha, país de residência e assim por diante.
A negociação de opções binárias é desaprovada em muitos países porque é fácil ser enganado por essas plataformas. É por isso que a maioria dos corretores tem medidas de segurança rígidas em relação à verificação da conta. Normalmente, uma imagem digitalizada, uma foto ou um comprovante de identidade são solicitados para concluir o processo de verificação.
(Aviso de risco: seu capital pode estar em risco.)
#3 Use demo ou conta ativa

Agora que você sabe como registrar sua conta de negociação, o 3º passo envolve a escolha do tipo de conta. Uma conta demo e uma conta genuína são as 2 categorias de contas disponíveis.
A maioria das plataformas de corretores oferece as duas opções. Antes de fazer sua escolha, vamos falar um pouco sobre os tipos de conta. A conta demo é a que recomendamos fortemente. Ao usar um Conta demo de opções binárias, você não precisa usar dinheiro real, mas virtual. Como a conta demo ajuda a evitar riscos financeiros, esta é a melhor maneira de aprender e praticar a negociação binária. Você pode estudar, analisar e implementar seu aprendizado sem nenhum prejuízo financeiro.
Agora vamos falar sobre contas ao vivo. Uma conta real é onde você usa dinheiro real em tempo real. Isso significa que, em termos de lucro ou perda, seu próprio dinheiro real está envolvido.
#4 Escolha um ativo para negociar

Um ativo pode ser ações, moedas, commodities, índices, etc. Os preços desses ativos não são fixos. O trader, ou seja, você deve prever em que direção o preço se moverá - para cima ou para baixo. Com base na precisão de sua previsão, você ganha ou perde dinheiro. A fase mais importante do procedimento é selecionar o ativo correto.
Para fazer as previsões corretas, você deve ter um conhecimento profundo dos fatores que influenciam os preços dos ativos.
(Aviso de risco: seu capital pode estar em risco.)
Supostamente, para negociar ações, você terá que estar ciente de toda e qualquer informação relevante. Essas informações incluem dados estatísticos, desempenho atual da empresa, atualizações sobre seus concorrentes, notícias geopolíticas e corporativas e assim por diante.
Se você planeja negociar commodities, a mesma regra se aplica. Você deve ter uma compreensão adequada de como a mercadoria se comporta em diferentes circunstâncias, e o papel dos vários fatores de influência também deve ser estudado.
Sugerimos que você entre em contato com um especialista em negociação experiente para aprender tudo o mais completamente possível. É aconselhável iniciar sua jornada de negociação com uma conta demo, pois você não perderá dinheiro real aqui e poderá praticar bem.
#5 Faça uma análise

O mundo do trading é curioso. Toneladas de dinheiro são ganhas ou perdidas com apenas um clique. É por isso que os especialistas estão tentando desenvolver padrões e indicadores para orientar os comerciantes na previsão do resultado. O único propósito da análise é detectar padrões no comportamento do mercado.
Esta análise é feita através do estudo de vários indicadores de mercado. Esses indicadores técnicos de opções binárias ajudam a reconhecer os movimentos do mercado.
#6 Coloque o comércio

Depois de entender o método de como ele realmente funciona, é hora de colocar a negociação. Colocar a negociação significa que você escolheu sua previsão em relação ao preço de impacto, o que significa que você decidiu se o preço do ativo aumentará ou diminuirá dentro de um determinado período de tempo.
#7 Aguarde o resultado

O resultado é conhecido apenas quando o prazo expirou e o preço é revelado. Dependendo disso, você pode determinar se sua previsão estava correta ou incorreta.
(Aviso de risco: seu capital pode estar em risco.)
Fatos importantes para saber sobre negociação de opções binárias
A negociação binária inclui executando trocas que permitem que você aproveite as oscilações de valor de diferentes recursos, incluindo mercadorias, estoques, listas e formulários monetários.

Como um comerciante de opções binárias, você executa uma negociação que depende se você calcule o custo do recurso e terminam acima ou abaixo de um determinado custo em um determinado período de tempo, conhecido como terminação. Esta situação básica de sim/não torna o binário extremamente simples de negociar, o que é não é difícil de executar. Posteriormente, vários financiadores esperam atualmente negociar alternativas binárias na Índia.
(Aviso de risco: seu capital pode estar em risco)
As opções binárias são legais na Índia ou não?
Em contraste com várias nações diferentes, o comércio binário é ilegal na Índia. De acordo com as regras dadas pelo Banco de Reserva da Índia, negociação binária ou qualquer tipo de negociação baseada na web não é legítimo na Índia.
O local da diretriz na Índia é obrigado pelo RBI e Securities and Exchange Board da Índia (SEBI), que não continue colocando recursos em negociação binária na Índia.
A Lei de Câmbio e Gestão (FEMA) diz que os corretores binários ou forex precisam ser autorizados na Índia por meio de passagens comerciais eletrônicas ou on-line. Os cidadãos indianos ainda podem usar corretoras no exterior porque não existe uma lei explícita que o proíba. Portanto, qualquer patrocinador monetário que assuma o comércio binário na Índia o faz por sua própria conta e risco, com nenhuma lei para coordenar as negociações de decisões de negociação binária na Índia.
Existe uma punição para o comércio binário na Índia?
Não, não há punição para o comércio binário na Índia. A negociação de opções binárias não é regulamentada na Índia e não há lei ou regulamento contra ela pelo Indian Securities and Exchange Board of India (SEBI). Você não pode ser punido usando um corretor binário porque é por sua conta e risco. No entanto, as leis podem mudar no futuro.
(Aviso de risco: seu capital pode estar em risco)
Os 4 melhores corretores e sites de opções binárias na Índia
Você já imaginou quais corretores são legais na Índia? Mostramos não apenas os fornecedores legais, mas também o melhor deles:
Vamos discutir os corretores em detalhes:
Mais de 100 mercados
- Min. depósito $10
- $10,000 demo
- Plataforma profissional
- Lucro alto até 95%
- Retiradas rápidas
- Sinais
Mais de 300 mercados
- Depósito mínimo $10
- Conta de demonstração gratuita
- Alto retorno até 100% (no caso de uma previsão correta)
- A plataforma é fácil de usar
- Suporte 24/7
Mais de 100 mercados
- Plataforma profissional
- Conta de demonstração gratuita
- Depósito mínimo $10
- Webinars e educação
- Pagamentos altos
Mais de 100 mercados
- Aceita clientes internacionais
- Pagamentos elevados 95%+
- Plataforma profissional
- Depósitos rápidos
- Negociação Social
- Bônus grátis
Mais de 100 mercados
- Min. depósito $10
- $10,000 demo
- Plataforma profissional
- Lucro alto até 95%
- Retiradas rápidas
- Sinais
a partir de $10
(Aviso de risco: negociar é arriscado)
Mais de 300 mercados
- Depósito mínimo $10
- Conta de demonstração gratuita
- Alto retorno até 100% (no caso de uma previsão correta)
- A plataforma é fácil de usar
- Suporte 24/7
a partir de $10
(Aviso de risco: seu capital pode estar em risco)
Mais de 100 mercados
- Plataforma profissional
- Conta de demonstração gratuita
- Depósito mínimo $10
- Webinars e educação
- Pagamentos altos
a partir de $10
(Aviso de risco: negociar é arriscado)
Mais de 100 mercados
- Aceita clientes internacionais
- Pagamentos elevados 95%+
- Plataforma profissional
- Depósitos rápidos
- Negociação Social
- Bônus grátis
a partir de $50
(Aviso de risco: negociar é arriscado)
#1 Quotex
Quotex é uma corretora de opções binárias que trabalha com clientes internacionais. Esta plataforma chega ao mercado em 2020. Permite negociação fácil e oferece uma ampla gama de ativos de negociação.

Awesomo Ltd., com sede em Seychelles, possui Quotex, que é regulado por uma autoridade reguladora independente – The International Financial Market Relations Regulation Center (IFMRRC). Esta plataforma oferece serviços em todos os países. Você pode começar a negociar com um depósito mínimo de $10.
(Aviso de risco: seu capital pode estar em risco)
Opção IQ #2
O comércio online plataforma IQ Option é um dos principais corretores de opções binárias e o melhor aplicativo de negociação binária na Índia. A plataforma foi criada em 2013 e oferece uma ampla variedade de instrumentos de negociação.

O corretor online recebeu muitos prêmios e reconhecimento por suas características e serviços. A empresa foi introduzida como uma corretora de opções binárias, mas agora também oferece negociação de CFDs, Ações, Forex, etc.
A plataforma é acessível em smartphones e desktops. Comerciantes de mais de duzentos países podem acessar IQ Option. Nesta plataforma, mais de um milhão de transações ocorrem todos os dias.
(Aviso de risco: seu capital pode estar em risco)
#3 Olymp Trade
Olymp Trade é uma plataforma de negociação online que foi introduzida no ano de 2014. A plataforma oferece uma ampla gama de ativos e recursos que a diferenciam de outras plataformas de prestação de serviços financeiros. Mais de 20.000 usuários negociam com Olymp Trade todo dia. A plataforma oferece gratuitamente conta de demonstração para cada comerciante que se inscrever com eles.
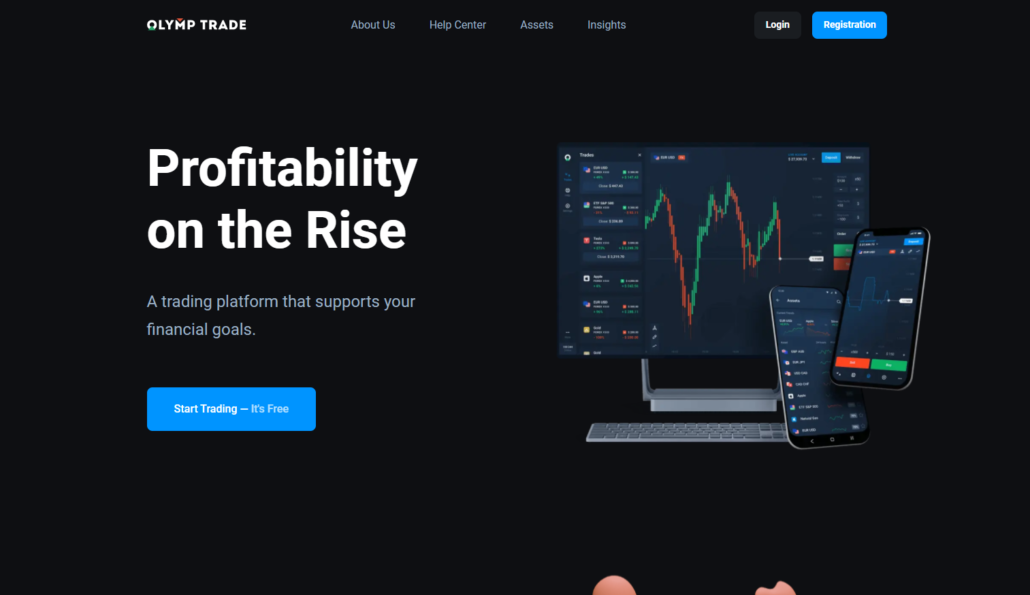
Olymp Trade é um membro da comissão financeira. Fornece serviços de alta qualidade; a plataforma oferece excelente suporte aos seus traders.
(Aviso de risco: seu capital pode estar em risco)
Opção de bolso #4
É um dos Melhores plataformas de opções binárias estabelecido em 2017. Opera sob a empresa denominada Gembell Ltda., localizado nas Ilhas Marshall.

Centro de Regulamentação das Relações com o Mercado Financeiro Internacional (IFMRRC) controla esta plataforma.
(Aviso de risco: seu capital pode estar em risco)
Regras e regulamentos de opções binárias na Índia
Embora seja uma paixão entre o comércio on-line indiano na área local sobre se é ilegal negociar opções binárias na Índia, na verdade falando, a resposta apropriada é um básico "Não".
Ao contrário do comércio binário na Índia, que O Securities and Exchange Board da Índia controla firmemente, existem sem limitações legais comparáveis forçado na negociação de opções binárias indianas. Devido à ausência de empresas de controle privado, muitos comerciantes na Índia dependem da administração de agentes marítimos, alguns dos quais são dirigidos e outros não regulamentados.

Para ter uma compreensão superior das questões administrativas que envolvem o comércio on-line, vejamos o cenário administrativo do negócio monetário com mais detalhes. Os principais órgãos administrativos responsáveis pela gestão do negócio monetário na Índia são os Banco de Reserva da Índia (RBI) e o Securities and Exchange Board da Índia (SEBI).
(Aviso de risco: seu capital pode estar em risco)
O banco de reserva da Índia regras sobre negociação de opções binárias
O RBI é o Banco Central da Índia e assume um papel imperativo na execução das abordagens financeiras da Índia. Além disso, funciona como um controlador e gerente da indústria financeira da Índia, especialmente as áreas financeiras.

Mais uma capacidade chave do RBI é a conselho de controle comercial, explicitamente o aumento de rúpias indianas fora do país para trabalhar com parcelas de negociação e acompanhar a estabilidade do mercado cambial na Índia.
O conselho de valores mobiliários e de câmbio da Índia destaca as opções legais para binárias
Criado em 1988, SEBI vai sobre como o controlador para o índio mercados de proteção. Sua importante obrigação foi retratada como “… garantir os interesses dos financiadores em proteções e avançar no aprimoramento e gestão do mercado de proteções e para a questão associada a essa ou coincidente a”.

A SEBI, de qualquer forma, assume três partes como órgão administrativo para o mercado de proteções indiano. Acontece como um órgão semi-administrativo, semi-chefe e semi-legal. Em sua função semiadministrativa, a SEBI elabora os pré-requisitos administrativos do negócio. Em seu trabalho de liderança, a SEBI realiza exames e faz um movimento de autorização. Enfim, em seu limite legal, o SEBI faz decisões legítimas que a empresa precisa submeter a. Com cada uma das três capacidades transferidas para um corpo, isso torna o SEBI um corpo administrativo muito surpreendente.
A negociação de opções binárias na Índia é excepcionalmente limitado porque o RBI está tentando controlar o derramamento de INR, tentando diminuir o atual déficit recorde do país. Com o binário, você está gerenciando conjuntos de dinheiro. Para um corretor indiano, isso implica negociar o INR para USD ou EUR.
Dê uma olhada:
Assim, para parar este surto de INR fora do país, o RBI decidiu que a troca de binários on-line pode levar os corretores indianos a desconsiderar a Lei de Gerenciamento de Câmbio Estrangeiro (FEMA). Como resultado, o único caminho indiano corretores pode trocar binário é quando os conjuntos de dinheiro que eles trocam são combinados com o INR.
Métodos de depósito disponíveis na Índia para negociação binária
Na Índia, devido às limitações impostas à retirada das rupias indianas pelo RBI, os comerciantes precisam determinar por que estão transmitindo dinheiro para fora do país.
O que fazer se você se envolver em um esquema de negociação de opções binárias na Índia?
Sem leis ou regras para supervisionar a negociação de opções binárias na Índia, os financiadores relacionados à negociação na Índia fazem isso por sua conta e risco. Há nenhuma correção legítima aberta a um truque comercial de negociação binária na Índia. Muitos interfaces baseadas na web falsas enganar as pessoas e acabar levando seus dados e dinheiro.

É absolutamente impossível saber se as apostas que você coloca em estágios binários são genuínas ou não. Eles foram contabilizados para casos de controle de programação mutilar custos e pagamentos. Além disso, recusando-se a retornar reservas de clientes, tais estágios deram suas áreas geográficas, sem dúvida quebrar todo o contato com os clientes. No entanto, ainda assim, muitos indivíduos capitularam consistentemente. Por quê?
A resposta adequada está na anúncios por meio de mídia on-line e arranjos de artigos. Esses anúncios os levarão a um plano e sites de especialistas. Portanto, é uma solicitação séria não administrar nenhuma empresa de administração monetária que os especialistas indianos não aprovem.
Verifique cada pequeno insight em relação ao elemento com o controlador antes de fazer qualquer escolha de especulação. A simples apresentação de logotipos administrativos em seus sites não é suficiente.
Métodos de pagamento para comerciantes na Índia

Simplificando, qualquer que seja o método que você escolher para depositar na conta offshore, o pagamento será feito da mesma maneira.
Como fazer depósitos e saques?
Antes de escolher um método, você deve selecionar a moeda que usará para as transações. Depois de escolher a moeda, você não poderá alterá-la. Devido às restrições impostas pelo RBI à saída de rúpias indianas, os comerciantes devem informar especificamente por que estão movimentando o dinheiro.
Os métodos a seguir são geralmente escolhidos para fins de depósito e retirada.
- Cartões de Débito ou Crédito – MasterCard, VISA
- E-Wallets – Skrill, Perfect Money, GlobePay, Webmoney, Advcash,
- UPI, Netbanking, Rupay
- Depósito BTC (você pode convertê-lo em dinheiro fiduciário)
(Aviso de risco: seu capital pode estar em risco.)
Prós e contras de negociar opções binárias na Índia
Os prós da negociação de opções binárias são:
- É um compromisso financeiro curto.
- Para negociar em opções binárias, você não precisa de muito dinheiro para investir. O depósito mínimo pode ser tão baixo quanto 10 dólares.
- Forte potencial para altos retornos em baixos investimentos
- Com contas demo, você pode praticar e aprender muito sobre negociação. Depois, com dinheiro real, as chances de seu lucro serão muito maiores.
- De acordo com muitos, a negociação de opções binárias é certamente tão complexa quanto a negociação forex. Portanto, a simplicidade do comércio é definitivamente um bônus adicional.
- O risco envolvido é claro e limitado. Você sabe a quantidade exata que vai perder. Então, você tem o escopo de tomar a decisão de seguir em frente ou não. Isso é chamado de risco fixo.
Os contras da negociação de opções binárias são:
- O número de corretores continua subindo e, no entanto, a maioria deles não é regulamentada. Portanto, a confiabilidade dos corretores é definitivamente uma questão.
- É um verdadeiro desafio encontrar um corretor confiável. É frequentemente visto que os comerciantes estão enfrentando problemas na coleta de seus ganhos. Como esses corretores estão localizados no exterior, é quase impossível rastreá-los.
- Quase sempre há uma limitação envolvida no uso das contas demo. A maioria dos corretores oferece apenas algumas negociações de contas demo, o que definitivamente não é suficiente para aprender o jogo.
Conclusão
Os três estágios principais IQ Option, Quotex e Pocket Option são decisões incríveis quando escolher um estágio de negociação binário. Você pode até perseguir cada um deles e ter vários registros para utilizar. Além disso, eles têm contas demo com ativos virtuais que você pode usar para preparação adicional e aprimorar suas habilidades de troca.

Há sem perigos implícitos ou encargos para utilizar a conta demo para testar suas habilidades enquanto descobre como os estágios funcionam. Todos eles tem materiais educativos que você precisa explorar e aprender o máximo que puder sobre negociação binária. Isso até incorpora exercícios instrucionais em vídeo gratuitos. Examine as auditorias totais sobre eles em nosso site e, então, faça sua escolha.
(Aviso de risco: seu capital pode estar em risco)
Perguntas frequentes (FAQs) sobre opções binárias na Índia:
O comércio binário é regulamentado na Índia?
Não, não é regulamentado na Índia.
Como negociar opções de binários na Índia?
Para fazer negócios na Índia, os comerciantes indianos precisam se inscrever em um corretor de opções binárias offshore. Infelizmente, não há empresas locais na Índia que prestem esses serviços.
É legal negociar opções binárias na Índia?
O comércio binário é proibido na Índia, com exceção de várias outras nações. A negociação binária ou qualquer tipo de moeda negociada em bolsa on-line não é autorizada na Índia, de acordo com os regulamentos do RBI.
Na Índia, qual é a penalidade por negociar opções binárias ilegalmente?
Se a pessoa negociasse ilegalmente, a pessoa seria penalizada no máximo em 10000INR para o dia específico em questão. Juntamente com uma multa inicial de 10000INR, a mesma multa para cada dia adicional de infração pode ser imposta.
Se a pessoa negociasse ilegalmente, a pessoa seria penalizada no máximo em 10000INR para o dia específico em questão. Juntamente com uma multa inicial de 10000INR, a mesma multa para cada dia adicional de infração pode ser imposta.


