
Focus Option incelemesi – Dolandırıcılık mı değil mi? – Broker testi
- Kripto seçenekleri
- Çoklu ödeme yöntemleri
- 88%+'a kadar yüksek kar
- Kullanıcı dostu arayüz
- Kişisel destek
- Hızlı kayıt
Ticaretten bahsetmişken, kripto para piyasası hızla büyüyor. Aslında dijital varlıkların kolayca ticaretini yapmanın harika bir yolu olarak ortaya çıktı. Ancak ikili kripto ticaretinin popülaritesiyle birlikte, ticaretine izin veren platformların sayısı da arttı. Bu yüzden, doğru olanı seçmek o kadar kolay değil.
Ancak endişelenmeyin çünkü piyasayı iyice analiz ettik ve en iyi ticaret platformunu bulduk. Focus Option denir. Bu olağanüstü platformun kullanımı kolaydır ve kısa sürede yatırımcıların favorisi haline gelmiştir.
Bu platform hakkında daha fazla bilgi edinmek için okumaya devam edin.

(Risk uyarısı: Sermayeniz risk altında olabilir)
Focus Option hakkında kısa bilgiler:
| ⭐ Derecelendirme: | (5 / 5) |
| ⚖️ Düzenleme: | ✖ (düzenlenmemiş) |
| 💻 demo hesap: | ✔ (mevcut, sınırsız) |
| 💰 Minimum depozito | 10$ |
| 📈 Minimum ticaret: | 1$ |
| 📊 Varlıklar: | 40+ Döviz çifti, 20+ Kripto para birimi, 60+ Emtia, Hisse Senedi ve Endeks |
| 📞 Destek: | Telefon, sohbet, e-posta yoluyla 5/24 müşteri desteği |
| 🎁 Bonus: | Kullanılabilir bonus yok |
| ⚠️ Teslim olmak: | 88%+'a kadar |
| 💳 Para yatırma yöntemleri: | Kredi kartları (MasterCard, Vize Kartları), banka kartları, kripto para birimleri (Bitcoin, USDT ve daha fazlası), Banka havaleleri, Yerel ödeme yöntemleri, e-cüzdanlar |
| 🏧 Para çekme yöntemleri: | Kredi kartları (MasterCard, Visa Card), Banka kartları, Kripto para birimleri (Bitcoin, USDT ve daha fazlası), Banka havaleleri, Yerel ödeme yöntemleri, Elektronik cüzdanlar |
| 💵 Ortaklık programı: | Mevcut |
| 🧮 Ücretler: | Depozito ücreti yok. Para çekme ücreti yok. Spreadler ve komisyonlar geçerlidir. Hiçbir gizli ücret. |
| 🌎Diller: | İngilizce, Portekizce, İspanyolca, Japonca, Malezyaca |
| 🕌 İslami hesap: | Müsait değil |
| 📍 Merkez: | Saint Vincent ve Grenadinler |
| ⌛ Hesap etkinleştirme süresi: | 24 saat içinde |
(Risk uyarısı: Sermayeniz risk altında olabilir)
Bu Yazıda Okuyacaklarınız
Focus Option hakkında tam inceleme videomuza bakın:

Videoyu yükleyerek YouTube'un gizlilik politikasını kabul etmiş olursunuz.
Daha fazla bilgi edin
(Risk uyarısı: Sermayeniz risk altında olabilir)
Focus Option nedir? Broker sundu:
Focus Option yeni bir ikili opsiyon komisyoncusu, 2021'de kurulduğundan. Bu, bazı kişilerin bu brokerin sunduğu şeylerden şüphe etmesine neden olabilir. Şirketin merkezi St. Vincent ve Grenadinler'de bulunmaktadır. Yeni kurulduğu için, başladığından beri bu komisyoncuya ulaşan çok fazla müşteri olmadı. İkili komisyoncu, uluslararası düzenleme kapsamında olmadığı için hala meşruiyet göstermiyor. Lisanslama organizasyonunun olmaması, komisyoncunun platformunu ticaret konusunda şüpheci kılar.
Ancak tüccarlar, alım satım varlıklarının miktarı eski ve popüler forex brokerlerinin miktarıyla eşleşmese de çoklu alım satım erişimine erişime sahiptir. Yatırımcılar, ticaret platformunun basit tasarımı sayesinde ticaret varlıklarına kolayca erişebilir. Platform kullanıcı dostudur ve kullanıcıların anlamasını sağlar.
Focus Option yeni bir broker olmasına rağmen, mevcut platformlar oldukça etkileyici ve müşteri desteği bu makalenin ilerleyen kısımlarında ele alınacak olan farklı şekillerde geliyor. Daha fazla gecikmeden, bu forex broker platformunun özelliklerine bakalım. Focus Option, daha çok bir ikili opsiyon ve CFD tabanlı ticaret platformudur.
Artıları:
- Focus Option ile ilgili en iyi şey, 80'den fazla kripto para birimi sunmasıdır.
- Tüccarlar birden fazla vade süresi arasından seçim yapabilir
- Piyasayı doğru tahmin etmek için 95% ödemeleri beklenebilir
- Ticaret hesabı Bitcoin ve Crypto ile finanse edilebilir
- Para çekme işlemi 24 saat içinde işlenir
- Minimum depozito $10
Eksileri:
- Tek dezavantajı, ikili opsiyon demo hesabı 30 gün geçerlidir.
(Risk uyarısı: Sermayeniz risk altında olabilir)
Focus Option düzenlenmiş mi? komisyoncu güvenliği
Düzenleme, herhangi bir ikili opsiyon komisyoncusu için önemli bir değerlendirme kriteridir. Ne yazık ki, Focus Option düzenlenmemiştir, bu bir dezavantajdır. Focus Option, 2021'de yeni başlayan bir komisyoncudur ve henüz onu denetleyen bir finansal lisanslama şirketi yok. Tüccarların fonlarının komisyoncudan ayrı bir hesapta tutulacağına dair bir garanti yoktur.
Ancak testi yaptık. Focus Option'de tüm karlar anında ödendi ve kısa bir süre sonra para çekme hesabına geçti. Diğer tüccarlar da bildirdi Focus Option ile olumlu deneyimler. Ticaret platformu şifrelidir ve bilgisayar korsanlığını ve diğer dolandırıcılık türlerini önlemek için elinden gelenin en iyisini yapar.
Tabii ki, bir tüccarın güvende olduğunu garanti eden en iyi şey, komisyoncunun bir uluslararası otoritelerden lisans gibi CySEC, BaFin, FCA, ve ASIC. Belki gelecekte, komisyoncu uygun düzenlemeye tabi olacaktır.
Güvenlikle ilgili tüm gerçekleri görün:
| Düzenleme: | Numara |
| SSL: | Evet |
| Veri koruması: | Evet |
| 2 faktörlü kimlik doğrulama: | Evet |
| Düzenlemeye tabi ödeme yöntemleri: | Evet, mevcut |
| Negatif bakiye koruması: | Evet |
Focus Option'yi seçmeli misiniz? Alım satım tekliflerine ve varlıklara genel bakış

Evet, bu yeni broker ticaret yapmanıza izin verdiği için Focus Option'yi seçmelisiniz kripto ikili seçenekleri ve CFD'ler. 80'den fazla kripto opsiyon çifti arasından seçim yaparak onları bu alandaki en iyi brokerlardan biri haline getirebilirsiniz. Ayrıca, tüccarlar ayrıca rekabetçi ödemeler ve sorunsuz kullanabilecekleri kullanıcı dostu bir platform elde eder.
Focus Option'yi kendi alanında mutlak en iyi yapan şey demo hesabı, $10,000 ile birlikte gelmesidir. sahte para. Demo hesabı, Litecoin, Ethereum, Bitcoin ve daha fazlası dahil olmak üzere 80'den fazla kripto para biriminde işlem yapma fırsatı sunar.
Ayrıca, demo hesap ayrıca 140'ın üzerinde teklif sunar. ikili ticaret araçları böylece gerçek benzeri bir deneyim elde edebilirsiniz. Para çekme veya para yatırma işlemlerinde herhangi bir komisyon ödemeden parayı hızlı bir şekilde çekebilirsiniz. En yüksek ödemeyi kazanmak istiyorsanız, sadece 95%'ye kadar ödeme sunduğu için bu platformu seçmelisiniz.
ilginç olan şu ki ikili broker tatmin edici müşteri hizmetleri ve kripto para birimleri sunar. Bu işlem platformunun destek ekibi, herhangi bir zorlukla karşılaşmamanız için her zaman size yardımcı olmaya hazırdır.
Focus Option teklifleri hakkında kısa bilgiler:
| Minimum ticaret miktarı: | $1 |
| Ticaret türleri: | İkili Opsiyonlar, dijital opsiyonlar |
| Son kullanma süresi: | 60 saniyeden 4 saate kadar |
| Piyasalar: | 120+ |
| Döviz: | Evet |
| emtialar: | Evet |
| Endeksler: | Evet |
| Kripto para birimleri: | Evet |
| Hisse senetleri: | Evet |
| İşlem başına maksimum getiri: | 88%+'a kadar |
| Uygulama vakti: | 1 ms (gecikme yok) |
(Risk uyarısı: Sermayeniz risk altında olabilir)
Focus Option'yi daha iyi yapan nedir?
Başka birçok ticaret platformu olduğu için, Focus Option'yi neyin daha iyi bir seçim yaptığını sormak yaygındır. Bu ticaret komisyoncusu, müşterilerin daha iyi ödemeler elde etmesine yardımcı olmak için tasarlandığından diğerlerinden farklıdır.
Focus Option, müşteriler hakkında daha fazla düşünen müşteri odaklıdır. Güvenli ticaret sistemi, herhangi bir üçüncü tarafın tüccarın bilgilerini çalmasına izin vermez. Ayrıca, tüccarların fonları, bilgisayar korsanlarının onları çalma riski olmadan güvenli bir şekilde tutulur.

Focus Option'yi daha iyi bir seçenek yapan şey:
(Risk uyarısı: Sermayeniz risk altında olabilir)
1. Yenilik
Focus Option'nin son derece yetenekli ekibi, platform için yeni özellikler sunabilmek için sürekli çalışır. Sürekli yenilik, bu platformu dünyanın her yerinden daha çeşitli ve kolay erişilebilir hale getirir.
Kendilerini Focus Option'ye kaydettiren yatırımcılar, daha iyi bir ticaret ortamını deneyimleme seçeneğine sahip olurlar. Bu şekilde portföyleri daha iyi hale gelir ve ticaret becerileri keskinleşir.
2. Bütünlük
Diğer birçok ticaret platformunun aksine Focus Option'nin amacı, müşterilerinin fonlarının ve çıkarlarının korunmasını sağlamaktır. Platform, yatırımcıların herhangi bir zarara uğramasını istemiyor.
Focus Option, tüccarlara fayda sağlamak için tasarlanmış uygulamalara ve politikalara bağlıdır. Bu, kendinizi bu platforma kaydettirdiğinizde; en iyi ticaret hizmetinin tadını çıkarırsınız.
3. Teknoloji
Focus Option'nin kullandığı teknoloji duyarlı, benzersiz ve kullanıcı dostudur. Bu platformun uzmanları yalnızca en şaşırtıcı teknolojiyi içerir. Yatırımcıların kısa ve uzun vadeli işlemler için Focus Option kullanabilmeleri için yapılır.
4. Çoklu son kullanma süreleri
Focus Option'yi daha iyi bir seçim yapan şeylerden biri, çoklu son kullanma süreleridir. Bu platform üzerinden işlem yaptığınızda, 30 saniye, 1 dakika, 2 dakika, 5 dakika, 15 dakika, 30 dakika, 1 saat, gün sonu ve uzun vadeli olmak üzere farklı vade süreleri arasından seçim yapma seçeneğine sahip olursunuz.
5. Duygu göstergesi
Focus Option, para birimi yüksek/düşük ticaret oranları hakkında fikir edinmenizi sağlayan duyarlılık göstergesini kullanmanıza olanak tanır. Duyarlılık göstergelerinin yardımıyla piyasanın ruh hali hakkında fikir edinebilirsiniz.
6. Hesap seviyeleri
Focus Option'ye kaydolurken farklı hesap türleri arasından seçim yapabilirsiniz. Hesap türü, size ticaret tarzınızı kontrol etme ve daha fazla pazar avantajı elde etme gücü verir.
7. Tek tıkla ticaret
Focus Option'nin bir başka benzersiz yönü de tek tıklamayla ticarete izin vermesidir. Bu, bu platform üzerinden işlem yaparken işlemi tek bir tıklamayla gerçekleştirebileceğiniz anlamına gelir.
(Risk uyarısı: Sermayeniz risk altında olabilir)
8. Olağanüstü müşteri desteği
Zor bir ticaret durumuyla karşılaşmanız veya anlaşılması zor bir şeyle karşılaşmanız ihtimali vardır. Böyle bir durumda Focus Option'nin olağanüstü müşteri hizmetlerinden yardım alabilirsiniz.
Bu ticaret platformunun destek ekibi, daha iyi bir ticaret deneyimi elde edebilmeniz için her durumda size yardımcı olmaya kararlıdır. Focus Option'nin müşteri desteği, tüm deneyim seviyelerindeki yatırımcılara ve alım satım hedeflerine ulaşmalarına yardımcı olabilir.
9. Üstün ticaret ortamı
Focus Option'yi gerçek bir ticaret platformu yapan şeylerden biri, üstün ticaret ortamıdır. Bu platformun müşterileri, düşük gecikmeli bağlantı ve premium fiyatlandırma gibi profesyonel ticaret koşullarının keyfini çıkarabilir.
10. Gelişmiş ticaret platformu
Son olarak, Focus Option teknik analiz, grafik düzenleri ve göstergelerden yardım almanızı sağlar. Platform, karlı işlemler yapmak için ihtiyacınız olan her şeyi size sunar.
Tüccarlar ve paraları için güvenlik önlemleri
Yukarıda görüldüğü gibi, Focus Option henüz herhangi bir düzenlemeye tabi değildir ve bu nedenle ticaret için güvenli bir komisyoncu olduğu henüz garanti edilmemiştir. Meşru olmayan birçok forex brokeri var. Platformda işlem yapan yatırımcılardan çalmak isteyen dolandırıcılardır. Ancak, Focus Option için durum böyle olmayabilir çünkü oluşturulduğu tarihten itibaren, komisyoncuda herhangi bir dolandırıcılık faaliyeti haberi olmadı.
Aracının herhangi bir düzenlemesi olmadığı için, tacirin hesabının aracıyla aynı mı yoksa ayrı bir hesapta mı tutulduğu bilinmiyor. Bununla birlikte, komisyoncunun yasal standartları hakkında riskler ve gerekli bilgiler için resmi web sitesinde komisyoncunun yasal şartlarını kontrol edebilirsiniz.
Focus Option'nin farklı ticaret platformlarının gözden geçirilmesi:
Focus Option web ticareti

Kendinizi Focus Option'ye kaydettirdiğinizde, platform sizi ticaret platformunuza her yerden göz atma ve çalıştırma gücü ile ödüllendirir. Bu ticaret platformunun web versiyonuna sorunsuz bir şekilde hızlı bir şekilde erişilebilir.
Ne daha iyi? Eh, herhangi bir ek indirmenize gerek yok ikili yazılım Bu web sürümünü kullanmak için. Tek ihtiyacınız olan istikrarlı bir bağlantı ve işlem yapmaya hazırsınız. Bu genç ticaret platformunun web versiyonu, aşağıdakiler de dahil olmak üzere farklı dillerde mevcuttur: Japonca, Portekizce, İngilizce, Malayca ve İspanyolca.
(Risk uyarısı: Sermayeniz risk altında olabilir)
Focus Option mobil ticaret (uygulama)
Focus Option, yatırımcılarının önemli alım satım bilgileriyle kendilerini güncel tutmak için piyasaya kolayca girmelerini istiyor. Bu nedenle mobil üzerinden işlem yapılmasına olanak sağlar. Yatırımcılar, bu ticaret platformunun mobil versiyonunda kolayca gezinebilir.

Bu platformun web versiyonu gibi, mobil versiyonu da basit ve kullanımı ücretsizdir. Tüm işlevleri hızlı bir şekilde anlayabilirsiniz ve ikili ticaret uygulaması tıknaz hissetmez. Ayrıca mobil uygulama, işlem geçmişini sorunsuz bir şekilde hızlı bir şekilde kontrol etmenizi sağlar.
Güvenilir mobil uygulama olabilir iOS dahil akıllı telefonlar için hızlı bir şekilde indirilir ve kullanılır. Ayrıca, paranız güvence altına alınır. Bu, endişelenmeden ticaret yapabileceğiniz anlamına gelir.
Mobil veya web platformu üzerinden piyasaya giriş yaptığınızda haberleri ve günlük piyasa analizlerini kolayca takip edebilirsiniz. Kendinizi büyük finans kurumlarının ve bankaların haberlerinden haberdar etmek, daha iyi ticaret kararları vermenize yardımcı olur.
Mobil ve web versiyonu, size herhangi bir kârlı fırsatı kolayca kaçırmadan ticareti başlatma gücü verir.
(Risk uyarısı: Sermayeniz risk altında olabilir)
Focus Option platformunda nasıl işlem yapılır:

Platformda işlem yapmak basittir. Diğer herhangi bir komisyoncu gibi, tüccarın da aracının platformunda bir ticaret hesabına sahip olması gerekir. Bu, müşterinin ticaret platformuna erişmesini sağlayacaktır. Yukarıda görüldüğü gibi, komisyoncuya mobil cihazınızı veya masaüstünüzü kullanarak erişebilirsiniz.
Ticaret platformunuza eriştiğinizde, herhangi bir enstrümanı seçebilir ve onunla piyasayı açabilirsiniz. Varlığı, piyasada yatırmak istediğiniz tutarı ve ticaret pozisyonunuzu belirlemek istediğiniz zamanı seçin. Platformda işlem yapmadan önce işlem hesabınızda gerekli paranın olması gerektiğini unutmayın. Ticaretinizi yaptığınızda, dikkatli bir şekilde göz atın. İkili Opsiyon zor bir piyasadır; bir kişi birkaç dakika içinde sahip olduğu her şeyi kaybedebilir. Bunu önlemek için, alım satım yaptığınız varlığın piyasasını izlediğinizden emin olun.
Stake sürenizin bitiminden hemen sonra tahmininizi alırsanız, bir kar elde edersiniz. Ancak tahmininiz yanlışsa, ticareti yapmak için kullandığınız parayı kaybedersiniz. Focus Option'nin işlem platformları, yatırımcıların düzgün şekilde işlem yapabilmeleri için kullanıcı dostudur. Platform, tüccarın dikkatini dağıtabilecek hiçbir yan çekicilik olmadığı için alım satım yaparken yatırımcıların düzgün bir şekilde odaklanmasına yardımcı olur.
Yatırımcıların ayrıca platformda bir deneme hesabına erişimi vardır. Bu hesap, canlı hesapla birlikte gelen varlıkların sayısına sahiptir. Yatırımcılar, canlı hesaplarına gelmeden önce nasıl ticaret yapacaklarını öğrenmek için üzerinde bulunan varlıkları kullanabilirler. Mevcut platformlarda işlem yapmayı hala zor buluyorsanız, uygun yardım için müşteri desteği ile iletişime geçmelisiniz.
Focus Option'de Forex ticareti nasıl yapılır?

Forex ticareti yapmadan önce yapılması gereken en önemli şeylerden biri, yatırım yapmak istediğiniz döviz çiftinin durumu hakkındaki bilgileri ve güncellemeleri kontrol etmektir. Aracı, yatırımcıların 20'den fazla forex döviz çifti arasından seçim yapmasına izin verir. Birini seçtiğinizde, işlem yapmadan önce farklı bloglardan piyasanın nasıl olduğunu öğrenin. Bir kez sahip olduktan sonra, ticaretinizi yapmak için devam edebilirsiniz.
Focus Option'de forex çiftleri için işlem yapmak istiyorsanız, işlem hesabınızda para olması gerekir. Bu fonu, bahis yapmak istediğiniz tutarı belirlemek için kullanacaksınız. İşlemin sürmesini istediğiniz zamanı ayarlayın. Odak seçeneği, tüccarların grafikte uzun ticaret pozisyonları tutmasına izin verir. Grafikteki pozisyonunuzu, bahis miktarını ve süreyi belirledikten sonra, gitmeye hazırsınız. Kararınızı onaylamak için onayla düğmesine basın.
İşlemi onayladığınızda, işlem süreniz, belirlediğiniz süre kadar sürecektir. Örneğin, 3 saat ise, işleminizin bitmesi 3 saat sürecektir. Bu süre içinde, işlem lehinize gitmiyorsa piyasadan çekilmeye karar verebilir veya tahmininiz doğruysa, etrafta dolaşıp ödülünüzü alabilirsiniz. Forex, platformda işlem yapmak o kadar kolay ki. Deneme hesabında forex mevcuttur, bu nedenle hesabı kendinizi eğitmek için kullanabilirsiniz.
(Risk uyarısı: Sermayeniz risk altında olabilir)
Focus Option'de ikili opsiyon ticareti nasıl yapılır?

Focus Option, opsiyon tabanlı bir şirket olarak bilinir, bu da platformda ikili opsiyonun mevcut olduğu anlamına gelir. Herhangi bir varlıkla ikili opsiyon gerçekleştirmek için, yatırım pozisyonunuzla birlikte stake etmek istediğiniz tutarı seçin. Bir tüccar olarak, süre geçene kadar ticaretin sorunsuz bir şekilde ilerlemesini nasıl sağlayacağını izlemeniz gerekecek.
Piyasaya bağlı olarak, ticarete devam edip etmeyeceğinize karar vermeniz gerekecek. Genellikle, işler iyi gittiğinde kalır ve tahmininizi sonuna kadar görürsünüz, ancak aksi takdirde, zaman geçmeden önce onu terk etmeniz gerekir. İşlemi bazen süre dolmadan bırakmak, stake ettiğiniz miktarda tam bir kayıp yaşamamanıza neden olur.
Tüccarların da ticaret yapmasına izin verilir deneme hesabındaki ikili opsiyonlar. Yatırımcılar nasıl yapılacağını öğrenmek için demo hesabını kullanabilir Ikili seçenek nasıl çalışır ve Focus Option ticaret platformunda nasıl ticaret yapılır. Gerçek hesap gibi, tüccarlar da platformda bulunan alım satım varlıklarının sayısına erişebilir. Ancak, demo hesap bir deneme hesabından başka bir şey değildir, bu nedenle kâr veya zarar önemli değildir.
Focus Option'de kripto para ticareti nasıl yapılır?

Kripto, Focus Option'deki en önemli varlıklardan biridir. Aracının platformunda işlem yapmak hem telefonlarda hem de masaüstlerinde yapılabilir. Yatırımcılar, platformda bulunan bazı kripto para birimlerine erişebilir. Kriptoya yönelik ticaret yaklaşımı, platformda forex veya ikili opsiyon ticareti yapmak gibidir.
Ticaret yapmak istediğiniz jeton veya jetona karar verin ve ürün hakkında kapsamlı araştırma yapın. Araştırma, ürünün sizin için ticaret yapmak için en iyisi olup olmadığını bilmenize yardımcı olacaktır. Araştırmanızın ardından, platforma geri dönebilir ve normal işlem yapma işlemini, yani grafikte bir pozisyon seçerek, bahis yapmak istediğiniz miktarı ve son olarak işlemin süresini girebilirsiniz.
İşlemi onayladıktan sonra, zaman zaman piyasanın nasıl gittiğini kontrol edin. Kazanmanız veya kaybetmeniz, ürünle ilgili tahmininizin doğru veya yanlış olmasına bağlıdır. Kripto para ticareti yapmak isteyen tüccarlar, isterlerse canlı hesapları ile bunu yapmadan önce demo hesapla bunu yapabilirler.
Focus Option'de hisse senedi alım satımı nasıl yapılır?

Borsaya yalnızca mobil uygulama üzerinden işlem yapmak için erişilebilir, ancak bu varlığa yatırım yapma süreci platformdaki diğer varlıklarla aynıdır. Tercih ettiğiniz hisse senedi enstrümanını seçin ve üzerinde işlem yapın. Borsa değişikliklerden sorumludur, bu nedenle piyasayı kontrol ettiğinizden emin olun. Tahmininiz, kazancınızı veya kaybınızı belirleyen şeydir. Bununla birlikte, işlem yaptığınız hisse senedi enstrümanı hakkında kapsamlı araştırma yaparak daha iyi tahminler yapmanıza da yardımcı olabilirsiniz.
Platformun basit bir arayüzü var, böylece tüccarlar ticaret yaptığında tamamen konsantre olabilirler. Uzun süre pozisyon tutmuyorsanız gözünüzü ondan ayırmanıza gerek yok. Bu şekilde, işlem pozisyonunu ne zaman durduracağınızı veya devam ettireceğinizi bilirsiniz.
(Risk uyarısı: Sermayeniz risk altında olabilir)
Focus Option'nin ticaret teklifleri ve koşullarının gözden geçirilmesi
Platformda bulunan varlıkların sayısı sınırlıdır. Ancak, tüccarların hala aralarından seçim yapabilecekleri birçok alım satım varlığı var. Ancak komisyoncu, tüccarların alım satım yapmak için kullanabileceği popüler varlıklara sahiptir. Brokerde mevcut olan varlıklar şunları içerir: Forex çiftleri, kripto para birimleri ve emtialar. Focus Option'de bulunan farklı varlıklar hakkında daha iyi bilgi sahibi olalım.
Forex

Yatırımcılar, platformda bulunan farklı döviz çiftleri arasından seçim yapabilir. Var 40'tan fazla forex varlığı tüccarlar ile ticaret yapmak için. Bazı döviz çiftleri AUD/CAD, EUR/USD, GBP/CAD vb.'yi içerir. Döviz çiftlerinde farklı spreadler ve kaldıraçlar bulunur. Forex, portföyünüz için iyi bir varlıktır çünkü piyasa diğer varlıklardan daha kolay izlenebilir.
Kripto para

Focus Option daha çok bilinir çünkü tüccarlar üzerinde kripto para ticareti yapabilirler. Aracı, tüccarlara aralarından seçim yapabilecekleri çeşitli kripto para birimleri sunar. 20'den fazla kripto para birimi mevcut Focus Option'de yatırımcıların platformda işlem yapmaları için. Bazı kripto paralar Bitcoin, Ethereum, Ripple, Bitcoin cash vb. Ticaret platformunda farklı spread pipleri ve kaldıraçları da vardır.
emtialar

Çoğu brokerin aksine, platformda bulunan emtia varlıkları çok düşüktür. Bu, komisyoncu platformunu önde gelen komisyoncu platformlarıyla rekabet edemez hale getirir. 60'tan fazla mal mevcut onlara. Focus Option, platformda yalnızca metallere sahiptir. Bu iki metal altın ve gümüştür. Bununla birlikte, her iki metalin de yüksek likiditesi vardır, bu da onları iyi yapar. Her ikisinin de farklı spreadleri vardır ve bunlardan yararlanır.
Hisse senetleri

Yatırımcılar platformda hisse senedi ticareti yapabilirler. Ancak bu varlık yalnızca mobil uygulamayı kullananlar tarafından kullanılabilir. Borsa, özellikle yeni bir tüccar olarak, ticaret açmak için iyi bir pazardır. Piyasa pek çok risk içermez, bu da tüccarların varlığın ticaretini yapmasını kolaylaştırır.
Endeksler

Bu, yalnızca mobil uygulama platformunu kullanıyorsanız erişilebilen başka bir varlıktır. Mevcut endeksler, önde gelen forex şirketleri kadar çok değildir, ancak yeterlidir. Aracı, tüccarların erişebileceği en iyi ve en dikkate değer endekslerden bazılarına sahiptir. Bunlardan herhangi birini seçmeden önce, onlar hakkında uygun bulgular yaptığınızdan emin olun.
İşlem ücretleri: Focus Option'de işlem yapmanın maliyeti nedir?
Focus Option'deki işlem ücretleri, mevcut çoğu platformun ücretleri kadar yüksek değildir. Ancak spread pip, varlıktan varlığa değişir. Yatırımcılardan platformda yaptıkları para yatırma veya çekme işlemleri için ücret alınmaz. Bu, komisyoncuyu özellikle yeni tüccarlar için hoş karşılar.
Spreadler, hesap türüne ve bir tüccar olarak ticaretinizi yerleştirmek için kullandığınız varlığa bağlı olarak 3 pip'ten 1 pip'e kadar çıkabilir. Aracı, web sitesinde şart koşmadığından, platformun dahili işlem ücretleri hakkında fazla bilgi bilinmemektedir. Bu, yatırımcıların işlem ücretlerinin tam miktarını bilmesini zorlaştırır.
(Risk uyarısı: Sermayeniz risk altında olabilir)
Kendinizi Focus Option'ye nasıl kaydedebilirsiniz?
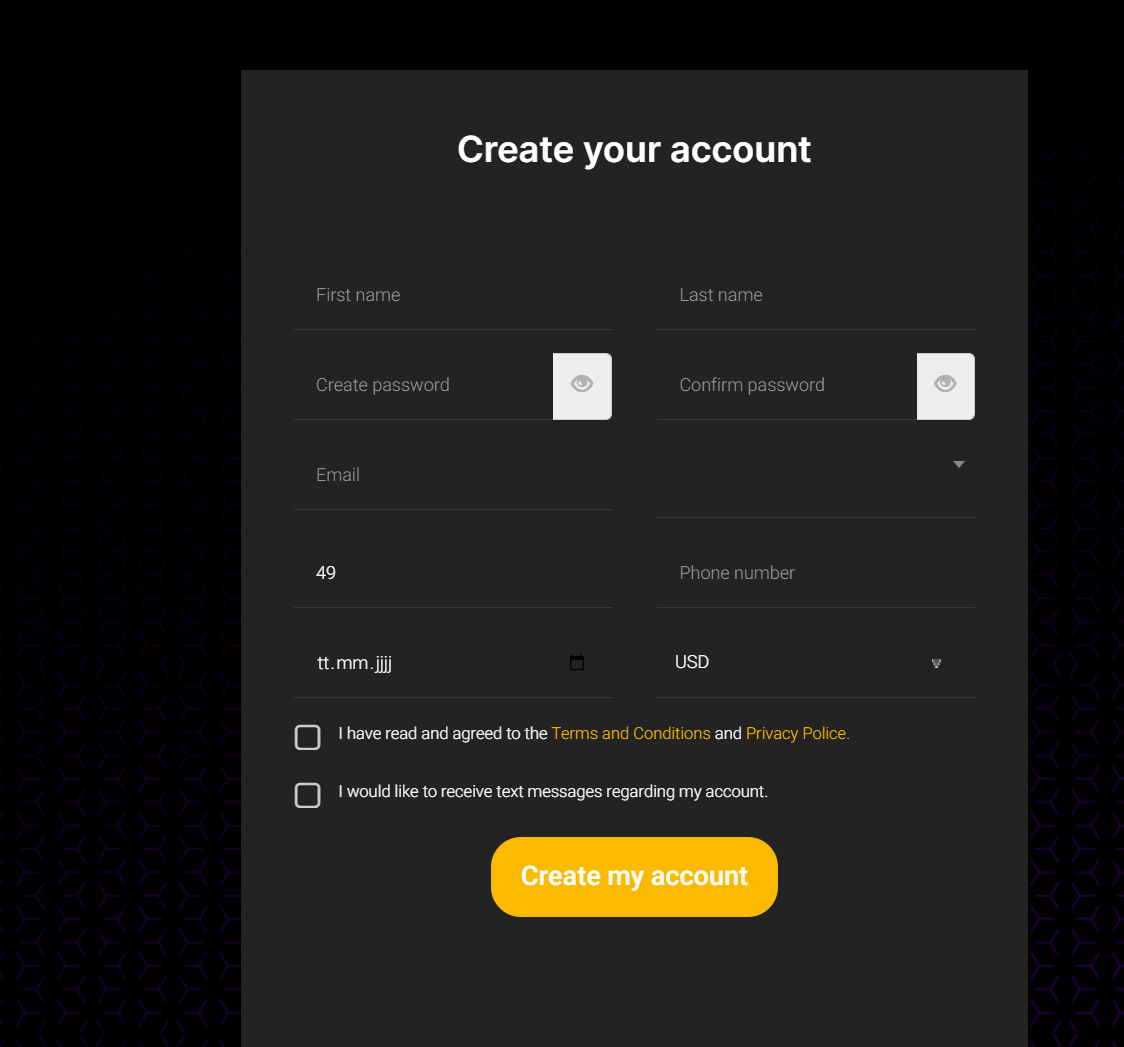
Focus Option'nin etkileyici ticaret araçlarından yararlanmak istiyorsanız, kendinizi bu platforma kaydettirmelisiniz. Ama bunu yapacak mısın? Üç basit adımı izleyerek bunu yapabilirsiniz.
(Risk uyarısı: Sermayeniz risk altında olabilir)
Aşama 1: Bu ticaret komisyoncusunun web sitesini ziyaret edin ve kayıt düğmesine tıklayın. Ardından, gerekli bilgileri girmeli ve işlem yapmaya başlamak istediğiniz hesap türünü seçmelisiniz. Hesabınızın hızlı bir şekilde doğrulanabilmesi için doğru bilgileri girdiğinizden emin olun. Focus Option bilgilerinizi doğrulayamazsa, hesabınızı iptal edebilir.
Adım 2: Bir hesap türü seçtikten sonra, hesaba minimum depozito ücreti ile para yatırmanız gerekir. Tutar başarıyla aktarıldıktan sonra hesabınızı kullanabilirsiniz. Ödeme yöntemlerini yalnızca Focus Option tarafından kullanılan hesabınıza para yatırmak için kullanabilirsiniz.

Aşama 3: Hesabınız oluşturulduktan sonra, işlem yolculuğunuza sorunsuz bir şekilde başlayabilirsiniz. Sadece dayanak varlığın fiyatının piyasa fiyatının üstüne mi yoksa üstüne mi çıkacağını tahmin etmeniz gerekir. Piyasayı doğru tahmin etmek için otoyol ödemeleri ile ödüllendirileceksiniz.
(Risk uyarısı: Sermayeniz risk altında olabilir)
Focus Option'de farklı hesap türleri
Her tüccar, hedefleri farklı olduğu için farklı ticaret hesaplarını kullanma esnekliğine sahip olmalıdır. Bazı tüccarlar sadece ikili opsiyon ticaretinin temellerini öğrenin, bazıları becerilerini geliştirmek, bazıları ise kariyer yapmak istiyor.
Neyse ki, Focus Option bunu anlıyor. Bu yüzden farklı ticaret hesapları sunar. Bu hesapların farklı özellikleri olduğu gibi minimum depozito tutarları da farklıdır.
Aşağıda, Focus Option'nin yatırımcıları için sunduğu dört hesap türü bulunmaktadır.
1. Bronz hesap

Bu ticaret hesabı türü, ticaret piyasasına yeni başlayanlar için tasarlanmıştır. Bu hesap için minimum depozito tutarı $10'dur. Kabul edilen ödeme yöntemiyle parayı başarıyla yatırdıktan sonra, kolayca ticarete başlayabilirsiniz.
Ticaretinize başlamadan önce demo hesabında pratik yapmanız önerilir. Bu şekilde gerçek ticaret hakkında bir fikir edinebilir ve para kaybetme şansınız daha az olacaktır. Bu hesap türüyle, 24/5 sorunsuz müşteri desteği ve işlem yapma seçeneği bekleyebilirsiniz. 140 enstrüman kullanarak. Teknik analiz, göstergeler ve çoklu grafik düzeni içerir.
(Risk uyarısı: Sermayeniz risk altında olabilir)
2. Gümüş hesap

Biraz ticaret tecrübesi olan tüccarlar için bir gümüş hesap önerilir. Bu ticaret hesabı türü için minimum depozito miktarı öncekinden daha fazladır. Bununla birlikte, daha fazla özellik ve avantajdan da yararlanabilirsiniz.
7/24 müşteri desteği ve teknik enstrümanların yanı sıra, hızlandırılmış fiat enstrümanlarını da deneyimleyebilirsiniz. Ayrıca, daha yüksek yatırım limitlerinden ve işlem başına daha iyi ödemelerin kilidini açın.
3. Altın hesap

Sıradaki, Altın hesabı konusunda bilgili tüccarların ticaret becerilerini bir sonraki seviyeye taşımak için kullandıkları. Bu hesap türünün ilginç yanı, önceki iki hesap türünün tüm avantajlarını ve daha fazlasını sunmasıdır.
Alacağınız iki ek özellikten biri alım satım sinyalleri ve piyasa analizidir. Focus Option'nin Altın hesabı, size özel ticaret sinyallerine ve piyasa analizlerine erişme fırsatı verir.
Ayrıca kişisel bir hesap yöneticisi alırsınız. Böylece hesap yöneticisi aracılığıyla sorularınızı yanıtlayabilir ve sorunsuz bir ticaret yolculuğunun keyfini çıkarabilirsiniz. Bu hesap için minimum depozito tutarı Silver hesabından fazladır.
4. Platin hesap

Sonuncusu, çoğunlukla güçlü bir ticaret kariyeri getirmek isteyen uzman tüccarların kullandığı Platin hesaptır. Minimum depozito ücretlerini ödeyerek iki ek özelliğin keyfini çıkarabilirsiniz: en yüksek yatırım ve özel VIP etkinlikleri.
Platin hesap size izin verir 95%'ye kadar ödeme kazanın varlığın fiyatını doğru tahmin etmek için. Ayrıca ticaret becerilerinizi geliştirmek için özel VIP müşteri etkinliklerinin keyfini çıkarabilirsiniz.
Focus Option'de bir demo hesabı kullanabilir misiniz?
Tabii ki, tüccarlar Focus Option'nin ticaret platformunda bir demo hesabı kullanabilirler. Broker sağlar $10000 için halihazırda finanse edilen demo hesabı. Ancak hesaptaki para gerçek değildir ve çekilemez.
Demo hesabındaki paranın, platformda işlem yapmaya başlamanıza yardımcı olması gerekiyor. Demo hesabı, yeni bir tüccar olarak Focus Option'nin ticaret ortamına aşina olmanıza yardımcı olacak bir deneme hesabıdır. Demo hesabı kalıcı değildir ve hesap oluşturulduktan 30 gün sonra sona erecektir.
(Risk uyarısı: Sermayeniz risk altında olabilir)
Focus Option ticaret hesabınıza nasıl giriş yapılır

Ticaret hesabınıza giriş yapmak istediğinizde, sayfanın sağ tarafında bulunan ticaret düğmesini seçin. Mobil yazılım kullanıyorsanız, ticaret hesabınıza giriş yapmak hala mümkündür. Giriş yapmak için, tüccar önce hesabı oluşturmak için kullanılan e-posta adresini ve hesabı oluşturmak için kullanılan şifreyi girecektir.
Hesap ayrıntıları doğruysa, ticarete başlamak için hemen ticaret hesabınıza erişebileceksiniz. Ancak hesap bilgileri yanlışsa işlem hesabınızı geri alabilir ve hesabınızla işlem yapmaya başlayabilirsiniz. Focus Option'nin oturum açma işlemi stres olmadan yapılabilir.
Doğrulama – Neye ihtiyacınız var ve bu ne kadar sürüyor?
Doğrulama süreci diğer aracı kurumlarla aynıdır. Komisyoncu, tacirlerin devlet tarafından kabul edilen kimlik ve ikamet belgesi sunmalarını ister. Kimlik kanıtı olarak, tüccarlar adlarını, yaşlarını, uyruklarını vb. doğrulamak için Ulusal Kimlik Kartlarını, Ulusal Pasaportlarını veya Sürücü belgelerini ibraz etmelidir.
İkamet kanıtı olarak, sadece yaşadığınızı iddia ettiğiniz ülkede gerçekten kaldığınızı göstermek içindir. Bu belge için tüccarlar bir elektrik faturası düşürebilir. Doğrulama işlemi 24 saate kadar sürmelidir. Belgelerin gerçek olduğundan emin olun; Aksi takdirde hesabınız açılmayacaktır.
Focus Option'de para yatırma ve çekme
Focus Options ticaret hesabınızdan hızlı bir şekilde para yatırabilir ve çekebilirsiniz. Bu ticaret platformu, ülkenin herhangi bir yerinden para yatırabilmeniz için çeşitli ödeme yöntemlerini kabul eder.
Ödeme türüne bağlı olarak, tutar anında işlenebilir veya 1 ila 3 gün arasında sürebilir. Ayrıca para çekme talebinde bulunduğunuzda para yatırmak için kullanmış olduğunuz mod üzerinden paranızı alırsınız.
(Risk uyarısı: Sermayeniz risk altında olabilir)
Para yatırma yöntemleri:
Focus Option'de minimum depozito $ 10'dur. Herhangi bir ücret ödemezsiniz.
- Kredi kartları (MasterCard, Visa Card)
- banka kartları
- Kripto para birimleri (Bitcoin, USDT ve daha fazlası)
- Banka transferi
- Yerel ödeme yöntemleri
- Elektronik cüzdanlar
Ödeme yöntemlerinin ikamet ettiğiniz ülkeye bağlı olduğunu unutmayın.
Para çekme yöntemleri:
Minimum para çekme, Focus Option'de $ 10'dur. Banka havalesi için en az $ 100 çekmeniz gerekmektedir. Herhangi bir ücret alınmamaktadır.
- Kredi kartları (MasterCard, Visa Card)
- banka kartları
- Kripto para birimleri (Bitcoin, USDT ve daha fazlası)
- Banka transferi
- Yerel ödeme yöntemleri
- Elektronik cüzdanlar
Nasıl para yatırılır – Minimum depozito açıklandı

Hesabınıza giriş yaptıktan veya işlem hesabınızı oluşturduktan sonra, hesabınıza para yatırabileceksiniz, böylece işlem yapmaya başlayabilirsiniz. Alım satım hesabınıza para yatırmak için para yatırma seçeneğine tıklayın. Bunu yaptığınızda, seçebileceğiniz farklı ödeme yöntemlerini göreceksiniz, size en uygun olanı seçin ve ardından işlem yapmak istediğiniz tutarı girin.
Broker platformunda $10'un altında para yatıramayacağınızı unutmayın. Hesabınıza para yatırdıktan sonra dilediğiniz gibi işlem yapabilirsiniz. Focus Option'de işlem hesabınıza para yatırmak ücretsizdir.
para yatırma bonusları
Focus Option'de para yatırma bonusu yoktur. Aracı, tüccarların yapabileceği ilk veya sonraki para yatırma işlemleri için herhangi bir bonusun reklamını yapmaz.
Para çekme incelemesi – Focus Option'de paranızı nasıl çekersiniz?

Para çekmek için, ticaret hesabınıza giriş yaptığınızdan emin olun. Para çekme seçeneğine tıklayın. Üzerine tıkladığınızda, para çekme için platformda mevcut olan farklı ödeme seçeneklerini göreceksiniz. Birini seçin ve çekmek istediğiniz tutarı girin.
Bununla birlikte, çekebileceğiniz minimum bir miktar vardır. Tıpkı mevduat gibi, Focus Option yatırımcılarından alım satım hesaplarından para çekmek istedikleri için ücret alınmaz. Para çekme işleminizin tamamlanması en az 24 saat sürer.
Tüccarlar için müşteri desteği
Broker, 24/5 çalışan bir müşteri destek sistemi işletir. Tüccarlar için farklı destekleri var. İlki SSS bölümüdür. SSS bölümü iyi olsa da, bazı cevapların yine de bunlara cevap verilmesi gerekiyor. Ancak tüccarlar SSS sayfasından bir avuç bilgi alabilir.
SSS'nin yanı sıra, yatırımcıların ihtiyaç duydukları soruların yanıtlarını almak için kullanabilecekleri bir çağrı merkezi, canlı sohbet ve e-posta adresi bulunmaktadır. Ayrıca tüccarların iletişim kurabileceği bir Whatsapp numarası var.
İletişim bilgileri
- Telefon numarası – (+(62)21 2002-2012)
- E-posta adresi – [email protected]
- İnternet sitesi - www.focusoption.com/contact-us/
| Desteklenen diller: | 5'ten fazla teklif |
| Canlı sohbet | 24/5 |
| E-posta: | [email protected] |
| Telefon desteği: | +(62)21 2002-2012 |
(Risk uyarısı: Sermayeniz risk altında olabilir)
Eğitim materyali – Focus Option ile ticaret nasıl öğrenilir
Bu komisyoncuda eğitim materyali yok. Bu komisyoncunun düzenlediği kurslar, web seminerleri veya seminerler yok. Bunun nedeni, yeni bir komisyoncu olmaları ve hala başlamaya çalışıyor olmaları olabilir, ancak evet, eğitim materyali yok.
Ek Ücretler
Ek ücretlerin olup olmadığı komisyoncu tarafından şart koşulmaz. Bu nedenle takas ücretleri ve geri kalanı olup olmadığı bilinemez.
Kullanılabilir ülkeler ve yasak ülkeler
Broker aşağıdaki ülkelerde mevcuttur:
- Birleşik Krallık
- Japonya
- Kenya
- Nijerya
- Avustralya
Yasak ülkeler şu anda bilinmiyor, ancak tüccarların bu ticaret platformuna katılamayacağı bölgeler olması büyük olasılık.
Focus Option'nin diğer ikili brokerlerle karşılaştırılması
Mükemmel bir ikili broker arıyorsanız, Focus Option bir zorunluluktur. Eşsiz kullanıcı arayüzü ve sunduğu birçok özellik nedeniyle platforma 5 üzerinden tam 5 yıldız verdik. Tüccarlar tarafından iyi karşılanan yenilikçi bir ticaret konseptine sahiptir. Focus Option'nin özel bir işlevi, tek tıklamayla ticarete izin vermesidir. Bu, bu platformda işlem yaptığınızda, işlemi tek bir tıklama ile gerçekleştirebileceğiniz anlamına gelir.
Ne yazık ki, platformda herhangi bir bonus bulunmamaktadır. 88%'ye kadar olan yüksek verim bu dezavantajı giderir. Birçok özelliğe sahip güvenilir ve iyi bir ikili broker arıyorsanız, Focus Option'yi seveceksiniz.
| 1. Focus Option | 2. Olymp Trade | 3. IQ Option | |
|---|---|---|---|
| Değerlendirme: | 5/5 | 5/5 | 5/5 |
| Düzenleme: | / | Uluslararası Finans Komisyonu | / |
| Dijital Seçenekler: | Evet | Evet | Evet |
| Dönüş: | 88%+'a kadar | 90%+'ya kadar | 100%+'a kadar |
| Varlıklar: | 120+ | 100+ | 300+ |
| Destek: | 24/5 | 24/7 | 24/7 |
| Avantajlar: | Tek tıklamayla ticaret sunar | 100% bonusu mevcut | CFD ve forex ticareti de sunar |
| Dezavantajları: | Kullanılabilir bonus yok | En yüksek getiri değil | Her ülkede mevcut değil |
| ➔ Focus Option ile kaydolun | ➔ Olymp Trade incelemesini ziyaret edin | ➔ IQ Option incelemesini ziyaret edin |
Sonuç: Focus Option yeni bir komisyoncu ve dolandırıcılık tespit edilmedi
Focus Option alım satım piyasasına güvenle girmek için kullanabileceğiniz mükemmel bir alım satım platformudur. Ayrıca dört seçenek arasından ihtiyacınıza uygun hesaplardan birini seçebilirsiniz.
Bu İkili Opsiyon komisyoncusu çok yeni ve 2021'de yeni başladı. Şimdiye kadar herhangi bir dolandırıcılık veya dolandırıcılık tespit edemedik. Bu platforma 5 yıldız veren ve tavsiye eden kullanıcıların çok sayıda çevrimiçi incelemesi ve deneyimi var.
(Risk uyarısı: Sermayeniz risk altında olabilir)
SSS – en çok sorulan sorular: Focus Option hakkında:
Focus Option güvenli mi?
Platformu yönlendiren herhangi bir düzenleyici kuruluş olmadığı için aracının güvenli olduğu söylenemez. Bu, üzerinde işlem yapmak isteyenler için inanılmaz derecede riskli hale getirir. Şimdiye kadarki tek iyi şey, Focus Option'nin herhangi bir tüccarın mali suistimali vakası için rapor edilmemiş olmasıdır.
Bu komisyoncu ile kopya ticareti mümkün mü?
Hayır, kopya ticareti mümkün değildir. Tüccarlar, başka bir tüccarın ticaret tekniğini kopyalayamaz ve tekniğe dayalı bir ticaret yapamaz. Her yatırımcının platformda başarılı olması için bir ticaret stratejisi olması gerekir.
Bonuslar Focus Option'de mi?
Focus Option, tüccarlar için herhangi bir bonusun reklamını yapmaz. Bu, platformda herhangi bir bonus olmadığı anlamına gelebilir.
Focus Option iyi bir komisyoncu mu?
Tecrübelerimize dayanarak Focus Option'nin iyi bir broker olduğunu söyleyebiliriz. Platform sadece 2021'den beri piyasada olmasına rağmen, düşük komisyonlar ve ham spreadler ile cazip ticaret koşulları sunuyor. Para çekme talepleri hızlı bir şekilde işlenir ve 80'den fazla kripto para birimi de dahil olmak üzere birçok finansal varlık mevcuttur. Platform karşılaştırmamızda çok iyi performans gösteriyor, bu yüzden Focus Option'yi mükemmel bir broker olarak görüyoruz.
Focus Option'de minimum depozito nedir?
Focus Option'deki minimum depozito $10'dur.
Focus Option düzenlenir mi?
Hayır, Focus Option düzenlenmemiştir. Ancak, bu bir aldatmaca olduğu anlamına gelmez.
Deneyimlerimize göre platform, karı güvenilir ve zamanında öder. Bu nedenle, genel olarak güvenli kabul edilebilir. Platform yalnızca 2021'de kurulduğundan, platformun gelecekte iyi bir düzenleme altında olduğunu görmemiz için iyi bir şans var.