
AvaTrade incelemesi: Kaydolmalı mısınız? – Tüccarlar için komisyoncu testi
- Düzenlenmiş komisyoncu
- 1.000+ Piyasa
- Profesyonel platformlar
- Ücretsiz demo hesabı
- Düşük ücretler ve Ham spreadler
- Yüksek kaldıraç
artan aralığı ile çevrimiçi komisyoncular, iyi bir tane bulmak giderek daha zor hale geliyor. Sonuçta, hepsi farklı koşullar, ücretler sunuyor, ve varlıklar bu takas edilebilir.
Bu nedenle özellikle deneyimli tüccarlar ve ciddileşmek isteyenler için brokerleri birbirleriyle karşılaştırmak mantıklıdır. Bu incelemede, çevrimiçi broker AvaTrade'ye daha yakından baktık. Bu genel bakışta komisyoncunun neden bu kadar sağlam olduğunu ve neden ona iyi bir puan verdiğimizi öğrenebilirsiniz.
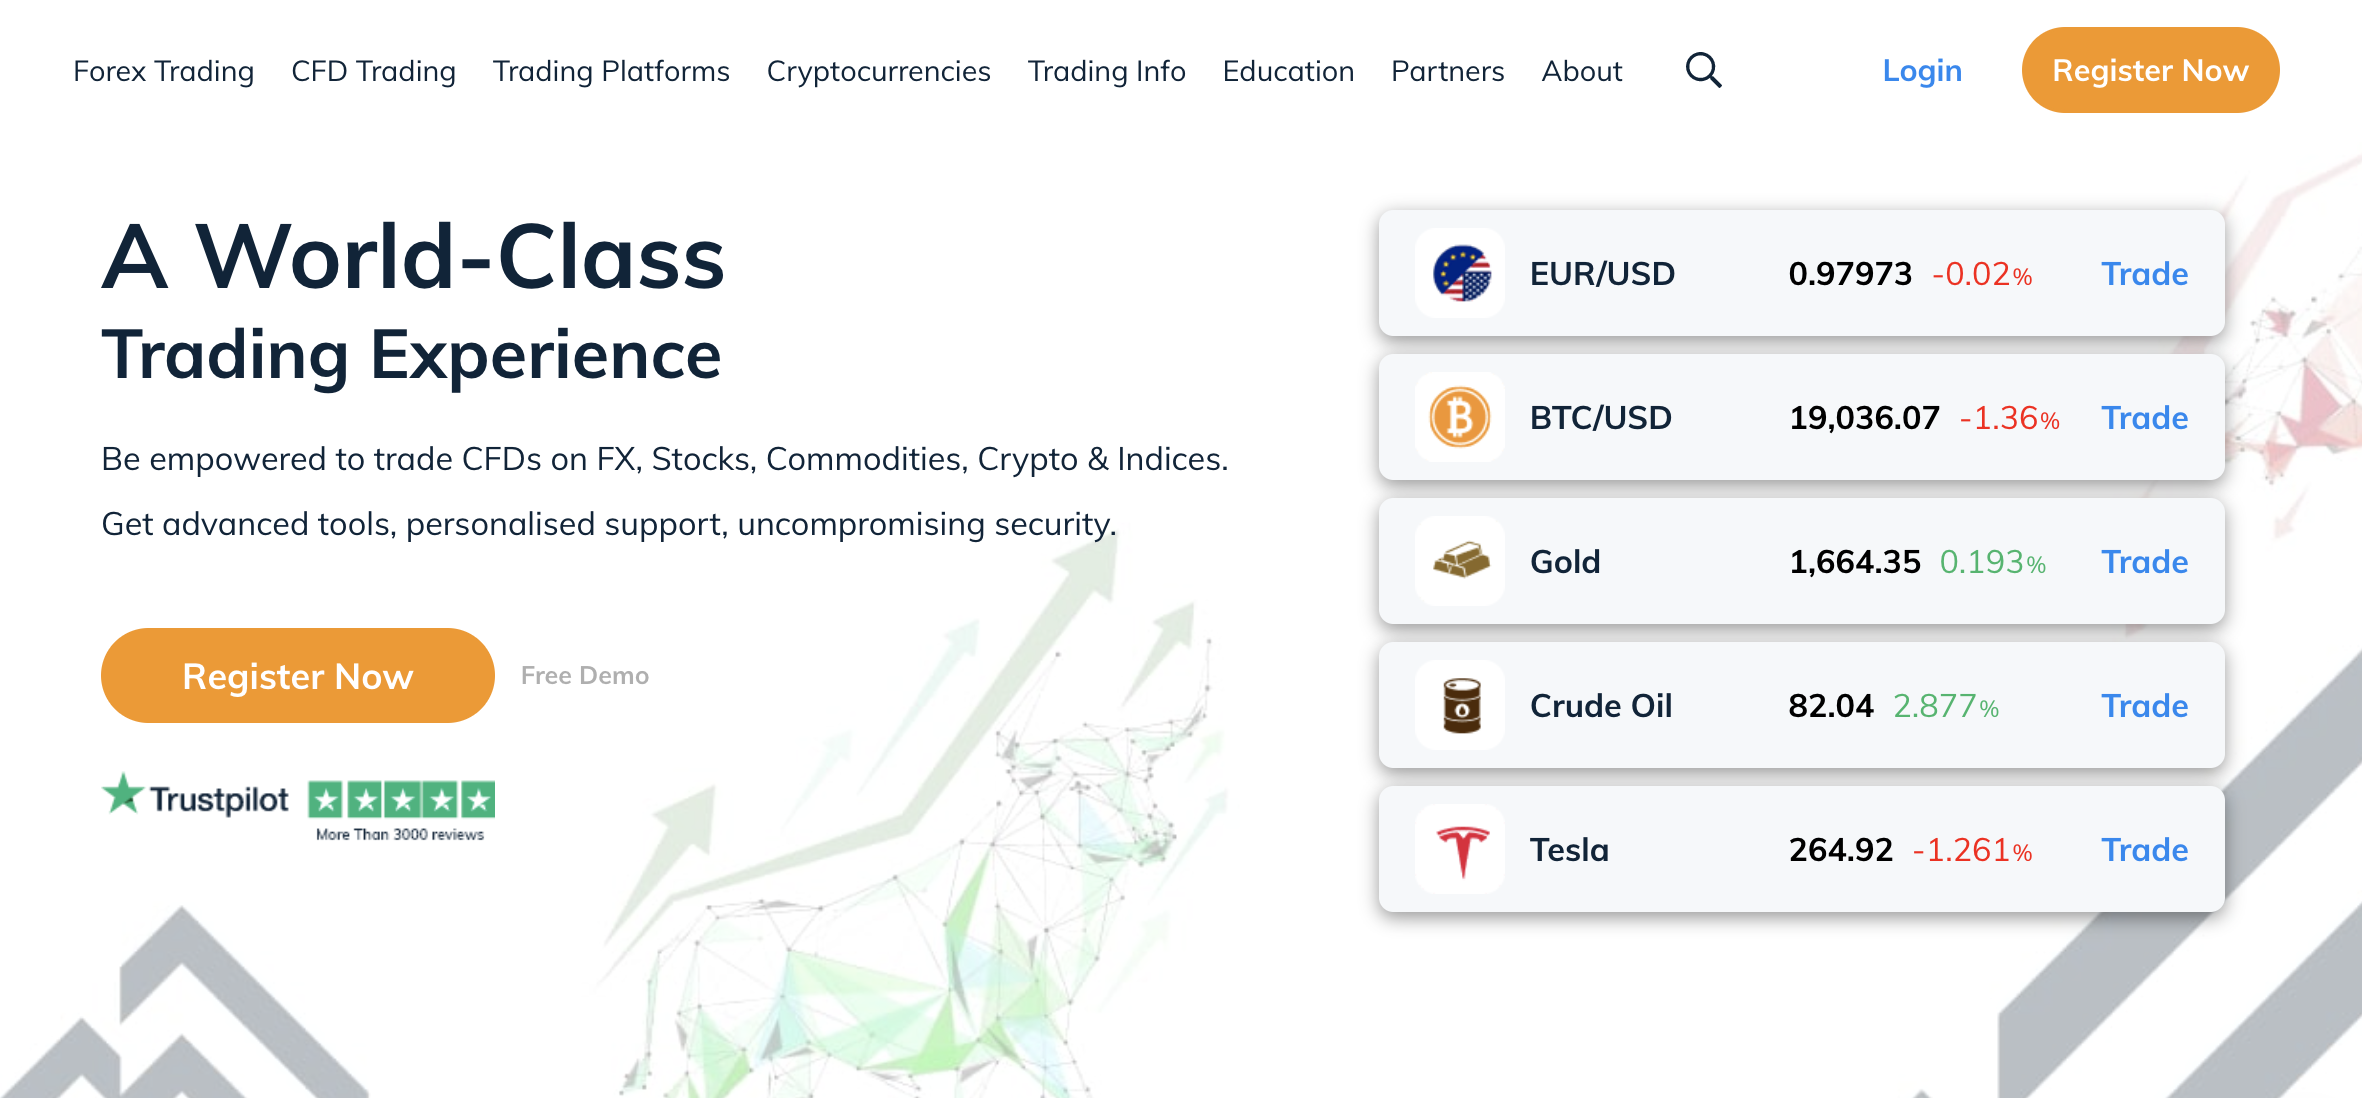
AvaTrade nedir?
AvaTrade bir küresel ve güvenilir aracılık son yıllarda birçok ödül kazanan firma. Tüccarlarına, statüleri ne olursa olsun onlar için uzun bir yol kat eden şirket içi bilgi ve eğitim materyalleri sunarlar. Uzun süredir dijital varlık sağlayıcısı olan şirket, gelişmiş bir teknolojik arayüze sahiptir. Arayüzü kullanıcı dostudur ve kullanıcıların iyi bir ticaret deneyimi yaşamasını sağlar.
Ayrıca, AvaTrade bir tanınmış ve dünya çapında güvenilir forex brokeri. Şirket, 2006 yılında faaliyete geçti ve onu var olan en eski brokerlerden biri haline getirdi. Aracı sadece kaç yaşında olduğu için bilinmekle kalmıyor, aynı zamanda AvaTrade son yıllarda Manchester City ile ortaklık kurdu. Manchester City, popüler bir İngiliz futbol kulübüdür.

Ticaret platformu ile ilgili olarak, AvaTicaret vardır 1000'den fazla takas edilebilir varlık tüccarların işlem yapmak için kullanabileceği. Broker ayrıca bir MT4 ve MT5 ticaret platformuna sahiptir. Bu iki platformun yanı sıra, diğer platformlar komisyoncuyu müşteriler tarafından iyi bir şekilde korur.
AvaTrade olur dünya çapında farklı ofisler. Bu ofisler, elbette, komisyoncunun görevlerini şeffaf ve doğru bir şekilde yerine getirmesini sağlamak için düzenlemelere tabidir. AvaTrade'nin merkezi İrlanda - Dublin'de bulunmaktadır. Makul bir minimum depozito ve kolay ticaret platformu ile çoğu tüccar bu brokeri kullanmayı sever.
AvaTrade uygun düzenleme altında mı?

AvaTrade uygun düzenleme altında. Düzenlemeler, bir komisyoncunun uluslararası veya yerel olarak denetlendiğini kanıtlayan şeydir. Düzenlemeler gereklidir çünkü ticaret platformunun dolandırıcı olmadıklarını kanıtlamasına yardımcı olurlar. AvaTrade düzenlemeye tabi olduğundan, bu komisyoncunun bir dolandırıcı olmadığının kanıtıdır.
Forex brokerinin şirketi, uluslararası lisans kuruluşlarının düzenlemesi altındadır. Bu lisans veren kuruluşlar, finansal kuruluşları veya finansal sağlayıcıyı denetlemeks. AvaTrade'yi denetleyen bu uluslararası lisans şirketleri şunları içerir: İrlanda Merkez Bankası (CBI), ASICAvustralya'da bir mali düzenleyici, FSC, Güney Afrika'dan bir düzenleyici, FSCA, ADGM, ve ISA.
Bu finansal düzenleyicilerin bir sonucu olarak, AvaTrade platformu, tüccarlar için güvenliği korumak. Platformdaki her yatırımcının haklarını korumak, uluslararası kabul görmüş bir Forex brokeri olarak AvaTrade'nin amaçlarından biridir. Tüccarlar, aracıda bu düzenleyicilerin mevcudiyeti nedeniyle fonlarının güvende olduğunu bilerek ticaret yapabilirler.
AvaTrade'nin alım satım tekliflerinin ve koşullarının gözden geçirilmesi
Ticaret platformları
- MetaTrader 4
- MetaTrader 4
- WebTrader
- AvaOptions
- AvaTradeGo (Uygulama)
(Bu makalenin ilerleyen kısımlarında her bir platform hakkında ayrıntılara gireceğiz)

Bu broker, ticaret platformunu kullanmanın birçok avantajına sahiptir. alacaksın nakit bonus işlem yapmak için kullanabileceğiniz hesabınızı oluşturmanın ilk örneğinde. AvaTrade, müşterilerine MetaTrader platformları sunar. Bu platformların teknolojide ileri düzeyde olduğu ve birden fazla işlevi yerine getirebildiği bilinmektedir.
MT platformlarını kullanma becerisine sahip olmanın yanı sıra, tüccarlar diğer mevcut platformlarla ticaret yapın telefonlarında ve masaüstünde (WebTrader, AvaOptions, AvaTradeGo). AvaTrade platformu iyi bir kullanılabilirliğe sahiptir. Arayüz, yatırımcıların sorunsuz bir şekilde gezinmesine izin verecek şekilde tasarlanmıştır. Her tıklanabilir düğme görünür şekilde tasarlanmıştır.
Platformdaki tüccarlar şunları yapabilir: sağladığı varlıklara erişin. Bu varlıklar ve tüccarlar, portföylerine eklemek için doğru varlığı seçme konusunda birçok seçeneğe sahiptir. Son olarak, bu komisyoncu tüccarlar için kopya ticareti sağlar. Kopya ticareti, bir tüccarın başka bir tüccarın ticaret stratejisini tam olarak kopyalamasına izin veren harika bir araçtır.
AvaTrade komisyoncusu için hesap türleri
Çoğu tüccarın aksine, komisyoncu çok fazla hesap türü yok. Ancak, mevcut hesap türleri, oradaki her tüccara uyacak şekilde yapılmıştır. AvaTrade platformunda tercih ettiğiniz hesap türünü seçmek için onlarla bir hesap oluşturmalısınız. Onlarla bir hesap oluşturmak, komisyoncuya kaydolmak anlamına gelir.
Kaydolduktan sonra, hesap doğrulanmalıdır. Bu işlem sadece bir gün sürmelidir. Hesap türleri planlar gibidir. Hesaplara farklı para yatırma miktarları ve diğer avantajlar yapılabilir. Bir hesap seçmeden önce, hesap ayrıntılarını gözden geçirdiğinizden emin olun.
AvaTrade'de bulunan hesap türleri şunları içerir:
- demo hesap
- standart hesap
- Ücretsiz veya İslami hesap değiştirin
- Profesyonel hesap
Demo Hesap
bu demo hesap adından da anlaşılacağı gibi, sadece bir simülasyon hesabıdır. Yeni gelenlerin platformda nasıl ticaret yapacaklarını bilmelerine yardımcı olmak için tasarlanmıştır. Bir forex ticaret platformuna yeni gelen biri olmak kafa karıştırıcı olabilir, bu nedenle demo hesabı size arayüz, nasıl ticaret yapacağınız ve platformda diğer gerekli şeyleri nasıl yapacağınız konusunda rehberlik etmek için burada. Demo hesap çok kullanışlıdır ve profesyonel tüccarlar bile hesabı kullanmaya devam eder.
Standart Hesap
bu standart hesap başlangıç hesabı gibidir. Hesap, platformda yeni olan tüccarlar için harika. En düşük minimum depozitoya sahip olmak gibi birçok avantajla birlikte gelir. Standart hesap sahipleri en düşük tutarda para yatırabilir. $100. Bu, bu hesap sahipleri için başlangıç mevduat tutarıdır. Yayılma sıkı ve kullanıcılar makul miktarda 1:400 kaldıraçtan yararlanıyor.
Ücretsiz Hesap Değiştir
İslam devletlerinin ticaret ve piyasa oranlarının normal ticaret oranından farklı olduğunu bilen AvaTrade, sadece İslam ülkeleri için ticaret hesabı. Takas hesapları, özellikle gecelik ticaret olmak üzere daha düşük ticaret ücretleri gibi İslam ülkelerindekiler için yeterli fayda sağlar. Swap hesabı, standart hesapla aynı sayıda varlık sunar.
Profesyonel Hesap
bu profesyonel hesap ağırlıklı olarak uzmanlar tarafından kullanılır. Herhangi bir tüccar sadece profesyonel bir hesap kullanmaz. Bu hesaba sahip olmak için, tüccarların AvaTrade'den bir hesap talep etmesi gerekir. Tacirler, talebi aldıktan sonra hesabı kullanabilirler. Bu hesap, tüccarlar için daha yüksek bir minimum depozitoya sahiptir, ancak aynı zamanda daha sıkı bir spread ve daha yüksek kaldıraç ile birlikte gelir.
AvaTrade'de işlem görmeye uygun finansal varlıklar:

Bu komisyoncu platformu, çoğu rakip kadar çok varlık sunmayabilir. Ancak, sahip oldukları tüccarların ticaret yapması için yeterli varlık. Varlıkların iyi kaldıraçları var ve çoğu varlık için spread çok makul. Ticaret platformunda, kesinlikle ürününüzü çeşitlendirebilirsiniz. portföy aşağıda bahsedilecek olan farklı varlıklarla.
- Forex
- kripto para birimleri
- emtialar
- Hisse senetleri
AvaTrade'deki Forex varlıkları

Forex şunları içerir: dünyanın önde gelen farklı para birimlerinin değişimi. Bu, platformda bulunan çok popüler bir ticaret varlığıdır. AvaTrade'de 50'den fazla FX döviz çifti mevcuttur. Forex varlıkları bir gecede alınıp satılabilir - bu, her gün 24 saat forex ticareti yapabileceğiniz anlamına gelir. Her döviz çifti için kaldıraç değişir ve 0,8 piplik bir spreade sahiptir. Forex ticareti platformda çok kolaydır.
| Forex çiftleri: | 50+ |
| Kaldıraç: | Döviz çiftine ve ikamet ettiğiniz ülkeye bağlı olarak 400:1'e kadar. Avrupa'dan tüccarlar için 30:1'e kadar |
| Spreadler: | 0,8 pipten başlayan |
| Uygulamak: | Ani |
| kullanılabilirlik: | Borsa açılış saatlerinde |
AvaTrade'deki kripto para varlıkları

AvaTrade'de çok fazla kripto para birimi bulunmamaktadır. Broker sadece sunar 8 adede kadar takas edilebilir kripto varlığı. Bu varlıklar şunları içerir: Bitcoin, Ethereum ve dalgalanma, birkaç madeni paradan bahsetmek gerekirse. Kanada ve Birleşik Krallık'ta bulunan tüccarlar için kripto para birimleri onlar için mevcut değildir. Bu, bu bölgelerdeki tüccarlar için ticaret deneyimini sınırlar. Kripto ticareti yapabilenlere 20:1 kaldıraç sunulur ve yayılma sıkıdır.
| Kripto para varlıkları: | 8+ |
| Kaldıraç: | Avrupa'dan gelen müşteriler için 2:1'e kadar |
| Spreadler: | 0.2% aşırı pazardan itibaren |
| Uygulamak: | Ani |
| kullanılabilirlik: | 24/7 |
AvaTrade'deki emtia varlıkları

Mallar varlıklardan biridir ticaret için uygun AvaTrade'de. Tüccarlar farklı emtialara erişebilir. Platformda işlem gören en yaygın emtialar Petrol ve Altındır. Yatırımcılar, kaldıraçla işlem yapma ve AvaTrade'de emtialar için en dar spreadlerin keyfini çıkarma olanağına sahiptir.
| emtia varlıkları: | 18+ |
| Kaldıraç: | Avrupa'dan müşteriler için 10:1'e kadar |
| Spreadler: | $0.0015'ten piyasanın üzerinde |
| Uygulamak: | Ani |
| kullanılabilirlik: | Borsa açılış saatlerinde |
Varlıkları AvaTrade'de stoklar

Stoklar da mevcuttur AvaTrade'de. Bu, tüccarların yatırım portföylerini çeşitlendirebileceklerinin bir işaretidir. Hisse senetleri gerçekten iyi yatırım varlıklarıdır. Portföyünüze varlıklardan birini eklemek kesinlikle bir artı olacaktır. Ayrıca sıkı bir yayılma ve tüccarlar için en iyi kaldıraçlardan birini sunarlar.
| Stok varlıkları: | 250+ |
| Kaldıraç: | Avrupalı müşteriler için stok CFD'lerinde 5:1'e kadar |
| Spreadler: | 0.13%'den itibaren |
| Uygulamak: | Ani |
| kullanılabilirlik: | Borsa açılış saatlerinde |
AvaTrade platformunda işlem ücretleri

AvaTrade'deki işlem ücretleri, aracının her varlık için verdiği spreadlerden elde edilir. Bu ücretler biraz makul. Bir gecede piyasa açan veya alım satım pozisyonu alan tüccarlara ücret uygulanır. Yayılma ve gecelik işlem ücretlerinin yanı sıra, tüccarlar farklı para birimleriyle hesap tutmak için de ücretlendirilir.
Tüccarlardan hesapları kullanımda değilken bir miktar tahsil edilir. Bu ücrete 'ticari olmayan ücret' denir. En azından $50 bir aydan fazla bir süre oturum açmazsanız, ticaret hesabınızdan düşülür. Bu ücreti aşmak istiyorsanız, yapabileceğiniz en iyi şey, ticaret yapmasanız bile hesabınıza sürekli giriş yapmaktır.
Ücretler, ancak para yatırma ve çekme işlemleri için ücret alınmaz. Bu, ticaret hesabınıza para yatırmak için bir kuruş ödemeyeceğiniz anlamına gelir. Aynı şey ticaret hesabınızdan para çekmek için de geçerlidir. Komisyoncu kesinlikle bunu yaptığınız için sizden ücret talep etmeyecektir. Bu, aracıyı kullanmanın getirdiği avantajlardan biridir.
| Ücret: | Bilgi: |
|---|---|
| Gecelik açık işlemler için takas ücretleri: | Tüccar pozisyonu tüm hafta sonu boyunca elinde tutarsa, 3 günlük takas ücreti tahsil edilecektir. Genellikle çarşamba günleri ücretlendirilir. |
| Yönetim ücreti: | Yönetim ücreti yok. |
| Hareketsizlik ücreti: | Ava Trade, hesaba üç ay boyunca giriş yapmamak için $50 hareketsizlik ücreti alır. On iki ay boyunca giriş yapmadıktan sonra hareketsizlik ücreti $100'dür. |
| Depozito ücreti: | Depozito ücreti yok. |
| Para çekme ücreti: | Para çekme ücreti yok. |
| Piyasa veri ücreti: | Piyasa veri ücreti yok. |
AvaTrade ticaret platformlarının testi
AvaTrade yapmak için yeterli platformları paketler tüccarlar için çok rahat ticaret. İşlemleri kolay ve hızlı yapmak için bu broker, tacirlerin seçebileceği farklı platformlara sahiptir. Platformlar, yatırımcılara aynı sayıda alım satım varlığı sunar. Bu varlıkların yanı sıra, platformların tümü kullanıcı dostudur.
AvaTrade'deki platformların listesi:
- MetaTrader 4
- MetaTrader 5
- Mobil Ticaret (AvaTradeGo)
- İnternet Ticareti
MetaTrader 4

Bu en eski ticaret platformlarından biri. Web tüccarının yanı sıra MetaTrader 4 de iyi bilinmektedir. Platform, birden fazla görevi gerçekleştirebilir ve tüccarın birden fazla şey yapmasına izin verir. Örneğin, belirli bir varlıkla işlem yaparken, tüccar başka bir varlıkla işlem yapma potansiyeline sahiptir.
MetaTrader 5

MetaTrader 5, başka bir platformdur. çok işlevli faaliyetlere izin verir. MT5, bazı yönlerden MT4'ten bile daha gelişmiştir. Örneğin, bu platform MT4'ten daha fazla teknik göstergeye sahiptir ve ticaret faaliyetlerinin daha kolay ve hızlı olmasını sağlar. MetaTrader 5 platformu, UI tasarımı nedeniyle kolay kullanılabilirliğe sahiptir.
Grafiği özelleştirilebilir ve işlem pozisyonu çizgileri çizilebilir.
Mobil ticaret

Konfor ve ticaret esnekliğini tercih etmeniz durumunda, mobil ticaret platformu sizin için harika bir platform. Tüccarlar aynı işlemi web ticaret platformu ile gerçekleştirebilirler. Mobil ticaret platformunda MetaTrader 4 ve 5 platformları mevcuttur. Mobil ticarete sahip bu ek platformlar, ticareti normalden daha da kolaylaştırır.
Platform çok etkileşimlidir ve tüccarlar işlemleri hızlı bir şekilde gerçekleştirebilir. Bu platforma erişmek için uygulamayı Play Store'dan veya Apple'ın Appstore'undan indirmelisiniz. Tüccarların kullanabileceği 90'dan fazla gösterge vardır.
İnternet Ticareti

İnternet Ticareti uzun süredir varlığını sürdürmektedir. Bu platform, masaüstü uygulamasını indirdiğinizde kullanılır. Web tüccarında, MT4 veya MT5 de indirilebilir, bu da alım satım işlemlerini çok kolaylaştırır. Web ticaret platformunun anlaşılması ve gezinmesi kolaydır. Grafik özelleştirilebilir, tüccarların kolayca bir strateji planlayabilecekleri bir tema seçmelerine olanak tanır.
AvaTrade'deki platform ne olursa olsun, kullanabilirsiniz kopya ticaret teknolojisi. Tüm platformlarda, tüccarlar kopya alım satım özelliklerine sahip olacaklar. Platformlarda ayrıca hızlı dönüşümler yapmanıza yardımcı olan hesap makinesi gibi başka araçlar da bulunur.
AvaTrade platformunda nasıl işlem yapılır

Bu komisyoncunun platformunda işlem yapabilirsiniz. cihazlarınızdan herhangi birini kullanmaya karar vermek platform web'de, mobil cihazlarda ve masaüstünüzde mevcut olduğundan. Bu, AvaTrade platformlarına bir artıdır. Bir hesap başlatmak, komisyoncu ile yapılacak ilk şeydir. Hesabınızı başlatmak için web sitelerine veya uygulamalarına kaydolmalısınız. Bilgilerinizi girin.
Gerekli bilgileri girdikten sonra, platformun demo hesabına erişin. Demo hesabı, AvaTrade'nin platformda işlem yapmanız için size vereceği ilk öğrenme aracıdır. Demo hesap, gerçek hesap gibi çalışır, sadece risk yoktur. Bu nedenle dilediğiniz gibi işlem yapabilirsiniz. Bu hesaptaki kar veya zarar gerçek değil.
Ancak, gerçek hesabınızla işlem yapmaya karar verirseniz, ticaret hesabınızı doğrulayın. Hesabınızı doğruladıktan sonra, canlı hesabınıza erişebileceksiniz. Dilerseniz AvaTrade'nin eğitim kaynakları üzerinde nasıl işlem yapacağınızı inceleyebilirsiniz. Değilse, hesabınıza para yatırmaya devam edebilirsiniz.
İşlem hesabınıza para yatırdıktan sonra, tercih ettiğiniz varlığı seçin. En az AvaTrade, yatırımcıların aralarından seçim yapabilecekleri bir dizi varlık sunar. Varlıklar farklı spread ve kaldıraç oranlarındadır. Alım satım portföyünüze arzu ettiğiniz varlıkları dahil edin. Bundan sonra, işlemleri açar ve açmak istediğinizi onaylarsınız.
İşlemlerinizi dikkatlice izleyin, seçtiğiniz varlık ne olursa olsun. Dikkatli bir şekilde ticaret yaptığınızdan emin olun ve ticaretinizden kar elde etmeye başlayın. Neyse ki AvaTrade'de, yeteneklerinizden o kadar emin değilseniz stratejileri test etmek ve nasıl ticaret yapacağınızı öğrenmek için her zaman demo hesabına dönebilirsiniz.
AvaTrade'de forex ticareti nasıl yapılır

Ticarete konu olan varlıkların bir parçası olarak, forex arasında. AvaTrade'de forex ticareti yapmak istiyorsanız, komisyoncuda zaten bir hesabınız olduğundan emin olun. Bunu yapmazsanız, endişelenmeyin çünkü hesap açma prosedürü basittir. Kısa bir süre içinde hesabı açacaksınız. Zaman alan doğrulama sürecidir. Maksimum, bir günde ticaret hesabınız hazır olmalıdır.
seçin seçtiğiniz hesap türü ve hesaba para yatırmaya devam edin. Asgari tutarla başlayabilir ve daha sonra komisyoncunun platformunu beğendiyseniz depozitonuzu artırabilirsiniz. Hesabınızı finanse ettikten sonra devam edin ve forex varlıklarını seçin. Değiştirmek istediğiniz para birimini ve döviz çiftini seçin.
Bunu yaptıktan sonra, yatırım yapmak için kullanmak istediğiniz tutarı girin ve sonra devam edin. Devam etmek, yapmak üzere olduğunuz ticareti onayladığınız anlamına gelir. Piyasanın bitmesini bekleyin; sonra, piyasa grafiğinin nasıl gittiğine bağlı olarak ödülünüzü veya cezanızı alırsınız.
Ancak, forex ticaretinde yeniyseniz, kopya ticaretini denemeyi düşünün. Bu araç çok kullanışlıdır. Alım satımı kopyalarken kendinizi strese sokmanıza gerek yok çünkü AI, takip etmesini istediğiniz kişinin her alım satım adımını kopyalayacak ve takip edecek. Kopya ticareti, kopyaladığınız yatırımcının en iyi yatırımcılardan biri olma konusunda iyi bir geçmişe sahip olmasını sağlar.
AvaTrade'de opsiyon ticareti nasıl yapılır?
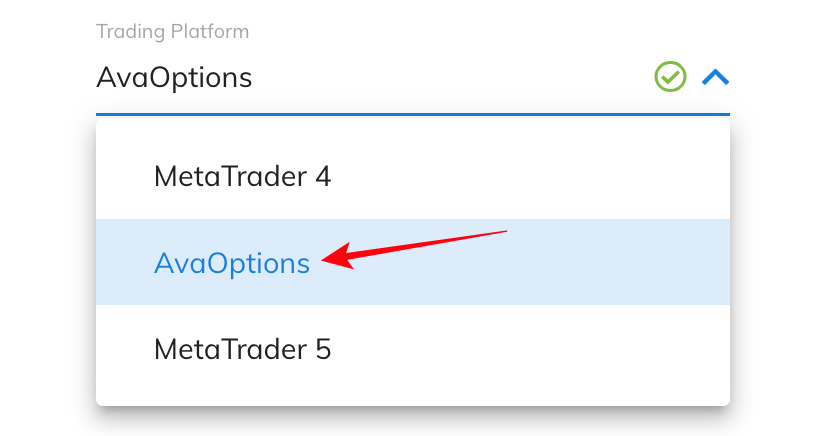
Opsiyon ticareti biraz popülerlik kazanmış olsa da, sadece AvaTrade'nin bunlardan biri olduğu birkaç broker tarafından sunulmaktadır. Yatırımcıların AvaTrade'de AvaOptions adlı opsiyon ticareti yapabileceği özel olarak tasarlanmış bir platform var. İyi tasarlanmış ve sezgisel bir platformdur. Alım satım yapmak istediğiniz varlıkları ve alım satımınızda kullanmak istediğiniz stratejiyi belirleyebilirsiniz.
AvaOptions hakkında sevilecek pek çok şey olsa da, platform tüccarlar tarafından özelleştirilemez. Bu, platformda yapamayacağınız veya değiştiremeyeceğiniz bazı şeyler olduğu anlamına gelir. Örneğin, platformun çeşitli bölümlerinde platform düzenini veya boyutunu değiştiremezsiniz.
AvaOption'da oturum açma işlemi bir adımdır ve hesabınızın güvenliğini sağlamak için iki faktörlü kimlik doğrulamayı ayarlama seçeneği de vardır. Aralarından seçim yapabileceğiniz alım satım seçenekleri ve stratejilerinin bir listesi vardır, ayrıca varlıkları ada göre bulmak için arama işlevini de kullanabilirsiniz.
AvaTrade'de kripto para ticareti nasıl yapılır?

AvaTrade'deki mevcut varlıklarda yukarıda görüldüğü gibi, Cryptocurrency aracının kalesi değildir. AvaTrade geniş bir kripto para birimi yelpazesine sahip değildir, ancak tüccarlar hala mevcut olanlarla ticaret yapabilir. Kripto ticareti ayrıca onlarla bir hesabınızın olmasını ve hesabı doğrulamanızı gerektirir.
Ardından dilediğiniz coini seçip yatırım yapabilirsiniz. Bir ticaret aç. Ne yazık ki kripto para birimleri için, her bölgedeki tüm müşteriler onlarla ticaret yapma fırsatına sahip değil, bu da platformda kripto kullanılabilirliğini daha da sınırlandırıyor.
Gece ticareti mevcuttur varlığın ticaretini yapabilen bölgeler için. Demo hesabınızla pratik yaparak ve materyalleri kontrol ederek aracının platformunda kripto para ticareti hakkında daha fazla bilgi edinebilirsiniz. Platformda sosyal kopya ticaretinin mevcut olduğunu unutmayın. Kripto ticareti yapmayı bilmiyorsanız, komisyoncudaki kopya ticaret aracını kullanabilirsiniz.
AvaTrade'de hisse senedi ticareti nasıl yapılır

Bu aynı basit süreci takip eder. Her şeyden önce, komisyoncu ile bir hesabınız olmalıdır. Broker ile bir hesaba sahip olmak size platformun çoklu alım satım varlıklarına erişim, hisse senetleri dahil.
Yatırımınıza hisse senedi eklemek portföy çeşitlendirmek için harika bir fikir. Hesabı açtıktan sonra, yatırım yapmak istediğiniz hisse senedini seçin. Hisse senedini seçtikten sonra borsada işlem açma işlemine geçebilirsiniz. AvaTrade yatırımcıları, platformda bulunan MetaTrader'yi kullanarak birden fazla hisse senedi türüyle işlem yapabilir.
senin kullanma demo hesap burada da sayılır. Platformda hisse senedi ticareti yapmayı öğrenmek için kullanabilirsiniz. Gerçek hesabınızda kullanmak istediğiniz stratejileri planlamak için de kullanabilirsiniz.
AvaTrade'de ticaret hesabınızı nasıl açarsınız?

Hesabınızı AvaTrade'de açmak oldukça basit. Şimdi takip edebileceğiniz kolay adımlarla AvaTrade'de işlem hesabınızı nasıl açabileceğinizi gösterelim.
Adım 1 – Platforma Kaydolun

Mecbursun resmi web sitesine git platforma kaydolduğunuzda. Eğer android veya IOS cihazınızda da mobil uygulamanız varsa, üye ol butonuna tıklayın. E-posta adresinizi girmenizi ve butona tıklayarak bir şifre oluşturmanızı gerektiren bir sayfada olacaksınız. Kullanmak istediğiniz e-posta adresi, aracı kurumdan bilgi alacağınız posta yoluyla olduğundan erişilebilir olmalıdır.
Ayrıca diğer kayıt yöntemleriyle kaydolun Facebook gibi. Ayrıca Google ile kayıt olabilirsiniz. Bu, müşterilerin platforma hızlı bir şekilde kaydolmasını teşvik etmektir.
Adım 2 – Hesabı doğrulayın

AvaTrade size gönderecek hesabınızı doğrulamak için kendinizle ilgili birkaç anket daha. Anketi doldurduktan sonra sizden bir kimlik kartı ve ikametgah belgesi vermenizi isteyeceklerdir. Bunların hepsi sürecin bir parçasıdır, bu nedenle alım satım hesabınızla ilgili gelecekteki komplikasyonları önlemek için orijinal belgeler sağladığınızdan emin olun.
Hesabınızı doğrulamak bütün bir gün sürmelidir. Bir gün sonra hesabınız hala kullanıma hazır değilse, destek ekibiyle iletişime geçmelisiniz. Ayrıca herhangi bir değişiklik olup olmadığını görmek için çıkış yapıp tekrar giriş yapmayı deneyebilirsiniz.
3. Adım – İstediğiniz hesap türünü seçin
Hesabınızı doğruladıktan sonra yapmanız gerekenler istediğiniz hesap türünü seçin, ister standart, ister Takas veya Pro hesabı olsun. Bunlardan herhangi biri için birini seçmelisiniz. Ancak takas hesabı sadece İslam ülkelerinden gelenler için geçerlidir. İslami bir devletin müşterisi değilseniz, sizin için takas hesabı yok.
hala sahipsin standart hesap birçok avantaja sahiptir ve daha sonra profesyonel bir hesaba yükseltilebilir.
Adım 4 – Ticaret hesabınıza para yatırın

Herhangi bir ödeme yöntemi seçin bu sizin için daha avantajlı olacak ve ticaret hesabınıza para yatıracaktır. Para yatırdıktan ve yansıyan paradan sonra, hesabınızın ayarlandığından ve ticarete başlamaya hazır olduğundan emin olabilirsiniz.
AvaTrade'ye nasıl giriş yapılır
AvaTrade ticaret hesabınızı oluşturmak için kullanılan e-postayı ve hesabın şifresini hatırladığınız sürece, önceden oluşturulmuş hesabınıza giriş yapmak kolaydır. her zaman tıklayabilirsiniz Parolanızı mı unuttunuz şifreyi hatırlayamıyorsanız. 'Şifremi unuttum' seçeneğine tıklamak, hesabınıza geri erişmenize yardımcı olacak bir işlemdir. AvaTrade, oturum açabilmeniz için e-postaya yeni bir şifre oluşturmanız için bir bağlantı gönderecektir. Ancak, aşağıdaki adımlar AvaTrade'deki ticaret hesabınıza nasıl giriş yapabileceğinizdir.

Adım 1: Giriş düğmesine tıklayın
mevcut tıklayın giriş düğmesi Web ticaret platformunu kullanıyorsanız ekranınızın üst kısmında E-posta adresinizi ve şifrenizi girin. Hesabı açmak için Google veya Facebook kullandıysanız, ikisinden biriyle giriş yapmaya devam edebilirsiniz.
2. Adım: Ticarete başlayın
Sonunda giriş yaptığınızda, hesapta işlem yapmaya başla. Ticaret bakiyenizi zaten finanse ettiyseniz, göz atmak için onu kullanmanıza hiçbir şey engel olamaz.
İle giriş düğmesine tıklayarak ve bilgilerinizi girerek, alım satım hesabınıza tekrar erişebileceksiniz. Her zaman gözünüz üzerinde olsun çünkü AvaTrade'nin işlem dışı ücreti, işlem yapmıyor olsanız bile sizden ücret almaya devam edecektir.
Hesabınıza nasıl para yatırılır
Broker platformunuzda işlem yapmaya başlayabilmeniz için, ticaret hesabınızda para var. Yani hesabınıza para yatırmanız gerekiyor. AvaTrade, diğer herhangi bir komisyoncu gibi, minimum depozitoya sahiptir. Aşağıda, ticaret hesabınıza nasıl para yatırabileceğinize ilişkin adımlar verilmiştir.
Adım 1 – Para yatırma düğmesine tıklayın
Doğrulama süreci de dahil olmak üzere hesap oluşturma prosedürünü bitirdikten sonra yapmanız gereken bir sonraki şey, hesaba para yatırmak böylece komisyoncu üzerinde işlem yapmaya başlayabilirsiniz. Bunun için para yatırma butonuna tıklamanız gerekmektedir. Tıkladıktan sonra AvaTrade, para yatırmak için kullanabileceğiniz ödeme yöntemlerini sunacaktır.
Adım 2 – Bir ödeme yöntemi seçin
Bir ödeme yöntemi seçmezseniz ticaret hesabınıza para yatıramazsınız. Bu nedenle AvaTrade, tüccarlarına çoklu ödeme yöntemleri. Sizin için en uygun olanı seçtiğinizden emin olmak çok önemlidir. Aracının platformunda bulunan ödeme yöntemlerinin bir listesi burada.
- Kredi Kartı veya Bankamatik
- Banka havalesi (bu yöntem çoğunlukla banka hesabınızdan ticaret hesabına doğrudan para yatırmadır)
- PayPal
- Skrill
- Neteller
Bazı ödeme yöntemleri bazı bölgelerde mevcut değil, yani bu bölgelerdeki tüccarlar bu ödeme yöntemlerini kullanamazlar. Kredi veya Banka Kartı yöntemi, çoğu müşteri tarafından en çok kullanılan ve genel ödeme yöntemidir.
Adım 3 – Yatırmak istediğiniz tutarı girin
Bir ödeme yöntemi seçtikten sonra, seçtiğiniz tutarı girmeniz gerekecektir. Ancak, yatırımcıların hesaplarına ekleyebilecekleri bir minimum depozito vardır. AvaTrade için, hesap için minimum depozito $100. İstediğiniz miktarı seçtikten sonra bir sonraki adıma geçmek için miktarı onaylayın.
Adım 4 – Ticarete başlayın
Yatırmak istediğiniz tutarı onaylayarak, istediğiniz para doğrudan ve anında işlem hesabınıza girecektir. Bu, sen olduğun anlamına gelir ticarete başlamak için ayarla. Seçtiğiniz herhangi bir varlıkla işlem yapmaya başlayın. Broker ile ticaret hesabınızı çeşitlendirmek için birden fazla varlık seçebilirsiniz.
Bu komisyoncuda para yatırmak ücretsizdir ve AvaTrade ile ticaret hesabınıza para yatırmak için sizden herhangi bir ücret alınmaz.
Para çekme incelemesi – AvaTrade'de nasıl para çekilir
bu bu komisyoncu ile para çekme işlemi değişir seçtiğiniz ödeme yöntemine bağlı olarak. Örneğin direkt banka havalesi ile para çekmek isterseniz işlem 3 iş gününü bulabilmektedir. Kart yönteminizi kullanmak 6 iş gününe kadar sürebilir. En hızlı para çekme yöntemi, sahip olduğunuz herhangi bir e-cüzdan kanalını kullanmaktır. Aşağıda işlem hesabınızdan para çekmek için atmanız gereken adımlar yer almaktadır.
Adım 1 – Para çekme düğmesine tıklayın
Platformda oturum açtığınız sürece, şunları yapabilirsiniz: para çekmeye başla senin kazancından. Bunu yapmak için platformun para çekme düğmesine tıklamanız gerekir. Oradan çekmek istediğiniz bir rakamı koyabilirsiniz. Yatırımcıların platformlarında yapabilecekleri minimum para çekme miktarı vardır.
Adım 2 – Para çekme işlemini onaylayın
Ödeme yöntemini seçtikten ve çekmek istediğiniz tutarı girerek ticaret hesabınızdan yapmanız gereken bir sonraki şey işlemi onaylamaktır. Seçtiğiniz ödeme yöntemine bağlı olarak, paranın hesabınıza yansıması biraz zaman alacaktır. İşlem 1-6 iş günü içinde olmalıdır.
AvaTrade'de tüccarlar için müşteri desteği

Platformla ilgili soru ve soruları olan tüccarlar, platform sayesinde şirketle iletişime geçebilirler. müşteri temsilcisi. Müşteri desteği 24-5 mevcuttur. Bu, müşterilerin hafta sonları onlara ulaşamayacağı anlamına gelir. Hafta sonu bir sorunuz olursa ne yazık ki onlara ulaşamayacaksınız.
Çağrı merkezinin yanı sıra AvaTrade, diğer destek biçimleri tüccarlar için. Bu, tüccarlar için SSS'lerin kullanılabilirliğini içerir. Sıkça Sorulan Sorular, hemen hemen her yatırımcının aklında olan yanıtlanmış sorulardır. Bazen tüccarın ihtiyaç duyduğu tüm gerekli bilgilere sahip olabilirler. Diğer zamanlarda, olmayabilir. Tüccar, yoksa cevap almak için daha yüksek bir yol arayabilir.
Sonuçta tüccarların da bir iletişim için e-posta ve iletişim için çevrimiçi yanıt herhangi bir sosyal medya ağında – örneğin, WhatsApp. AvaTrade destek ekibine bu satış noktalarından herhangi birinden ulaşılabilir. Destek, müşterilerin kendileriyle daha iyi iletişim kurmasına yardımcı olacak birkaç dilde çok dillidir.
İletişim bilgileri – AvaTrade ile nasıl iletişim kurulur
- Telefon numarası – +442033074336
- Sohbet desteği için WhatsApp irtibatı – +447520644093
AvaTrade'nin resmi web sitesini şu adresten ziyaret edin – www.avatrade.com/about-avatrade/contact-us dilinize bağlı olarak daha fazla numara için.
| Müşteri hizmetleri numarası: | WhatsApp desteği: | Canlı sohbet: | kullanılabilirlik: |
|---|---|---|---|
| +442033074336 | +447520644093 | Evet, mevcut | 24-5 |
AvaTrade ile ticaret nasıl öğrenilir

ile nasıl ticaret yapacağınızı öğrenebilirsiniz. komisyoncunun farklı ortamları platformda. Bunlardan en yaygın olanı demo hesaptır. Demo hesabı tam olarak gerçek hesaba benziyor. Demo hesabını seçebilir ve tüccar olarak ücretsiz olarak kullanabilirsiniz. Bu hesabın tam kullanımını kullandığınızdan emin olun.
Broker sağlar tüccarları için kurslar. Broker hakkında iyi olan şey, tüccarın büyümesini önemsemesidir. Kurslar, istediğiniz varlığın ayrıntılı bir açıklamasını sunar. AvaTrade, kurs dışında, platformda alım satım hakkında bilgi veren bir blog sayfasına sahiptir.
Tüccarların, komisyoncuyla nasıl düzgün ticaret yapacaklarını görselleştirmek için komisyoncu üzerinde kullanabilecekleri yeterli video var.
AvaTrade hangi ülkelerde mevcuttur?
AvaTrade kabul eder farklı bölgelerden müşteriler platformda işlem yapmak isteyenler.
AvaTrade platformunda kabul edilen bölgelerden bazıları şunlardır:
- Kanada
- Tayland
- İsveç
- Güney Afrika
- Danimarka
- BAE
- Fransa
- Nijerya
- Katar Emirliği
- Lüksemburg
Aşağıdaki bölgelerden müşteriler yapamam AvaTrade'nin ticaret platformunda ticaret yapın (yasaklanmış ülkeler):
- İran
- Belçika
- Küba
- Suriye
- Yeni Zelanda
- Irak
- Amerika Birleşik Devletleri
- Rusya
AvaTrade kullanmanın getirdiği avantajlar
Aşağıdaki avantajlar, müşterilerin bu brokerin ticaret platformunda ticaret yaparken yararlandıkları avantajlardır:
- Platformdaki her tüccarın haklarını koruyan iyi düzenlenmiş bir ticaret platformu
- Platformunda yatırımcılara geniş bir varlık yelpazesi sunar
- Müşteriler, büyümelerine çok yardımcı olan eğitim kaynaklarına erişebilir
- Aracı, müşterileri için bir demo hesabı sağlar
- İslami tüccarların kullanabilecekleri ayrı bir hesabı vardır.
- Kripto, hisse senetleri, ETF'ler gibi tüm varlıklarda gecelik alım satım mümkündür.
- MetaTrader platformları hem 4 hem de 5 olarak mevcuttur.
Yatırımcılar, AvaTrade'de bu ve diğer birçok avantajın tadını çıkarır.
Broker kullanmanın dezavantajları
AvaTrader'de işlem yapmanın getirdiği dezavantajlar şunlardır:
- AvaTrade'nin yeterli kıçı var ama diğer bazı rakiplerle rekabet edecek kadar değil
- Platform bazen gecikerek yatırımcıların platformdaki deneyimini azaltır.
AvaTrade güvenilir bir ticaret platformu mu?

Yapabilirsin bu ticaret platformuna güvenin birkaç nedenden dolayı. Komisyoncu, düzenlemeye tabidir, bu da onu güvenilir kılar. Avatrade Piyasaları şeffaftır ve ticarete konu olan varlıklar dar spreadler sunar. İslam ülkelerindeki müşteriler için, kendilerine özel olan ve kendilerine uygun işlem ücretleri ve koşulları sunan bir hesap seçebilirler.
AvaTrade'de bir tüccar olarak, emin olabilirsiniz kendi dilinizde müşteri desteği alma. Yatırımcılar ayrıca en iyi ticaret deneyimlerinden birini sağlayan MetaTrader platformlarında ticaret yaparlar.
AvaTrade güvenilirdir. Ancak, rakiplerinin çoğuna kıyasla tüccarların ticaret yapmak için kullanabilecekleri yeterli varlığa sahip değil. Yine de sıkı spreadler ve yüksek kaldıraçlar üzerlerinde AvaTrade bir şekilde boşluğu daraltabilir.
Sonuç – AvaTrade, tüccarlar için iyi koşullar sunan güvenli bir komisyoncudur

Belki de eski bir komisyoncu olan AvaTrade, en iyi ticaret memnuniyetini sağlamak için ticaret platformunu geliştirebilir. AvaTrade, en iyi müşteri desteği forex brokerlerinden biri için ödüllü bir komisyoncudur. Platform, tüm müşterilere bir dolandırıcılık olmayan şeffaf ticaret ücretleri sunar. Bu broker, yıllar içinde güvenilir olduğunu kanıtlamıştır.
AvaTrade (SSS) hakkında sık sorulan sorular:
AvaTrade bir cTrader platformu sunuyor mu?
Maalesef hayır, tüccarlar AvaTrade'deki cTrader platformuna erişemez. Broker hala MetaTrader, Mobil Ticaret ve Web Ticareti gibi iyi ticaret platformlarına sahiptir. Her müşteriye benzersiz ticaret deneyimleri sunarlar. Platformlar bile teknik göstergelerle birlikte gelir.
AvaTrade müşterilerine ikramiye sunuyor mu?
Evet, müşteriler bu komisyoncudan ikramiye alır. Yatırımcıların aldığı ilk bonus hoş geldin bonusudur. Hoşgeldin bonusunun yanı sıra, tüccarlar başkalarını platformda ticaret yapmaya davet ettiklerinde de indirim alırlar. AvaTrade'de, tüccarların arkadaşlarını ve ailelerini davet etmelerine olanak tanıyan bir arkadaşınızı davet edin seçeneği vardır. Bu kişiler komisyoncuya tam olarak kayıt olduklarında, AvaTrade'den bir bonus alacaksınız.
AvaTrade yeni başlayanlar için iyi bir komisyoncu mu?
Evet, komisyoncu yeni başlayan tüccarlar için bile iyidir. Broker, yeni yatırımcıların erişebileceği bir akademiye sahiptir. Bunun yanı sıra, tüccarlar bir demo hesabına erişebilir. AvaTrade ayrıca, her yatırımcının aracının web sitesinde erişebileceği makaleler ve videolar şeklinde kurslar sunar.
AvaTrade ile fonlarım güvende mi?
Evet, paranız komisyoncu ile güvende. Bunu kanıtlamak için AvaTrade, uluslararası düzenleyici kurumların lisansı altındadır. Bu kuruluşlar, AvaTrade'nin tüm tüccarlarının ticaret haklarını ve fonlarını korumasını sağlar. Broker, tüccarlarının fonunu kendi hesabından farklı bir hesapta tutar. Bu, komisyoncudaki tüm para yatırma ve kazançlarınızın komisyoncudan farklı bir hesapta tutulduğu anlamına gelir. Yani, bir tüccar olarak paranız güvende.
.
(Risk uyarısı: Sermayeniz risk altında olabilir)
