- Broker
- Fees
- Deposit
- Withdrawal
Pocket Option review 2023 – Is it a scam or not? – Test of the broker
- Accepts international clients
- High payouts 95%+
- Professional platform
- Fast deposits
- Social Trading
- Free bonuses
Is Pocket Option a scam or a reliable company? – Find out on my real review. As an advanced trader, I checked the Binary Options broker for you. Read if it is worth investing your money in the binary options market with Pocket Option or not, and get the best information in my Pocket Option review.
(Risk warning: You capital can be at risk)
Quick facts about Pocket Option:
| ⭐ Rating: | (5 / 5) |
| ⚖️ Regulation: | Regulated by the International Financial Market Relations Regulation Center (IFMRRC), Mwali International Services Authority (License T2023322) (No official government authority) |
| 💻 Demo account: | ✔ (available, unlimited) |
| 💰 Minimum deposit | 50$ |
| 📈 Minimum trade: | 1$ |
| 📊 Assets: | 100+, including Stocks, Forex, Indices, Cryptocurrencies, and Commodities |
| 📞 Support: | 24/7 phone, chat, email |
| 🎁 Bonus: | Deposit bonus available. The more you deposit, the higher your bonus |
| ⚠️ Yield: | Up to 90%+ |
| 💳 Deposit methods: | Debit Cards, e-payments, and cryptocurrencies; including Skrill, Neteller, ADV Cash, WebMoney, Payeer, Perfect Money Cryptocurrencies, Bitcoin, Litecoin, Ripple, and more |
| 🏧 Withdrawal methods: | Cards, e-payments, and cryptocurrencies; including Skrill, Neteller, ADV Cash, WebMoney, Payeer, Perfect Money Cryptocurrencies, Bitcoin, Litecoin, Ripple, and more |
| 💵 Affiliate program: | Available |
| 🧮 Fees: | No deposit fees, no withdrawal fees, no inactivity fees and no trading fees! |
| 🌎Languages: | Cards, e-payments, and cryptocurrencies, including Skrill, Neteller, ADV Cash, WebMoney, Payeer, Perfect Money Cryptocurrencies, Bitcoin, Litecoin, Ripple, and more |
| 🕌 Islamic account: | A swap-free, islamic account is available on Pocket Option! |
| 📍 Headquarter: | 2017 – 2023 in Majuro, NA – Marshall Islands, from 2023 in the Republic Of Costa Rica |
| 📅 Founded in: | 2017 |
| ⌛ Account activation time: | Within 24 hours |
In this article, I will introduce you to everything you need to know about the binary options broker. Is it a reliable broker? What are the trading conditions, what’s the minimum deposit? Are the indicators available? Can you trade via a Pocket Option app? Which account types does the broker offer? Is there a binary demo account you can use to get started? To get the answers to all of these questions and many more, keep reading.
(Risk warning: You capital can be at risk)
What is Pocket Option? – The company presented
Pocket Option is an international Binary Options broker. You can bet there (binary options market) on rising or falling markets with a chance of a high payout (yield). Pocket Option is a broker who is owned by Gembell Limited and based in the Marshal Islands. It is a registered company with the number 86967. Also, the broker is regulated by the IFMRRC.
At first glance, the website of Pocket Option looks very nice and clear. Directly you can see what they are offering their traders. Trade more than 100 different assets as Binary Options with a yield (of 90%+). For traders, there are like 10000 combinations possible. It is very easy to start trading with a broker. You can open a new account in a few seconds. In addition, they offer a free demo account for practicing the platform.
Watch my full review in this YouTube video:

By loading the video, you agree to YouTube’s privacy policy.
Learn more
Facts of Pocket Option:
- The location is in Marshal Islands
- Regulated by the IFMRRC and Mwali International Services Authority
- High yield 90%+
- User-friendly trading platform
- More than 100 assets
- Free Demo Account
(Risk warning: You capital can be at risk)
Pros and cons of Pocket Option
Pocket Option is one of the best binary brokers we have tested, with a full 5 out of 5 stars. The platform is regulated, reputable, and offers many features. All payouts are made on time, there are attractive bonuses and the trading platform is very easy to use. The pros and cons of Pocket Option include:
Advantages:
- High deposit bonus is available
- Many trading indicators
- User-friendly interface
- Free demo account
- Under the supervision of the International Financial Market Relations Regulation Center (IFMRRC)
- Social Trading
- Free bonuses
Disadvantages:
- Binary options are generally associated with a high level of risk
- Limited trading size
- Not all indicators are available
Is Pocket Option regulated? – Overview about the Regulation
After getting known with Pocket Option, let’s answer the question: Is Pocket Option regulated? It is important to deal with a trustworthy and regulated broker to avoid scams and losing money. With Pocket Option, you deal with a broker that’s not regulated by any government. Additionally, it doesn’t have any two-factor authentication.
But: It is regulated by the International Financial Markets Relations Regulation Centre, also known as IFMRRC. In addition, it also got a new license from the Mwali International Service Authority.

However, due to the high risk of binary options trading in general, countries such as Malaysia, Nigeria, the United States, and New Zealand banned Pocket Option. It’s also banned in the whole Europe, but you can still register for the free demo account.
Note: An official government authority does not regulate Pocket Option. In countries where it is needed to be regulated, Pocket Option can not operate.
Regulatory warnings about Pocket Option
There are different warnings about Pocket Option by regulatory authorities. Mostly, it says that Pocket Option operates unlicensed in a certain country. For example, the FCA published a warning in 2021 that the firm is providing services in the UK without authorization. In 2022, Pocket Option was listed on the “RED List” of the CFTC. It says that the broker is accepting funds from U.S. customers without a license.

But if we check the website of Pocket Option, we will find a small notice in the footer with the note of not providing services in the USA, UK, and more countries. The broker does not accept customers from these countries. It is hard to say if they violated the rules in the past, but for now, you can see that they are aware of the regulatory rules.
Is Pocket Option safe or not?
Offering great services and showing regulatory certificates is not the only trait Pocket Option possesses as a real broker. It also takes into concern the various security issues prevalent nowadays. It proposes different security policies and also protects the clients from damages in case of a dispute.
Since IFMRRC is the authority behind its regulation, of which it is also a compliance partner, it can offer its clients compensation during a failed resolution. A Pocket Option trader can directly file a claim to IFMRRC if she does not get a satisfactory solution to the issue. Further, it shall utilize the compensation funds to compensate for the trader’s damage.
This broker also secures every trader through multiple policies, as stated before. It includes:
- Guarantee the safety of trading details and personal information with a strict privacy policy
- Taking responsibility for trader accounts through payment policy
- Offering AML policy as a measure against illegal financial laundering and KYC policy to ensure trader transparency
- Secure your login and withdrawals with a 2-factor authentication
All such security measures are unimaginable with a fake broker. It will contradict the very purpose of a fake broker. So, these are solid evidence of being a real broker.
| Regulation: | Regulated by IFMRRC (License number TSRF RU 0395 AA Vv0207), Mwali International Services Authority (License T2023322) |
| SSL: | Yes |
| Data protection: | Yes |
| 2-factor authentication: | Yes |
| Regulated payment methods: | Yes, available |
| Negative balance protection: | Yes |
(Risk warning: You capital can be at risk)
Reviews on Trustpilot – Are they fake?
Doing research about Pocket Option will make you aware of the 4.0-star rating on Trustpilot. Trustpilot is one of the most trusted review platforms out there because it can be hardly manipulated by fake-reviews. However, there is always a small chance that the ratings are fake, I checked it in detail for you.

As you see, the majority of positive ratings are 5-star ratings; there are some 4-star, 3-star, and 2-star ratings. When it comes to 1-star ratings, the rating amount increases. The 1-star ratings are coming from frustrated traders who can not pay out money or saying Pocket Option is manipulating the prices. Often, OTC-Trading is mentioned.
OTC Trading is made by an algorithm at the weekend. On Binaryoptions.com, we do not recommend trading these assets because you can hardly predict the future of the price movements. Problems on withdrawals are mostly occurring because traders are using the wrong payment methods, using 3rd party accounts, or do not verify their account.
Overall, the reviews on Trustpilot are looking good to me. As a trading broker, it is nearly impossible to get only good reviews because traders who are losing money by trading a bad strategy will comment negative about the business!
Review of the conditions for traders on Pocket Option
After answering the regulation question, let’s get into the platform and its trading services.
Start to invest real money with a small deposit of 50$ in your account. Also, you can use only 1$ as the minimum bet amount for each asset. The broker provides you a 10.000$ free Pocket Option demo account too. So you can practice trading on the new platform.

It is very easy to deposit real money on Pocket Option because they offer you more than 50 different payment methods (read more about it below). After all, they charge you no commission for a deposit or payout. The payment system works 24 hours per day.
The regular asset profit of a Binary Option is between 80 – 97% which is compared to other brokers very high. Sometimes it depends on the asset you are investing in. Choose between 60-second trades minimum and 4-hour trades maximum. They offer you a lot of different time horizons. The execution of trades is very simple and fast. From my experience, there are no problems opening or closing a trade. It is possible to sell an option before the expiry time ends. This is a big advantage for this broker.

The diversity of assets is very high. Choose between Stocks, Forex, Indices, Cryptocurrencies, and Commodities. In conclusion, the conditions and the offers of Pocket Option are compared to other brokers at their best.
Conditions:
- High yields 80-95%
- 50 different payment methods
- Start trading with a 50$ deposit
- You only need 1$ per trade
- Trade OTC Assets on Pocket Option as well (it allows trading 24/7)
(Risk warning: You capital can be at risk)
How much does it cost to trade on Pocket Option?
Have you ever heard about the high fees and hidden costs you have to pay when dealing with a shady broker? No worries: With Pocket Option you are safe, the binary options broker won’t charge any untrustworthy fees.

Let’s have a quick overview of what it costs to trade on Pocket Option:
| Fee: | Amount: |
|---|---|
| Deposit fees | $0 |
| Withdrawal fees | $0 |
| Inactivity fees | / |
| Trading fees | $0 |
| Forex trading fees | / |
| Stock trading fees | / |
| ETF trading fees | / |
| Crypto trading fees | / |
| Saving plan fees | / |
As you can see, there aren’t any fees, whether for trading or for depositing and withdrawing money.
(Risk warning: You capital can be at risk)
Review of the Pocket Option trading platform
In my opinion, Pocket Option offers a very good trading platform. It seems that they programmed it independently. From my experience, it feels very comfortable to trade on this platform. You can clearly see what happens in the market. Also, the platform is very customizable. You can use different Pocket Option indicators or chart types.
Note: You can also use the MetaTrader 5 platform with Pocket Option.

Select between 100 different assets and analyze the chart. After that, you can open a trade with a call or put option. Use the social trading function to copy the best traders of Pocket Option and turn their profit into your profit.
Trade via computer or app. It is possible to trade from every point of the earth with the intelligent app on your smartphone. Finally, the trading platform gets 5 stars on my review. I really like the design and functions.

The platform runs smoothly in our Pocket Option review and is professionally programmed. There are not any bugs or lags with using it. In addition, the app is available for Android and Apple iOS. That is another big advantage because most brokers do not offer an IOS app.
Also, the app runs very smoothly like the web version. In conclusion, the trading platform of the broker is useful l for every trader because it is flexible.
Facts about the trading platform:
- Different chart types
- Different time frames (5-second chart up to daily chart)
- Free indicators and analysis tools
- Customizable and user-friendly for traders
- Social Trading, Signals, and Tournaments
- Very fast execution of trades
(Risk warning: You capital can be at risk)
MetaTrader 5
The MetaTrader 5 is available on Pocket Option and the world-famous platform for all forex traders and is. You can go to your account dashboard and download the MT5 for free. More than 30 currency pairs and 40 different other assets are available on the MT5 with variable spreads without commissions.

Trading advantages: Pocket Option indicators
If you want to trade binary options you will recognize very soon: You have to use technical indicators to analyze the markets with their trends and structures. Without these “trading advantages”; it’s difficult to be successful. Pocket Option offers a wide range of indicators in its trading software.

Let’s have a look at the 13 best indicators available on Pocket Option:
- #1 RSI
- #2 Stochastic Oscillator
- #3 CCI
- #4 Bollinger Bands
- #5 Donchian Channel
- #6 Moving averages
- #7 Fractal
- #8 Vortex
- #9 Accelerator Oscillator
- #10 Average true range
- #11 OsMA
- #12 Momentum indicator
- #13 Price rate of change
These are only thirteen out of more than 30 technical indicators the binary options brokers offer. If you want to get more detail and learn how to use them, read our article regarding the 13 best Pocket Option indicators.
(Risk warning: You capital can be at risk)
Mobile trading via the Pocket Option App
If you’re not the type of person who sits in front of the computer at the desk all day long, I can recommend the Pocket Option app. With the mobile application of the broker, you can show your trading skills where ever you are.


It’s available for Android smartphones as well as for iPhones. Of course, you can use it with tablets that run iOS or Android as well. Just download it from the Play Store or App Store, log in with your data, and start trading via your phone or tablet.
Every function that is available in the browser version is available in the Pocket Option app as well.
As the app is simple, it works well for mobile trading. The interface is quicker to install, and the trading process is the same with high or low options. Moreover, the application is free, and traders do not have to bear any additional expenses. The iOS application needs iOS 11 or above version, and the Android app needs Android 4.4 or above.

(Risk warning: You capital can be at risk)
How to trade on Pocket Option:
Pocket Option can be used to bet on rising or falling markets. Make a forecast for the direction of the price of an asset on the platform. It can be Forex, Stocks, Cryptos, and more. Always the Binary Options got an expiry time. You can trade in different time horizons, no matter if it is short-term or long-term. After the expiry time, the trade is automatically closed.

#1 Placing an order
You can adjust settings like trade amount and purchase time in the trading panel. You can place your trade here while predicting whether the price will get high or low. The higher price will display with a green button; if the price goes down, it will appear with a red button.
First, you must select assets from hundreds of assets on the app, like commodities, currency pairs, stocks, currency pairs, etc. You can search assets by typing the name or selecting through category. In the app, you can add any asset as a favorite, and your profit will increase when the asset percentage gets higher.
To set the purchase time of digital trading, you have to tap on the purchase time menu and opt for a preferred option. The expiration time in trade is purchase time + 30 seconds. You can also set the required time on the Expiration time option.

In the app, you can change the trade amount by tapping the + or – button on the Trade Amount section. With the help of Strike price settings, you can place a trade at a higher or lower price than the current value by adjusting the payout percentage. The payout rates depend on the difference between the strike and market prices.
You can also evaluate the price movement through charts and create your forecast. If you expect the price to go higher, then press UP or otherwise Down option. After placing the order, the result will appear correct or incorrect, whereas the correct forecast will provide trade profit. You can go to the Trades section to cancel a trade and close any trade you want.
#2 Placing express trade
Express trade is a forecast that depends on various events occurring across multiple trading assets. In the express trading mode, every green or red button tap can add your forecast to the trade. Then the forecast of all the trades will multiply, and thus, one achieves higher profit than the Digital Trade.
For Express trading, press the Express button on the Pocket Option app. Then select asset type and make two forecasts on different assets. After that, place the Express trade.
To see the opened orders, choose the Express option and press the Opened button. To view the closed orders, you have to choose the Closed tab in the panel.
#3 Monitoring trades
The Pocket Option app has the facility to view active trading sessions. You have to select the Trades button, and a pop-up menu will appear showing the transactions for the present session. If you want to view the open trades, tap on the Trades section to see all the trades in progress.

If you want to see the closed trades for your trading session, you can go to the same Trade Section and tap the Closed trades button. For viewing the live trades history, you can select the More option.
#4 Pending trades
It is a feature that enables users to place trades at a particular time in the future or when a particular asset price reaches a level. You can even close a pending trade before placing it to avoid loss. To place the trade order by time, you must select the asset and set the time and date when you want to trade.
After adding the amount and placing an order, you can track it through the Current tab. If you want to place the order by asset price, then choose the asset and set the needed open price and the payout percentage. After that, choose the amount and place an order. To cancel any pending order, you have to tap on the close button on the pending orders tab.
(Risk warning: You capital can be at risk)
Example: How to trade crypto (Bitcoin, 90%)
I’ll give you an example within this Pocket Option review. If you open a trade on Bitcoin with the amount of 1000$, you make the right forecast of the markets you will win a payout of 1900$. 900$ is the profit and 1000$ is the return of your bet amount. There are no hidden fees for investing.
To make it more clear and explain to you in detail how to trade binary options, you can visit my YouTube channel.
See my full Pocket Option trading tutorial video here:
By loading the video, you agree to YouTube’s privacy policy.
Learn more
(Risk warning: You capital can be at risk)
Social Trading – Copy binary options trading from others automatically
Pocket Option offers you to copy the best traders of the broker. First of all, it is important to know that social trading only works on a live account. Open the menu “social trading” and you see the best traders at the moment. You can click on them and watch their profile (picture below).
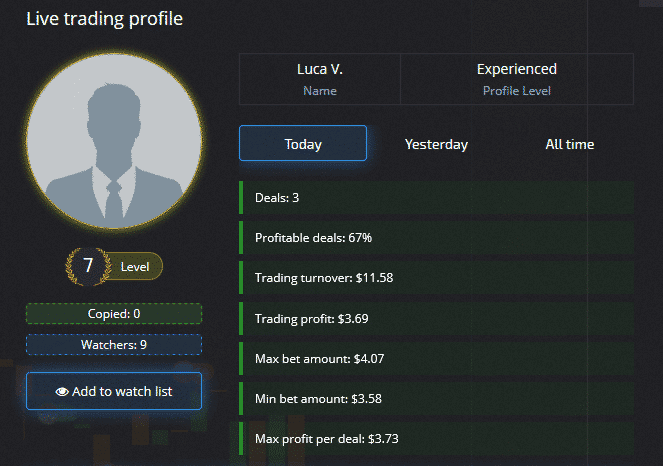
You can add the trader to a “watchlist” and follow him for a certain time. If you think he is good enough, you can copy him with one click. In my opinion, it is significant to analyze the trades of all time. If a social trading user got a high win rate overall time it is a good way to earn some extra profit. It is a big advantage for traders to see the whole profile and the trading style on Pocket Option.
How to open your trading account on Pocket Option
Have you read enough and want to open your own account on Pocket Option to prove your trading skills? Okay, let’s do this – it’s very easy. It just takes a few clicks to get there. Follow these simple steps:
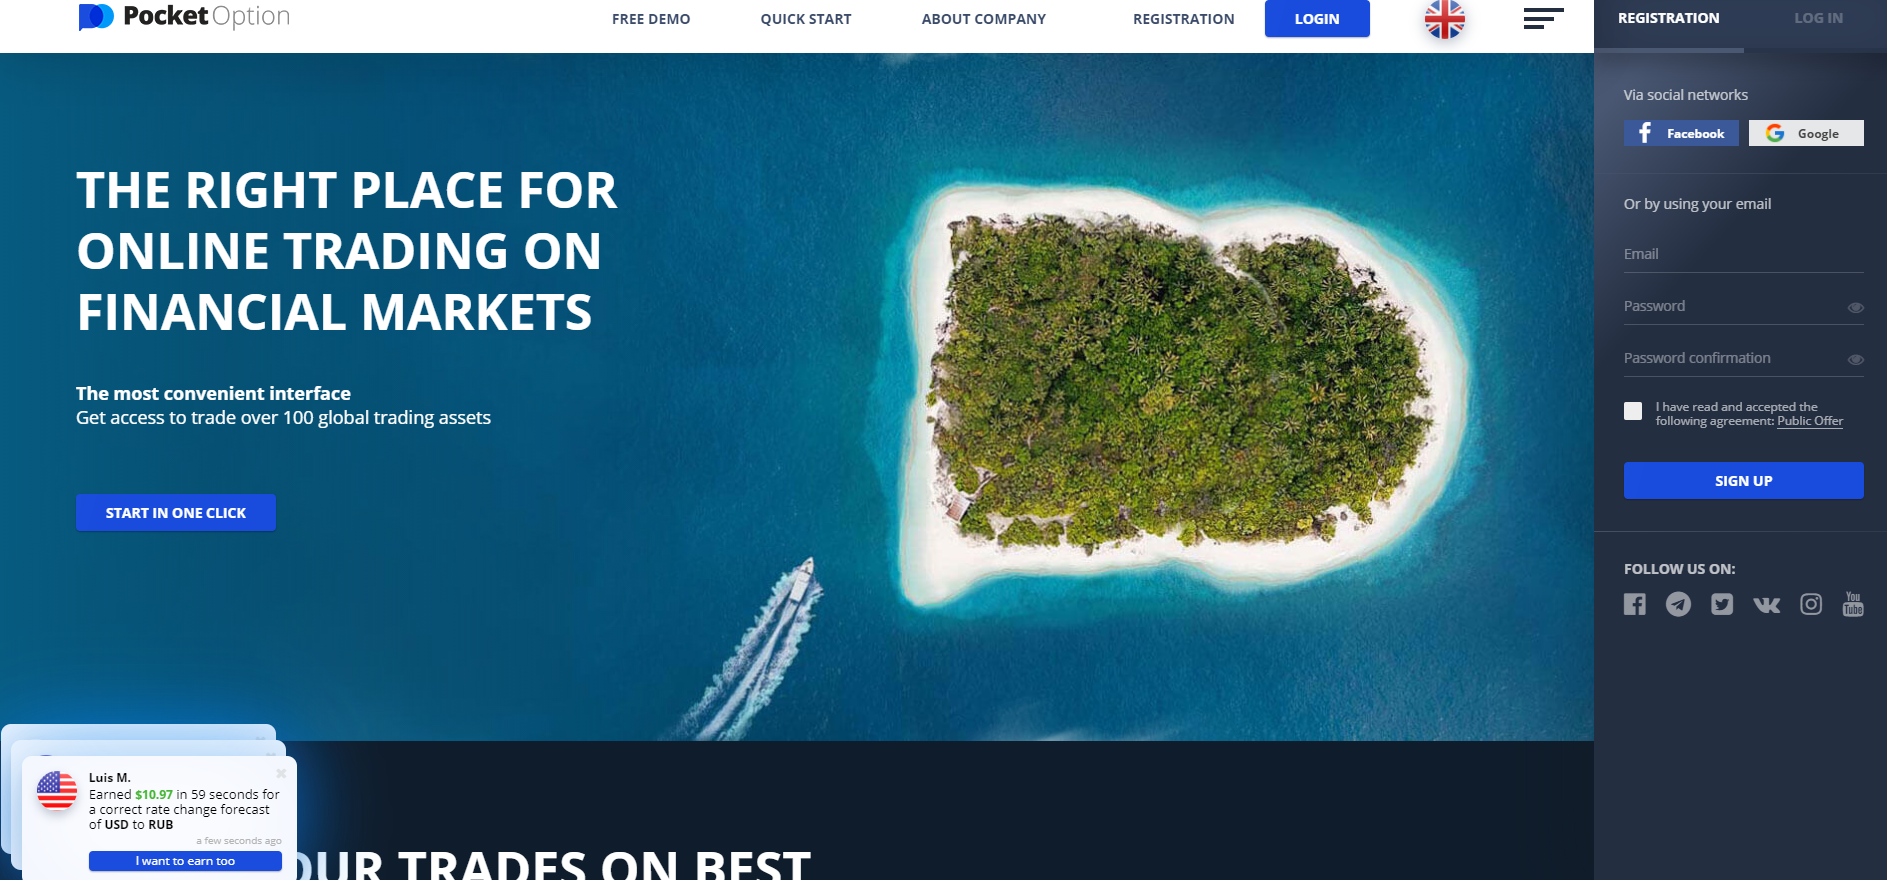
- Visit the homepage and click the “START IN ONE CLICK” button that appears in front of you
- Click on “CONTINUE DEMO TRADING” to use the demo account at first
- Once you practiced enough, click the “Registration” button in the bottom left corner
- Now choose one of the three methods (via email, Google, or Facebook) to create your account
- Fill in all the required information
(Risk warning: You capital can be at risk)
The following screenshots show you the first three steps – that’s the way how you get to the registration form which lets you register your account.


Once you are finished with the registration, you can start trading. For some features, you have to verify your account. I’ll show you how to do that later in this article.
(Risk warning: You capital can be at risk)
Pocket Option account types:
There are several different account types Pocket Option offers. Let’s have a detailed look at every of them in the following table:
| Account types: | Specifications: |
|---|---|
| demo account | virtual money, up to $10000 top up whenever you want |
| novice trader | account balance: less than $100 maximum transaction amount: $1000 |
| beginner trader | all novice trader points plus: account balance: $100 – $1000 access to the lottery of crystals, express orders, trading achievements |
| experienced trader | all beginner trader points plus: account balance: $1000 – $5000 increase profitability by 2% |
| master trader | all experienced trader points plus: account balance: $5000 – $15000 maximum transaction amount: $2000 increase profitability by 4% priority for withdrawals |
| professional trader | all master trader points plus: account balance: $15000 – $50000 maximum transaction amount: $3000 increase profitability by 6% personal manager |
| expert trader | all professional trader points plus: account balance: from $50000 maximum transaction amount: $5000 increase profitability by 8% high priority for withdrawals premium gifts personal discounts |
| MT5 Forex | available for all stages beginning with experienced leverage: 1:10 up to 1:1000 floating spread: from 1.1 pips |
(Risk warning: You capital can be at risk)
Can you use a demo account on Pocket Option?
It offers a free demo account for everybody to get started with binary options trading. The demo account can be used for training before starting to make real investments on Pocket Option. With just one click you can trade with virtual money on the platform. There is no registration or deposit needed for practice trading with virtual money. A lot of traders get their first experience in the demo account before starting with real money. I recommend that everybody practice the platform in the demo account – even if you read every single word of my Pocket Option review ;-)

The binary demo account is unlimited with 10.000$ virtual money. You can charge it with one click if you lose some money. After you got some experience and learned to trade Binary Options successfully you can directly start trading using real money.
- Free and unlimited account
- The best way to practice and learn how to trade
(Risk warning: You capital can be at risk)
Features of your Pocket Option trading account
Let’s have a closer look at how to log in to your Pocket Option account and how to verify it. The verification is an important step if you want to experience all functions of the Pocket Option platform.
How to login to your Pocket Option account
If you already created a Pocket Option account, the login is very easy. Just visit the website of the broker via pocketoption.com or search for the broker via Google. Once you got directed to the website, watch the upper right corner. Click on “Pocket Option Log in”.

Type in your e-mail and your password, do the reCAPTCHA, and press “LOGIN”. If you want, you can save your details and stay logged in.
(Risk warning: You capital can be at risk)
Pocket Option verification: How to verify your account
To get access to all Pocket Option functions, you have to verify your account. This takes a few steps but is easy to do.
Follow these verification steps:
- Log in to your account
- Open your personal account settings (profile)
- Prepare proof of an identification document (e.g. a scan of your ID, passport, or driver’s license)
- Upload the document
- Track the verification process

You have to enter an address proof as well. You can use a bank letter or documents like an electricity bill. It’s important that it has the name of the person who runs the account. Be careful: The document shouldn’t be cropped, and all important information should be clearly visible.
(Risk warning: You capital can be at risk)
Available payment methods for deposit and withdrawal
The good thing about Pocket Option is that they offer about 50 different payment methods for deposit and withdrawal.

The minimum deposit is 50$. You can use cards, e-payments, or cryptocurrency. They do not charge any commission and the withdrawal works within the time horizon of 24 hours. The minimum withdrawal amount is 10$.

Facts about the payment methods:
- Minimum deposit 50$ and the minimum withdrawal 10$
- Instant deposits with electronic methods
- Credit Cards
- Skrill, Neteller, ADV Cash, WebMoney, Payeer, Perfect Money
- Cryptocurrencies, Bitcoin, Litecoin, Ripple, and more
- No commissions and fees
(Risk warning: You capital can be at risk)
How to deposit money on Pocket Option
Do you want to start trading? The first thing you need to do after registration and verification: is deposit money. The process is very easy to understand. Open the Pocket Option website. Once you’re logged in, you can see your dashboard. Click on the “TOP-UP” button at the top of the page.

You can now choose one of the different payment methods. The minimum deposit is $50. After you select one payment method, follow the displayed steps.

If everything works out well, your account is topped up (minimum deposit: $50). You can start trading now!
(Risk warning: You capital can be at risk)
Are there any deposit bonuses?
Yes! Pocket Option offers deposit bonuses to attract new customers and give some credit to existing customers as well. If you choose a payment method, you can see how much deposit bonus you will get. It depends on how much money you want to deposit.

For example, if you top up your account with $ 5,000, you will get an extra 43% which is $2,150. So your account balance will be $7150 after the deposit.
(Risk warning: You capital can be at risk)
How to withdraw money from Pocket Option
In conclusion, the first tests of the withdrawal with the broker in our Pocket Option review are successful. Withdrawing funds and the deposit system works very well. Also, Pocket Option offers you a cashback of a maximum of 10% of your deposit or losses.

For more information open a real account. In addition, I have to mention you should verify your account before you start trading with real money. The broker does not pay out to unverified accounts.
Test of the bonus system and awards
As you see in the picture below Pocket Option offers you a bonus system. There is a large choice of options for earning additional money. Use a deposit or no-deposit bonus to get a bigger account. In addition to that, they offer risk-free trades, cash-backs, or promo codes.

You get rewarded if your trading volume is high. They give you “Gems” which you can use in the award shop. In the award shop, there are some options to buy additional bonuses.
Is the bonus system good?
For the first time, I see such a big bonus system with different options. But do not forget that every bonus is linked to a condition. On the other hand, you can cancel the bonus at any time by just clicking on the icon in your account. No money is held if you got an active bonus. You have to make an x50 turnover of your bonus to get paid.
Facts about the bonus system:
- Deposit Bonus
- No-Deposit Bonus
- Risk-Free trades
- Cashback
- Gems for Bonus
- Boosters for more profit
(Risk warning: You capital can be at risk)
Support and service for Pocket Option traders
The support is very important for traders to build reliable relationships. The broker offers fast, responsible chat support in our Pocket Option review.

Also, they got phone and email support. The support works in different languages. According to that, they got an agent in the EU (Czech).
Facts about the support:
- Support 24/7
- Phone, Email, and Chat Service
- Support in more than 5 different languages
- Free education center
- Analysis and training
| Support: | Operation time: | Phone: | Email: |
|---|---|---|---|
| Phone, Chat, Email | 24/7 | +44 20 8123 4499 | [email protected] |
Free education: How to learn trading with Pocket Option
For beginners and advanced traders, there is a big education section on the platform. Watch video tutorials or read new strategies from the experts of Pocket Option. They explain in detail how it works. It is important to get more knowledge before trading with real money.
(Risk warning: You capital can be at risk)
Trading signals on Pocket Option
If you don’t have the time to analyze the markets by yourself, there are many options for how you can make a profit either way. Copy trading is one of them, but also signals are very helpful in finding trading setups that can work and let you make a lot of money.

But not every binary options broker offers such trading signals. The good thing about Pocket Option is: It does offer those signals. Just open your account and trading desk and click on the “Signals” button on the right side of the screen.
You can now see all the signals generated by the system. If you want to copy one, just click “Copy signal”.

That’s all the magic – you now placed a trade according to the signal. This can help you to develop your trading skills. While signals are available on Pocket Option, trading robots are not!
Where is Pocket Option available?
You may have noticed that you can’t use the Pocket Option trading platforms in every single country of the world. Let’s have a quick overview of all available and banned countries.
(Risk warning: You capital can be at risk)
Available countries list:
These are the countries where you can trade via Pocket Option:
- China
- India
- Japan
- Malaysia
- Persia
- Russia
- Serbia
- South Korea
- Brazil
- Thailand
- Turkey
- UAE
- and many more
See the full Pocket Option country list here!
Unfortunately, there are some countries that banned trading with binary options completely.
Banned countries list:
These are the countries where you can’t trade via Pocket Option:
- All countries that belong to the European Union
- Israel
- Japan
- UK
- USA
What are the Pocket Option alternatives?
Pocket Option performs at least as well as our other two top binary brokers. We can give Pocket Option a full 5 out of 5 stars because the broker is regulated, offers high returns and bonuses, has an excellent and feature-rich interface, and is popular with many users.
Pocket Option can be considered the industry standard when it comes to binary trading. It is one of the top brokers we have in our comparisons.
| 1. Pocket Option | 2. Olymp Trade | 3. IQ Option | |
|---|---|---|---|
| Rating: | 5/5 | 5/5 | 5/5 |
| Regulation: | IFMRRC | International Financial Commission | / |
| Digital Options: | Yes | Yes | Yes |
| Return: | Up to 93%+ | Up to 90%+ | Up to 100%+ |
| Assets: | 100+ | 100+ | 300+ |
| Support: | 24/7 | 24/7 | 24/7 |
| Advantages: | Offers 30-second trades | 100% bonus available | Offers CFD and forex trading as well |
| Disadvantages: | Higher minimum deposit | Not the highest return | Not available in every country |
| ➔ Sign up with Pocket Option | ➔ Visit the Olymp Trade review | ➔ Visit the IQ Option review |
See more alternatives in our comparison between other brokers:
- Pocket Option vs Binomo
- IQ Option vs Pocket Option
- Deriv vs Pocket Option
- Quotex vs Pocket Option
- Olymp Trade vs Pocket Option
- Expert Option vs Pocket Option
- Exnova vs Pocket Option
Does Pocket Option offer an affiliate program?
Yes, Pocket Option offers an affiliate program for all traders who want to bring new traders to the brokers. The profit can be up to 80% of the revenue from Pocket Option. There are a lot of opportunities to get additional income as a partner.

You can attract new traders via social media, websites, youtube, or other types of advertising and get them signed up via your partner URL. If the referred trader starts to trade and invest, you earn money as a commission from the broker.
(Risk warning: Trading involves risks)
Conclusion of my Pocket Option review: Is it a reliable broker or a scam?
The result of my Pocket Option review: Pocket Option looks like a reliable Binary Options broker. There is a big range of different assets with high profits for traders. Binary Options are very simple and easy to understand on the platform. For further questions, you can use the big education center. In my opinion, the trading platform is one of the best in the world because you can customize it quickly. Moreover, it is very user-friendly, and it feels very comfortable to trade there.

For withdrawals and deposits, you got a lot of different payment methods. Opening an account in less than 5 minutes is no problem. You can start trading real money with a start balance of 50$. This is a good value for every trader. Also, big deposits are welcome, too. The only disadvantage of Pocket Option is the lack of real regulation of a financial institute. In conclusion, from my experience, this broker can be very useful.
The advantages of Pocket Option:
- High asset profit 96%+
- 100+ assets
- Fast and reliable support
- Social trading
- A lot of different payment methods
- No hidden fees
- Excellent trading platform
- Low minimum deposit
- Withdrawing funds is easy
Pocket Option shows a really good bonus program and a reliable platform for trading in my review. It’s one of the best trading platforms.
(Risk warning: You capital can be at risk)
Frequently Asked Questions (FAQ)
Is Pocket Option regulated?
Yes, it’s regulated by the International Financial Markets Relations Regulation Centre, also known as IFMRRC, and the Mwali International Services Authority. But there are no official government authorities for the financial markets.
Is Pocket Option a good broker?
From my point of view, Pocket Option is a reliable broker. You can use the demo account, trade without any fees, deposit and withdraw money without fees and earn a lot of money due to the high payout (96%+). Additionally, the platform offers good support and social trading as well.
Is Pocket Option available in the USA?
No, unfortunately, Pocket Option can’t be used by US traders because it is not regulated by the CFTC. But US traders can still create a free demo account.
Is Pocket Option safe?
Pocket Option is a legit and safe broker where you can trade binary options. Your funds are safe and it’s easy to withdraw money.
How long does the Pocket Option withdrawal take?
The payout at Pocket Option is usually very fast. When we tested the platform, the money was in the account the very next day. However, withdrawals can take up to 5 days. This depends on the chosen withdrawal method and the day of the week.
Withdrawals to electronic wallets and credit cards are usually fast. Bank or wire transfers take 4-5 business days and cryptocurrency withdrawals take 2-3 business days on average.
Can you make money on Pocket Option?
Yes, it is possible to make money on Pocket Option. There are many people who do it full time, and have made a fortune doing it. However, there are always two sides to the coin. It is not unlikely to make losses as well.
In general, it is about choosing a suitable trading strategy and placing correct trades at the right time. If you succeed, you can make a lot of money with Pocket Option. There is no upper limit on how much money you can earn.
Was means OTC on Pocket Option?
OTC means Over The Counter on Pocket Option. These are assets and charts which are available to trade on the weekend. It is difference from real stock exchange charts because the asset can not be traded on the exchange if it’s closed. Therefore OTC charts are used on Pocket Option.