Binary options trading has been around for many decades; however, trader interest in the financial instrument only saw a surge in 2008 when the SEC approved exchange-traded binary options.
There are now hundreds of brokerages offering thousands of new traders an opportunity to profit with binary options. The simplicity of binary options trading enables new and seasoned traders to partake in the market without much hassle. However, new traders often have difficulty learning about financial instruments. Moreover, a scarcity of comprehensive guides on the subject makes gathering accurate information a challenge in and of itself.
This post covers every detail of binary options trading you need to learn before entering the market and making profits.
What you will read in this Post
Binary Options Terminology:
Beginning binary options trading without knowing the necessary terminology sets you up for failure. So here’s a quick look at all the common terminology you will come across when you trade binary options:
- Binary Option: A binary option is a financial instrument that offers a fixed return. It has a fixed expiration period that you get to set when investing in the option. When you buy binaries, there are three outcomes.
- Price Movement: If you estimate the price movement correctly, your option will be “in the money,” and you win the trade. In contrast, if your estimation of the price’s movement is wrong, your option will be “out of the money,” and you will lose your investment. If the price remains the same as before at expiry, you will get your entire investment back.
- Broker: A broker or a brokerage is a company that enables individuals to trade binary options on the market of their choosing. Brokerages charge a fee for every order you place, and this fee varies from broker to broker.
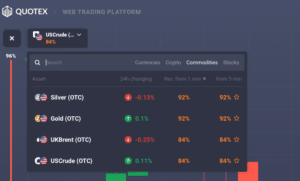
- Asset: An asset is an underlying commodity, stock, cryptocurrency, currency pair, or index that a binary option is based on.
- Current Rate: The current price of the asset is known as its current rate.
- Rate of Profit: It is the percentage of money that you get as a return if a trade expires “in the money.”
- Fundamental Analysis: It evaluates an asset’s price fluctuation based on political, geopolitical, and economic factors.
- Technical Analysis: It is a method of evaluating an asset’s price fluctuation using chart patterns. In technical analysis, fundamental factors are ignored, and the price movement is estimated using historical price movement and volume data.
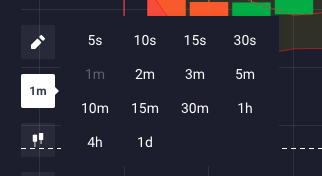
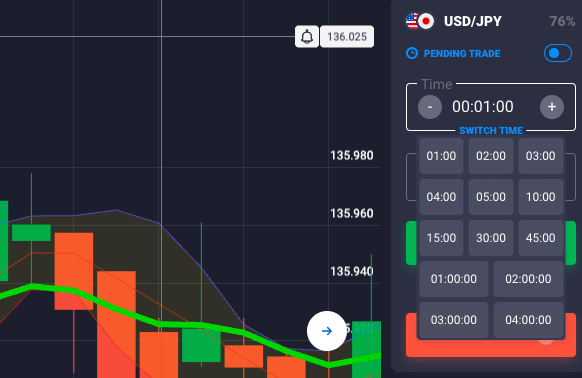
Expiration time
The data and the time at which the option is set to expire is called its expiration time. Every binary options trader must learn about several terms closely related to the expiration time.

If a trader places a bet, the time the trade took place is called the option’s strike time. Likewise, the asset price during the execution of an order is called the option’s strike price. Not every brokerage offers every asset type. Further, different brokers offer different expiry times for different asset types.
In most cases, you will get an opportunity to pick between hourly, daily, and weekly expiry. In addition, some brokerages offer 60-second expiration times, enabling you to potentially turn a profit in as little as a minute.
The expiration time is one of the most critical aspects of every binary options trade. The longer the expiry time, the higher the chances of the asset’s price to change under the influence of market conditions. However, this does not mean shorter expiry times are always preferred over longer expiry times.
A trader’s choice of expiry time entirely depends on their trading style and the analysis methods they use.
Trade extension
Sometimes called a “binary options rollover,” a trade extension is the extension of an expiry time post-execution of the order. Only some brokerages allow traders to get a trade extension.
It is an invaluable tool that can be extremely helpful if the asset’s price moves in the stipulated direction, but the movement isn’t fast enough. Using trade extensions in such scenarios gives the trader’s position a fighting chance since the possibility of the option being in the money increases.
It is important to note that brokerages typically give traders a 3-5 minute window to exercise trade extensions. The window is usually opened shortly before an option is set to expire. Furthermore, binary options expiry times can only be extended once.
(Risk warning: Your capital can be at risk)
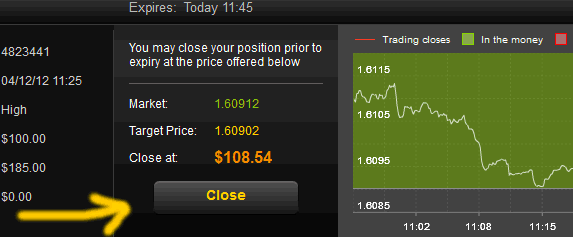
Early close
Some brokerages give traders the option to close their trade before the expiry time. Most traders use this feature when their option becomes profitable before expected, and the trader isn’t sure if it will remain profitable at expiry.
Similar to trade extensions, traders can only exercise an early close within a limited time window. Typically, brokerages make the early close option available 15 minutes before expiry. Furthermore, brokers charge a premium for an early close – which sometimes amounts to as much as 50% of the stipulated payout.
Double Up
To double up means to double an investment in a trade. Traders use this feature when they’re confident that they have a winning trade. The expiry time and direction of the option remain unchanged – only the investment amount changes when a trader exercises this feature.
Expiration rate
The expiration rate is the price of the asset at the moment that it expires. It is the factor that decides whether your bid is successful – or in the money – or not.
It is vital that you do your due diligence when stipulating the price movement of the asset. It is a key decision that determines whether you make money, and therefore, you must spare no time or effort and make an informed decision quickly.
Keeping track of the expiration rates of past trades will help you predict the asset’s future price movement more accurately. When you place a binary options order, you will see the amount you stand to make if the trade goes your way. If the asset’s price does not move per your stipulation, you will lose the amount you invested in the binary.
Since binary options traders always know how much they stand to win and lose, the financial instrument enables traders to manage risk effectively.
(Risk warning: Your capital can be at risk)
Outcomes of Binary Options trading
There are only three possible outcomes of binary options trading:
- First, if the trader predicts the price movement correctly (the trade is “in the money”), they earn a predetermined amount at expiry.
- If the trader’s stipulation about price movement is incorrect (the trade is “out of the money”), they lose the funds they invested into the option when it expires.
- If there is no change in the asset’s price, the trader receives the invested amount.
Let’s suppose a trade stipulates that the price of Nike shares which stand at $75 will rise in an hour. If the expiration time is set to one hour and the price rises to $76 in an hour, the option will be in the money. The option is “out of the money” if the asset’s price moves in the opposite direction at expiry.
If a trader buys binary options on Nike shares at $75, expecting the price to rise in an hour, and the price falls to $74, the option will be out of the money.
Types of Binary Options:
There are several types of binary options, and learning about them will help you use the ones that match your trading style.
Here’s an in-depth look at all of the binary options types that brokerages make available:
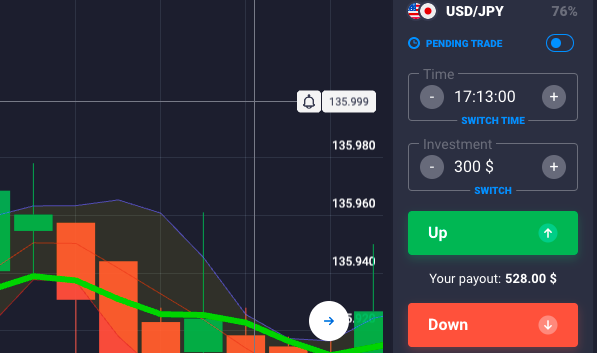
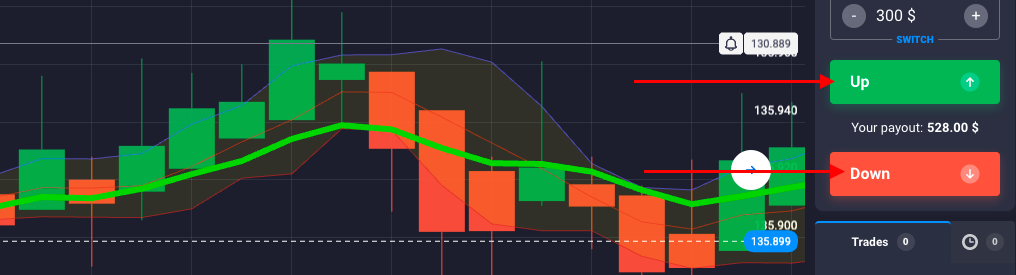
Call and put options
Binary options trading is one of the easiest methods of trading a trader can employ. When trading binaries, a trader does not have to make many decisions. Trading binary options can be as simple as choosing whether to invest in a call or a put option. They are the simplest binary options, making them the right ones to use at the beginning of your trading career.
Suppose a trader finds out that the price of an asset will rise within an hour using fundamental or technical analysis. In this case, the trader must buy a call option on the asset. Buying a call option means that the trader is predicting that the asset’s price will rise before it expires.
Conversely, if a trader were to analyze an asset and stipulate that its price will fall within the next hour, they would buy a put option.
One-Touch options
A one-touch option provides a payout if an asset’s price touches a precalculated barrier, called a “trigger.” Traders use this option type when they strongly believe that the asset’s price will see a sharp rise or decline. Placing call and put options only require you to stipulate whether the asset’s price will rise or fall. In contrast, you must set both the direction of price movement and the trigger level to place a one-touch option.
Most brokers require you to pick from precalculated trigger levels; however, some brokerages allow traders to set custom triggers. As the name suggests, for a one-touch option to be “in the money,” it must touch the trigger level only once.
One-touch options are discernibly riskier, but they also offer a higher payout, which can sometimes be 500% of the investment amount. Brokers typically provide one-touch options on weekends and allow traders to pick an expiration time within the next week.
No touch options
No-touch options work in the opposite fashion that one-touch options work. When you place a no-touch option, you stipulate that the asset’s price will not reach a certain level. The price level can be just below or above the current price of the asset. In other words, the trigger level represents a price that you’re betting against the asset touching in no-touch options.
If the price touches the trigger level, the option will become out of money. If the price never touches the trigger level, the option will be in the money. No-touch options carry a risk similar to one-touch options and offer similarly high payouts with a yield of up to 500% of the invested amount.
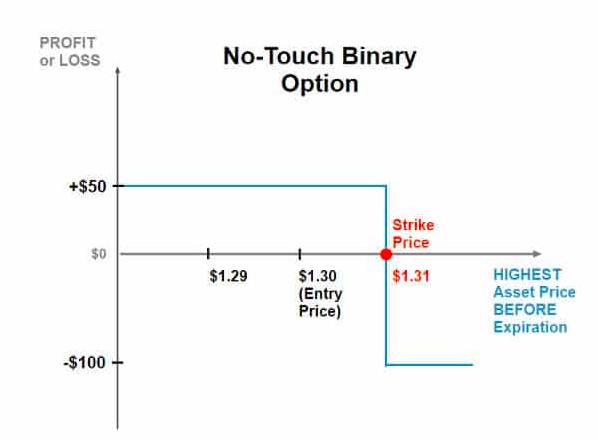
What’s important to remember about one-touch and no-touch options is that one-touch options offer a higher payout the further away the trigger level is from the asset’s current price. A one-touch option for a $100 asset will offer a bigger payout with the trigger set at $125 than if the trigger is set at $110.
On the contrary, a no-touch option will offer a higher payout the closer the trigger level is to the asset’s spot price. A no-touch option for a $100 asset will offer a bigger payout with the trigger set at $110 than if the trigger is set at $125.
In simpler words, the higher the risk, the larger the profits.
Double one-touch options
Double one-touch options work on the same principle as one-touch options – except instead of having one trigger level, double one-touch options have two triggers. There is a trigger level on either side of the current price.
For the option to be “in the money,” the asset’s price must touch either one of these triggers. Let’s say gold is trading for $1800. Then, with a double touch option, you can set a lower trigger at $1750 and an upper trigger at $1850. In other words, you will make money if the price drops to $1750 or rises to $1850.
If the asset price does not touch either of the triggers before expiry, the option will become “out of the money.”
Traders use double touch options when they believe the price will accelerate but don’t know in which direction.
Double no touch options
Double no-touch options work on the opposite principle that double touch options do. These options also allow you to set two triggers; however, the price should not touch either of the trigger levels for the option to be in the money.
These options are typically used when the trader stipulates that the asset trades in a consolidated price range. This scenario usually occurs after a substantial price spike in either direction.
Paired options
Paired options are unique binary options that not every brokerage offers to its traders. This option type is based on the performance of one asset relative to another. For a paired option to be in the money, you must select a pair of assets from a list and stipulate which one will outperform the other within a chosen period.
Brokerages usually pair assets based on their class and sector.
Choosing a Binary Options broker
Now that you understand binary options terminology and know-how various options can help you make money, your next step is to choose a binary options broker.
There are several reliable binary options brokerages; however, not every one of them will meet your trading needs. To make finding the right binary options broker easy, here’s a short list of characteristics to consider when sifting through the pile:
100+ Markets
- Accepts international clients
- High payouts 95%+
- Professional platform
- Fast deposits
- Social Trading
- Free bonuses
100+ Markets
- Min. deposit $10
- $10,000 demo
- Professional platform
- High profit up to 95%
- Fast withdrawals
- Signals
100 Markets
- High bonus
- Free gifts
- Accepts international clients
- Userfriendly platform
- Copy trading
100+ Markets
- Accepts international clients
- High payouts 95%+
- Professional platform
- Fast deposits
- Social Trading
- Free bonuses
from $50
(Risk warning: Trading is risky)
100+ Markets
- Min. deposit $10
- $10,000 demo
- Professional platform
- High profit up to 95%
- Fast withdrawals
- Signals
from $10
(Risk warning: Trading is risky)
100 Markets
- High bonus
- Free gifts
- Accepts international clients
- Userfriendly platform
- Copy trading
from $250
(Your capital can be at risk)
Ease of signing up
The best brokerages make it simple for traders to create an account and start trading binary options. Ideally, the brokerage must allow you to open an account and begin placing trades within a few minutes.
Doing your due diligence and learning more about the brokerage of your choice through reviews online is an excellent way to gauge a broker’s trustworthiness. It is also vital for every trader to learn about the payment methods that the brokerage offers. There’s a chance that the brokerage you pick is established in another country and does not accept certain payment methods.
Ensure that the broker you sign up with allows you to withdraw and deposit money in your preferred method.
Trading platform quality
If you’re entirely new to trading, working with a complicated trading platform can be challenging. Fortunately, there are brokers in the industry that have a simple interface.
It is important to consider the quality of the trading platform when selecting a binary options brokerage. Ideally, the trading platform must be accessible via computers through a web browser and applications on phones and tablets. Remember that you will require a stable internet connection to trade binaries regardless of the brokerage you pick.
An educational section on the trading platform’s website is an indicator of quality service – going through the section will make learning to use the platform a lot easier.
(Risk warning: Your capital can be at risk)
Available assets
Even if the brokerage makes sign-up easy and offers an easy-to-use platform, you will not like working with the brokerage if it doesn’t provide the assets you want to trade.
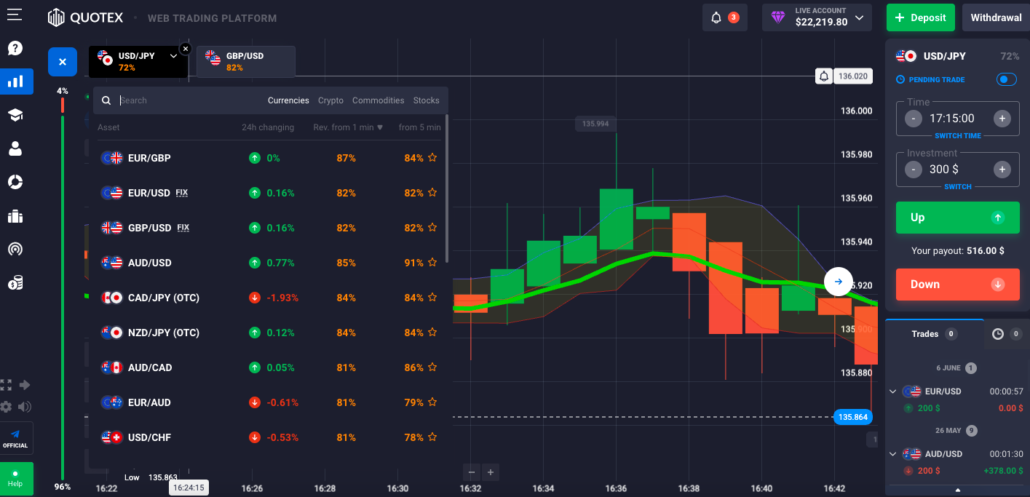
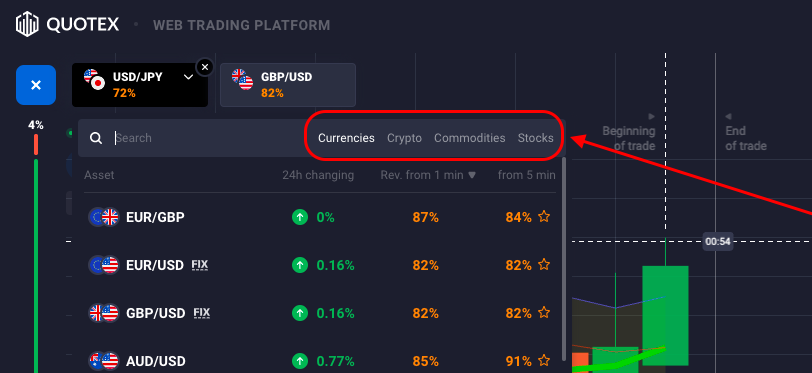
You must ensure that the broker offers a wide range of assets and allows you to trade the most popular commodities, currencies, crypto, stocks, and indices. Some brokerages fixate on offering a particular type of asset, which can limit profit opportunities. Remember that the wider the range of the assets provided, the better.
Demo account
It is best to avoid signing up with a broker that does not offer a demo account. Demo accounts are a pivotal part of your education since they enable you to test out the platform and learn trading strategies without investing real funds.
A demo account is an account that gives you access to dummy funds that you can invest in the live market. Brokerages typically do not charge traders any fee to use a demo account.
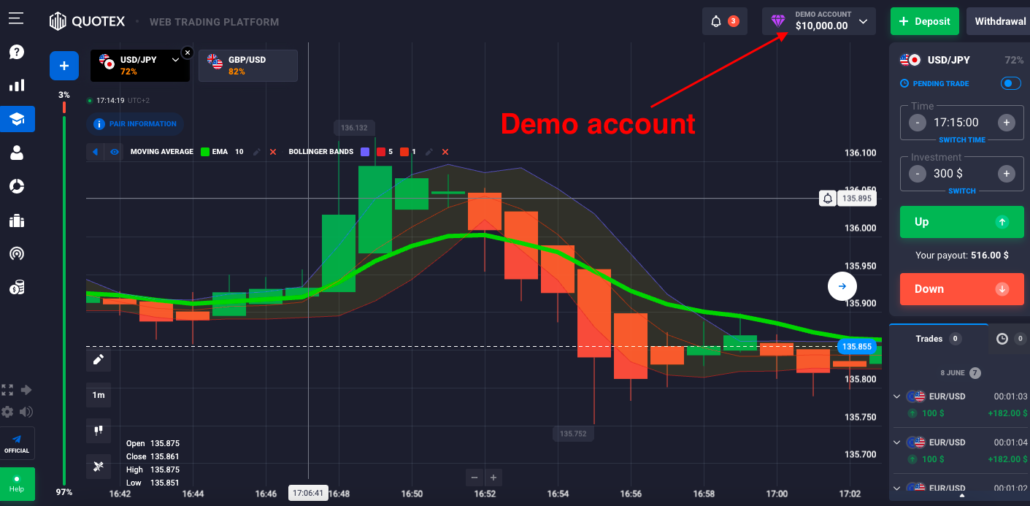
Seasoned users can use demo accounts to get used to the platform – since user interfaces can vary drastically from broker to broker.
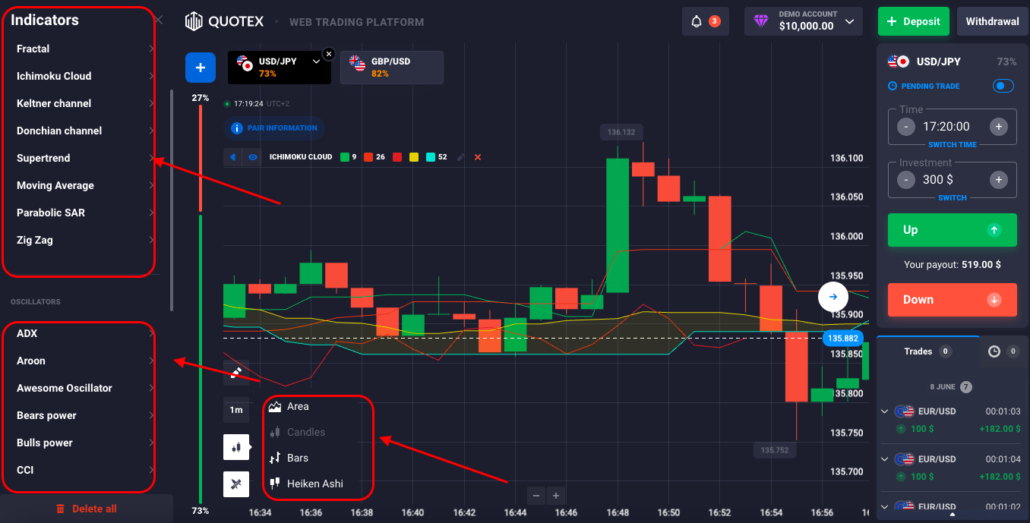
Technical tools
Technical tools are a rudimentary part of a binary options trader’s toolkit. These enable you to execute your strategies and carry out the proper technical and fundamental analysis.
It is rare for a brokerage not to offer popular technical tools; however, it is always better to stay safe and verify whether the brokerage provides the tools you use.
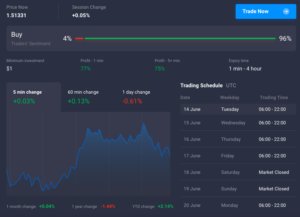
Rate of returns
The rate of returns that the brokerage offers is perhaps the most critical factor to consider when looking for brokers. It determines the profit you make when you trade binaries. The rate of returns is sometimes called the return ratio or payout percentage.
Of course, the rate of returns isn’t the final deciding factor because there are other characteristics that bear weight in your decision. Payout percentages are the primary means for brokers to compete. That said, market leaders don’t always offer the biggest payouts. The most popular brokerages offer a decent return ratio and also provide personal security and speedy withdrawals.

Most brokerages offer a rate of return of 65% of the invested amount. On the upper end, brokerages provide an 85% return on winning trades. Some brokerages offer up to 400% returns on winning trades; however, these brokers do not offer regular option types.
Nonetheless, checking the broker’s returns for the call, put, one-touch, and range options before signing up is the right way to go. We recommend that you pick a brokerage with a payout ratio of at least 70%.
It’s always a good idea to look for a broker that offers payouts on losing trades. It can be especially helpful for new traders.
Some brokers offer a payout for options that are out of the money. With these brokers, you never lose all of your money if you lose a trade. Depending on the brokerage you pick, you may get up to 15% of the original sum back on a losing trade.
(Risk warning: Your capital can be at risk)
Customer support
It is common for traders to run into obstacles when they first start trading binary options. As a result, you will likely need to speak to the customer support team a few times when you start out.
For this reason, you need to ensure that the broker you pick offers excellent customer support. Helpful and experienced customer support teams politely answer all of your questions promptly. A short response time indicates a commitment to providing a smooth trading experience. Signing up with a brokerage that offers good customer service can help you learn to use the platform and improve your trading skills quickly.

Besides the quality of support offered, ensure that support is offered in the language of your choosing. Having several means to contact the customer support team can be advantageous in a time-sensitive situation.
Withdrawals, deposits, and bonuses
The majority of reputable brokerages offer several withdrawal and deposit methods. Therefore, it is vital for a trader to go through the conditions tied to withdrawals and deposits. The conditions are available on the brokerage’s website.
A high degree of flexibility in the withdrawal/deposit conditions is common amongst reputable brokers. Most well-known brokers also offer traders a sign-up bonus to attract more users and increase their market share. The sign-up bonus can amount to up to 100% of your first deposit.
You must remember that you will receive the deposit bonus only when specific conditions are met. Therefore, contacting customer support and learning about the required conditions before signing up is a good idea.
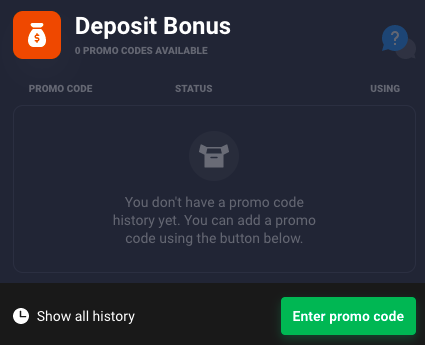
Get a free deposit bonus of 50% at Quotex with our promotion code “bobroker50“
You can only use this bonus code by signing up via our website.
(Risk warning: Trading involves risks)
Binary Options analysis methods
Regardless of the asset type and analysis method, proper analysis is a must to make money trading binary options consistently. Performing technical or fundamental analysis skews the odds in your favor. It gives you an in-depth look at market conditions, allowing you to make calculated decisions.
Without analysis, binary options are reduced to a simple bet, making every trade more a matter of luck than skill and experience. Likening binary options trading to gambling is not the right approach and only increases the chances of you losing money.
This section will give you an overview of technical and fundamental analysis.
Fundamental analysis
It is an analysis method that uses factors such as economic data, decisions and comments of the central bank, political events, and other significant events to predict an asset’s future price. In essence, fundamental analysis enables a trader to gauge market sentiment and make profits since market sentiment heavily influences the price of assets in any market.

Seasoned traders and traders in academic studies consider fundamental analysis to be a primary assessment method for predicting an asset’s price movement. Technical analysis has become more accessible over the years. Moreover, since technical analysis allows for gauging additional factors that influence price movement, it is sometimes considered more accurate than fundamental analysis.
Fundamental analysis may seem uncomplicated compared to technical analysis, but it can be just as effective. This is because the method takes into consideration every real-world factor that can affect an asset’s price. Everything from the news to economic indicators and reports published by a country’s central bank is considered in fundamental analysis.
For instance, a change in demand prospects and events such as supply outages can heavily influence the price of commodities such as oil and copper. In addition, company-specific news, such as performance forecasts and earnings reports, affects investor confidence and subsequently asset price.
Carrying out fundamental analysis gives you a first-hand look at price-influencing information on every kind of asset.
(Risk warning: Your capital can be at risk)
Economic calendar
Besides staying in the loop with major events, using an economic calendar is a popular way to source fundamental information.
Depending on the thoroughness of your calendar, it can include volatility indicators from a particular economy. In this way, using an economic calendar can give you a comprehensive and updated overview of an economy’s performance.
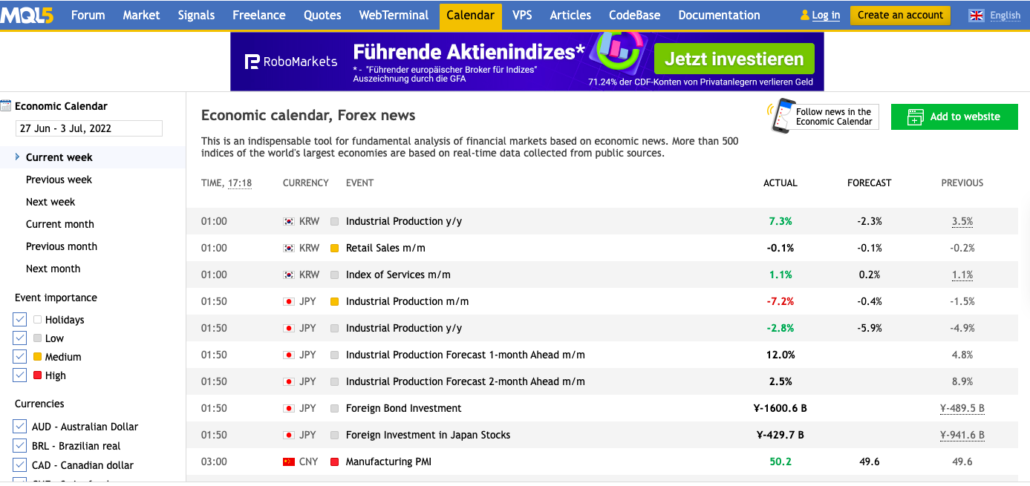
Most traders consider using a calendar with high-volatility indicators the right way to go. They are easy to access since the world’s top economies release this data to the public. Looking at data on unemployment, GDP growth, inflation, retail sales, consumer sentiment, and industrial production can offer insight into the price movement of all types of assets.
Technical analysis
Most traders find fundamental analysis a powerful enough tool to make sound trading decisions. Technical analysis is another great way to evaluate securities and predict their price movements.
The three pillars of technical analysis are:
- Every major and minor event that has occurred so far decides the asset’s price.
- Once a trend appears, it will likely continue.
- History repeats itself, and traders always react to repeating market conditions in a similar way.
Essentially, technical analysis primarily relies on historical market data. For this reason, you will find that technicians spend a lot of time looking for price patterns on charts. Once they recognize a pattern, they expect history to repeat itself. A well-known price movement likely follows, and the technician earns a profit for their skill and experience.
Traders that exercise technical analysis typically disregard fundamental factors and form a unique opinion about the price movement of an asset. Shutting out expert opinions on significant events helps the technician focus entirely on finding and tapping into price patterns. Regardless, force majeure events can move markets significantly, making ignoring fundamental factors an inefficient way to navigate markets.
For this reason, when major economic data is released, most technicians close their positions or avoid entering the market completely. This is because the released economic data can entirely override a technician’s market expectations and cause heavy losses.
Types of technical analysis
In general, there are two technical analysis methods you can exercise. You can either:
- Employ strategies that incorporate technical indicators like RSI, Stochastic Oscillators, Divergence, etc.; or
- Carry out price action trading.
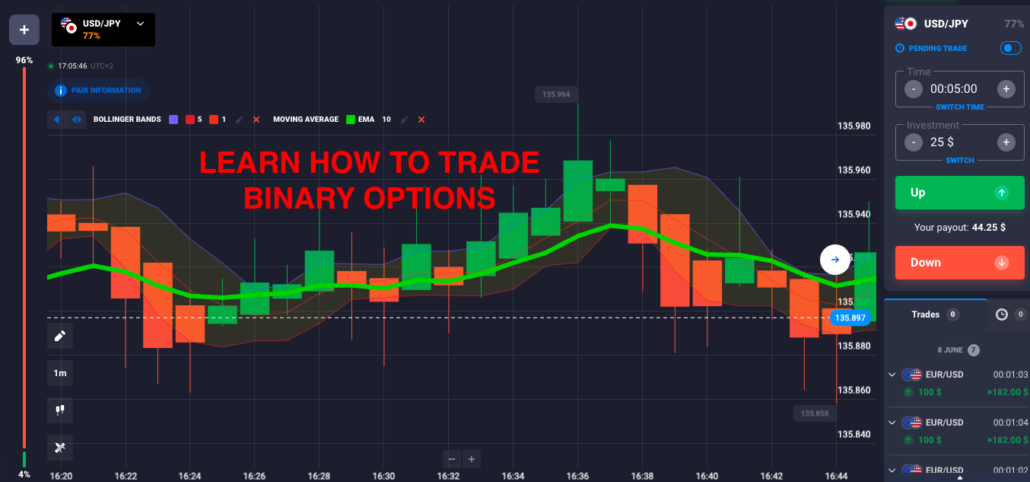
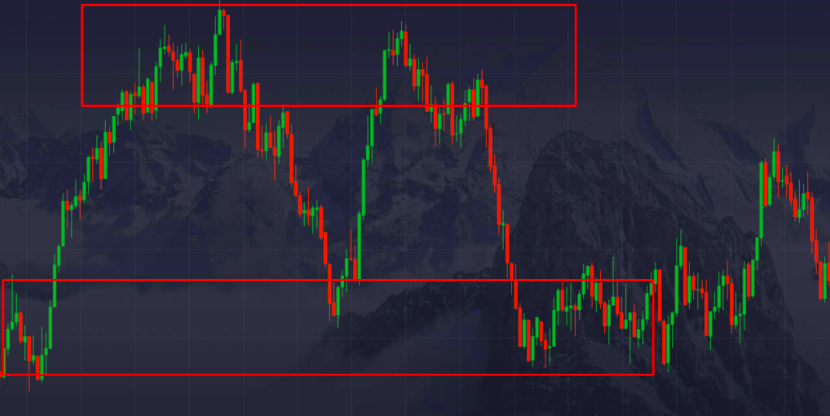
Studying Chart Patterns
Studying chart patterns will always remain at the core of the technical analysis. Whether you choose to use technical indicators to make trading decisions or carry out price action trading, you will depend on a chart to navigate.

You will come across terms like channel, triangle, flag, pennant frequently. These are patterns or “formations” that represent specific behaviors of the market. What’s important to remember is that the market continuously changes its behavior, and sometimes the change comes sooner rather than later. Additionally, the market always acts similar to how it performed in the same circumstances before.
Therefore, when a pattern appears on a chart, technicians use historical data to predict what will happen next and get in the appropriate position to make profits. Most patterns end with a breakout – a sharp price movement in a particular direction. Technicians determine the direction by finding chart patterns and use binary options to profit.
Sometimes patterns pose reversal scenarios, but most patterns leave the asset’s price moving in the same direction it was moving before. For example, flags and pennants most commonly leave the market moving in the same direction as before.
Large chart patterns take between 40 and 50 candlesticks before being complete. But there are also small reversal bar patterns that take between one and three bars and illustrate a price reversal.
Technicians learn to recognize these patterns and tell whether the reversal in price movement will end up a fake out or follow through. Further information about reversal bars and their types is beyond the scope of this post.
Price Action Trading
Some traders believe that technical indicators cannot yield profits consistently. Instead, these traders use price action trading to make profits.
Price actions traders rely entirely on the historical price and volume data of the asset. With time, these traders learn to predict changes in market sentiment and stay one step ahead of the market. This ability to read the market and forecast its behavior allows them to profit using binary options.
Hybrid Trading
Despite the foundational differences between technical and fundamental analysis, some traders adopt a hybrid trading style. Employing a mixed trading style offers several advantages. Market players can make trading decisions based on fundamental analysis and determine the ideal entry and exit points using technical analysis.
Since this method involves taking major support and resistance levels into account, you can estimate where the price will halt or rebound. In addition, considering previous highs, lows, and moving averages also enables you to determine if the price movement will accelerate further after breaking past a specific price level.
Why every Binary Options Trader needs a Trading Strategy
Regardless of whether you trade binary options or another financial instrument, there are two requirements for you to make profits consistently:
- A collection of sound trading strategies; and
- An efficient money management system.
Every family of assets has its peculiarities, i.e., each family tends to behave differently in different circumstances. For this reason, strategies used to trade commodities (for example) cannot be applied when trading stocks without making some adjustments. Learning these strategies via trial and error isn’t a good idea. Instead, the best way to learn strategies is to find tried-and-tested ones that traders have used with success previously. Picking up tactics that successful traders use is the best way to survive the intense competition.
Adopting a trading style based on cross-betting strategies will only lead to failure. Systematic trading that involves thoroughly tested strategies will pave your path to trading success. Some traders use fundamental analysis techniques as their primary tools to stipulate price movement. Other traders rely on technical analysis entirely for making trading decisions.
A fair amount of traders employ both fundamental and technical analysis to estimate price movement and possible turning points with greater accuracy. Finding the right strategies to trade with can be discernibly challenging, especially if you’re new to trading. This section outlines all you need to know to formulate the right trading strategies.
(Risk warning: Your capital can be at risk)
Why you need a solid trading strategy
Trading systematically is critical for success in the long run. Here are a few reasons why you should employ a solid trading strategy: Using a trading strategy ensures that you remain focused even when there’s a massive inflow of news and economic data. In addition, sticking to the strategy ensures you stay focused on the analysis process.
Trading the news isn’t a skill that’s learned in a day. It requires an in-depth knowledge of the pricing characteristics of the asset and typically also requires technical analysis to find the optimal entry and exit points.
Using a fixed trading strategy based on price action will enable you to profit regardless of the incoming news.
Systematic trading allows you to measure and subsequently improve your performance. Trading without a plan makes the entire process chaotic and leaves no reliable way to measure and assess your trading performance.
If you use a strategy consistently, you will have a database tracking your performance. Changing certain parameters during trading and comparing the new results with historical data enables you to see if the strategy has improved or not. One of the biggest challenges every trader must overcome is their emotions. The fear of losing hard-earned money and the greed of making more money gets in the way of reason. A streak of good or bad trades can put any trader in a vulnerable state of mind. Having another strategy to stick to ensures that you don’t bet over or under your capacity and trade consistently regardless of your current performance.
Looking at walls of news and advice from expert traders can distract you from your initial trading intentions. As a result, you may be tempted to overtrade. However, having a trading strategy that defines clear entry and exit rules makes it easy for you to carry out sensible trading in the direst of situations.
How to choose the right trading strategy
If you were to ask a group of traders what the best trading strategy is, every trader in the group would likely give you a different answer. Asking the question will also split the group into subgroups based on what analysis methods the traders use.

At the end of the day, there is no ultimate strategy that you can use to make money trading binary options. Financial markets change rapidly, and unwritten rules that the market operated on yesterday may not be valid today. To ride the wave and make money consistently, you must evolve just like the market does.
There are several factors for you to consider when picking a trading strategy to use. Here are some key details to remember when finding a trading strategy:
(Risk warning: Your capital can be at risk)
#1 Regardless of what strategy you pick, it will require thorough testing before its employed.
Testing out a strategy is the only way to determine if it will work in current market conditions. You must use demo accounts to apply the strategy in the live market and see if it works.
As mentioned earlier, different assets have different peculiarities and behave differently in different conditions. Therefore, using a demo account is the right way to determine which strategy works best for which asset and what changes it needs to work optimally for another asset.
#2 The most effective trading strategies are typically simple.
Seasoned traders apply complex trading techniques; however, the additional complexity does not guarantee reliability or profitability. On the contrary, a simple trading strategy that is easy to execute is often just as profitable or more profitable than a complicated strategy that involves more rules.
#3 All strategies eventually become obsolete.
Financial markets can change at an incredible pace. For this reason, it is normal for a trading strategy that worked yesterday to no longer be effective today. Therefore, it would be best if you prepare for your trading strategy to diminish at some point.
It is best to monitor the effectiveness of a strategy continually and stop using it as it stops fetching results. Alternatively, you could fine-tune the strategy to try and optimize it for new market conditions.
#4 No strategy will always yield wins
Regardless of how complex or successful a trading strategy is, it will fail a certain number of times. If your strategy has a success rate of 60%, it will fail four out of ten times.
Avoiding losing positions is not possible – it is part and parcel of trading any financial instrument. You must digest the losses without letting them sway you and stick to the trading strategy. It is the only way to find long-term success with trading.
Types of winning strategies
A trader must always remember that there are three types of trading strategies:

- A strategy that generates more wins than losses, and on average, the win is greater than the loss.
- A strategy that generates more losses than wins, and on average, the win is much greater than the loss. The net result of using this strategy is profit.
- A strategy that generates more wins than losses, and on average, the loss is greater than the win. However, the net result is a profit.
Logic dictates that the first strategy is the best strategy among the three. However, coming across such a strategy is rare. In contrast, the second strategy is not considered a good choice for binary options trading since it can potentially cause more losses than gains. While there are higher-yielding options, they also involve greater risk.
Furthermore, most brokers take 100% of the investment when you lose a trade but offer a 70%-85% payout ratio when you win. Therefore, for you to remain profitable in the long run, you must win more trades than you lose.
Some brokerages offer a refund on losing trades, but these brokers also offer a lower payout ratio. That leaves you with the third strategy – the overall loss will exceed the gain. You must find a trading strategy that has a high success rate, so you can fill the profit-loss gap in a way that makes you money in the long run. Aim to find a strategy that leaves you on the positive side of the breakeven.
Here’s how you calculate the breakeven point:
Breakeven=Winning percentage*Average return- 1-Winning percentage*Average loss
This equation gives you insight into what success rate you require so you break even and don’t lose money – as long as you know your average return and loss. The right strategy is the one that has a success rate higher than the breakeven.
Combining binary options trading strategies
Diversification of trading strategies has the same effect as diversification of assets: it increases the chances of profitability. Most traders employ more than one strategy since no one strategy can yield profits across markets and in different market conditions.

Having more than one trading strategy to rely on is an excellent idea for the following reasons:
- Losing streaks are inevitable, and every trader has them. However, having more than one strategy makes losing streaks easier to digest and navigate. In addition, switching to a more appropriate trading tactic on a losing streak can help reap profits and boost confidence.
- As mentioned earlier, strategies can become obsolete as market conditions change. Moments of market change are the perfect time to switch to a different trading strategy. Trying to mend the previous strategy and losing more money becomes unnecessary if you have another strategy ready to employ.
- Asset diversification is a well-known hedge against losses. If an asset or an entire class of assets defies your expectations, having open positions in other asset classes can help offset the losses. This tactic can be especially useful if you invested in an asset and set a long expiry time. That said, different assets have different trading specifics, and utilizing optimized trading strategies for each is the right way to go.
Conclusion: there are different ways to make a profit
Trading binary options are one of the best ways for any investor to make a profit. In addition, trading the financial instrument can be especially attractive to traders with a smaller budget since binary options are typically priced under $100. But regardless of the amount of money you have to invest, if you study tactics and keep applying your knowledge, you will be able to make a decent amount of money trading binaries.
Our binary options academy guide has covered everything you need to know about binary options trading. However, after reading through it, you will realize that trading binary options is no simple task.
However, with all the essential concepts covered in this post, you know everything you need to know to start trading binary options. All that’s left for you to do now is to create an account with the right binary options brokerage and begin your trading journey with a binary demo account.
(Risk warning: Your capital can be at risk)